Protect your forms from spam with Google reCAPTCHA v3 using HT Contact Forms. By enabling reCAPTCHA, you can secure your forms and ensure only legitimate submissions.
Follow these steps to integrate reCAPTCHA V3:
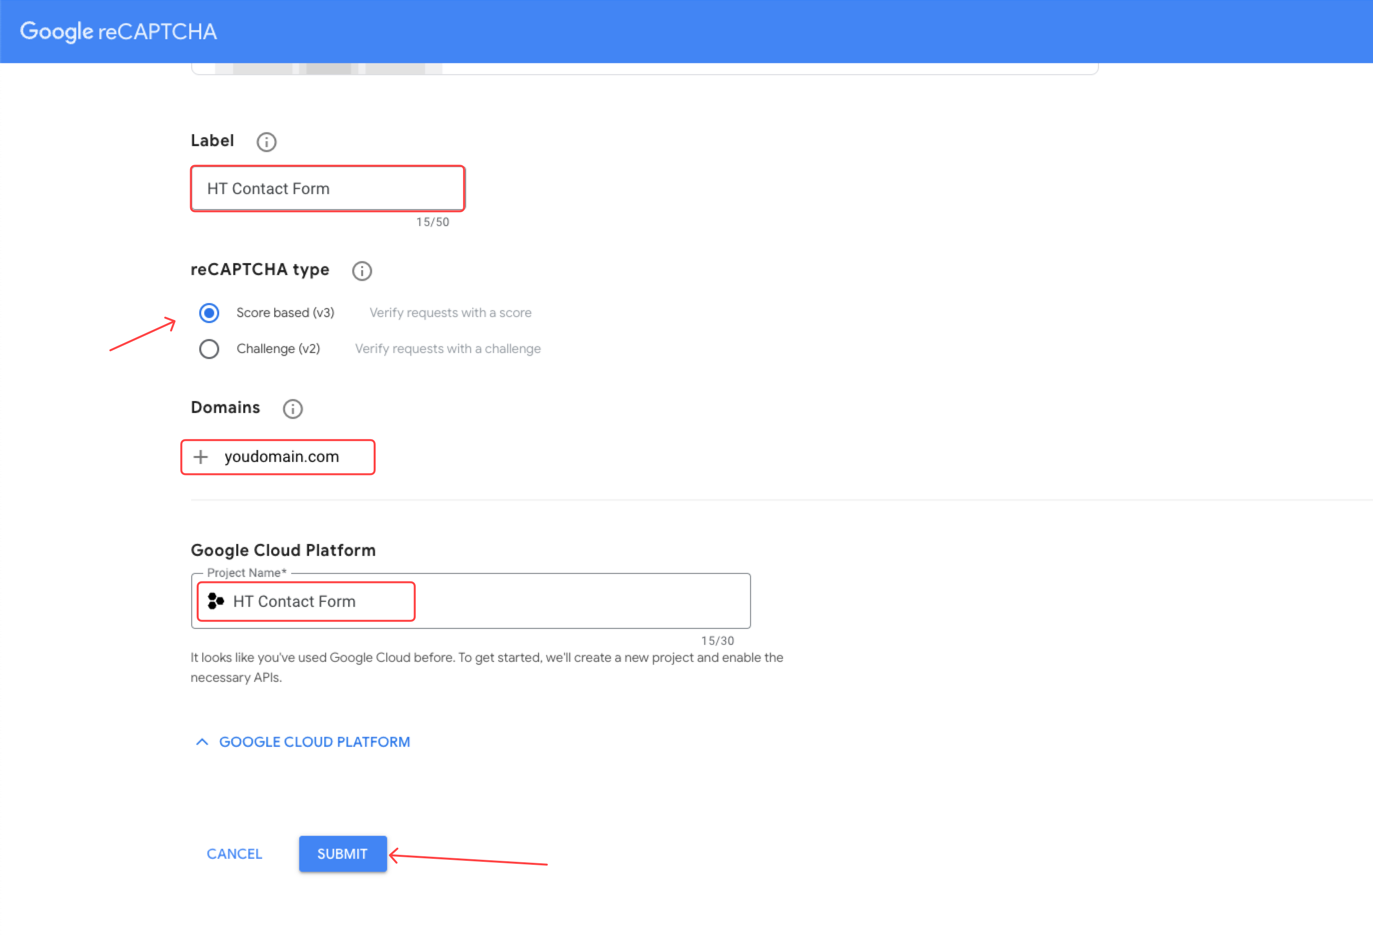
Step 1: Register Your Site on Google reCAPTCHA
- First, visit this URL: https://www.google.com/recaptcha/admin/create
- Label: Enter a label (example: yourdomain.com).
- reCAPTCHA type: Select Score based (v3).
- Domains: Add your website domain without
https://(example: yourdomain.com). - Google Cloud Platform Project Name: Enter a project name.
- Click the SUBMIT button.
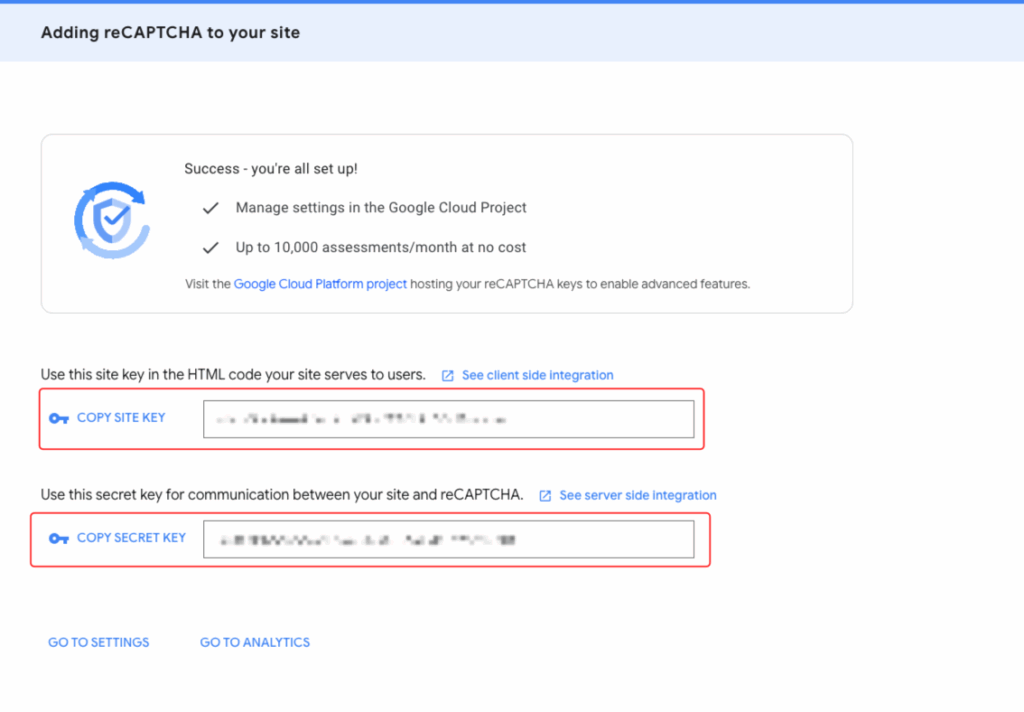
🔹 After registration, Google will provide you with a Site Key and a Secret Key.
🔹 Copy and save them—you’ll need these keys in the next step.
Step 2: Add reCAPTCHA Keys to HT Contact Forms
- Login to your WordPress dashboard.
- Navigate to HT Contact Form → Global Settings.
- Go to the Captcha tab.
- Select Google reCAPTCHA v3.
- Enter the Site Key and Secret Key you received from Google.
- Click Save Settings.
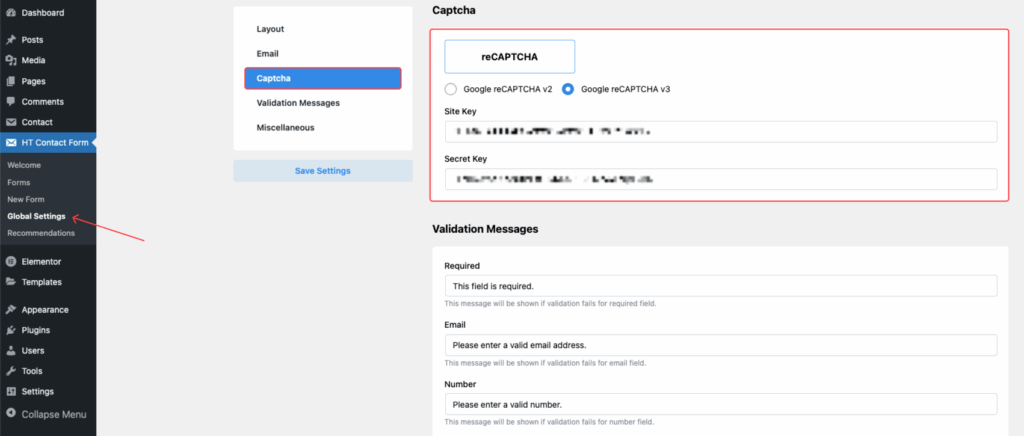
✅ After saving, your site will now be connected to Google reCAPTCHA V3.
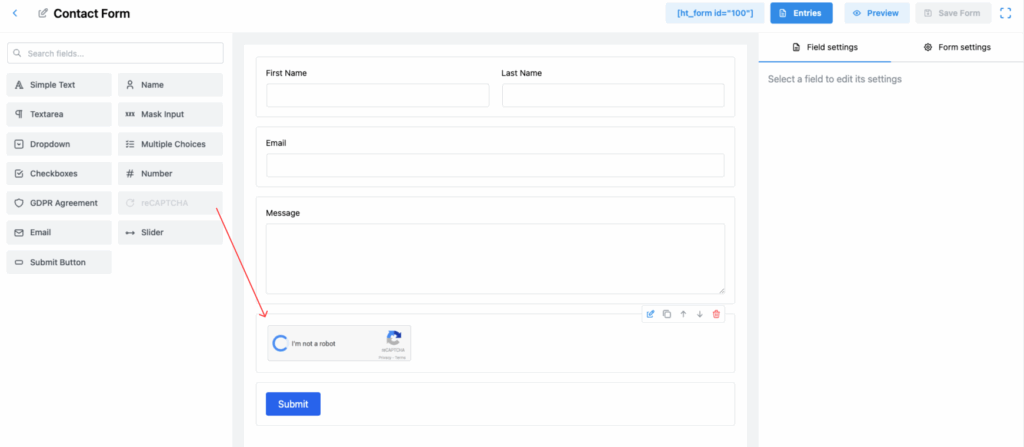
Step 3: Add the reCAPTCHA Field to Your Form
- Go to HT Contact Form → Forms.
- Edit your form or create a new one.
- Drag and drop the reCAPTCHA field into your form.
Step 4: Preview and Publish
- Save your form after adding the reCAPTCHA field.
- Preview or embed the form on your website.
- You’ll notice the reCAPTCHA protection badge appearing at the bottom of your website.
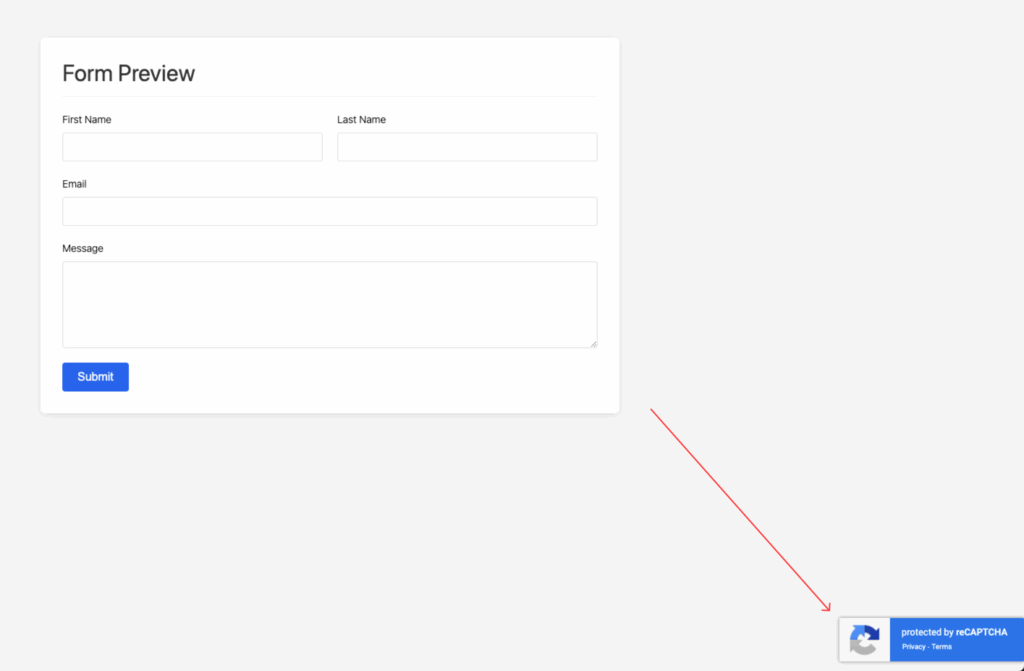
Note:
If you are using reCAPTCHA v3, it will appear as a small badge on the bottom right of your website.
If you are using reCAPTCHA v2, users will see the checkbox saying “I’m not a robot”.
Important Notes:
- If the Captcha option is not showing after adding, ensure that the Site Key and Secret Key are properly set up in Global Settings.
- Make sure you are using the correct version (v2 or v3) depending on the form design and your preference.
Last updated on March 10, 2026
Was this article helpful?
Powered by Support Genix