This guide will help you connect your HT Contact Form to OnepageCRM so that form submissions automatically create new contacts, deals, and note and action in your CRM.
What You Can Do with This Integration
- Automatically create contacts in OnepageCRM
- Map form fields to OnepageCRM contact fields
- Add deals, and notes to contacts
- Assign status, lead source, and pipeline stages
- Add actions like follow-ups or reminders
Requirements
Before starting:
- One active OnepageCRM account – Sign up here
- User ID and API Key from OnepageCRM
- Administrator access to your WordPress website
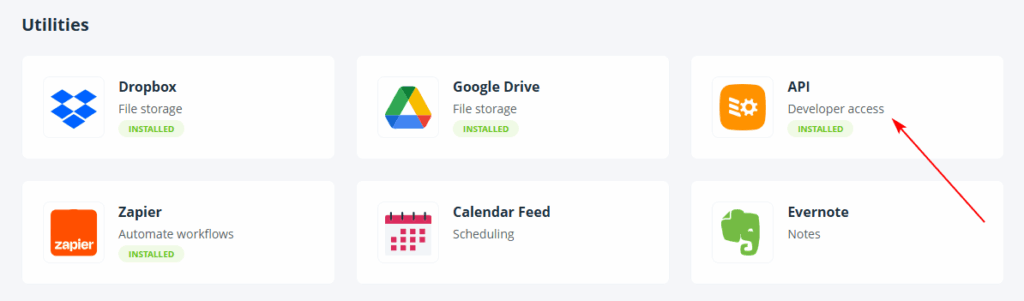
How to Get OnepageCRM API Credentials
- Go to app.onepagecrm.com and log in
- Click on your profile icon in the top-right corner
- Go to Apps and Integrations→ API
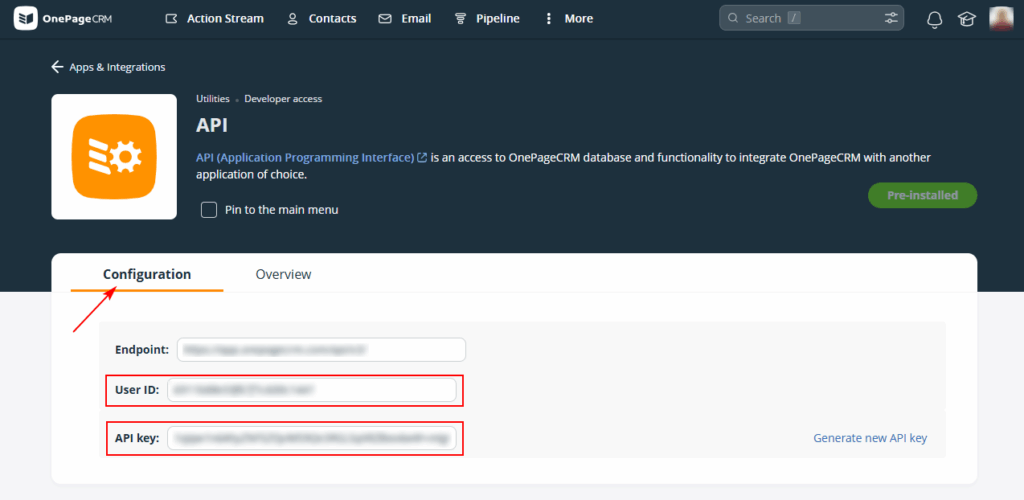
- Copy your User ID and API Key
- Keep them secure and don’t share publicly

Connect OnepageCRM to HT Contact Form
Step 1: Enable OnepageCRM Globally
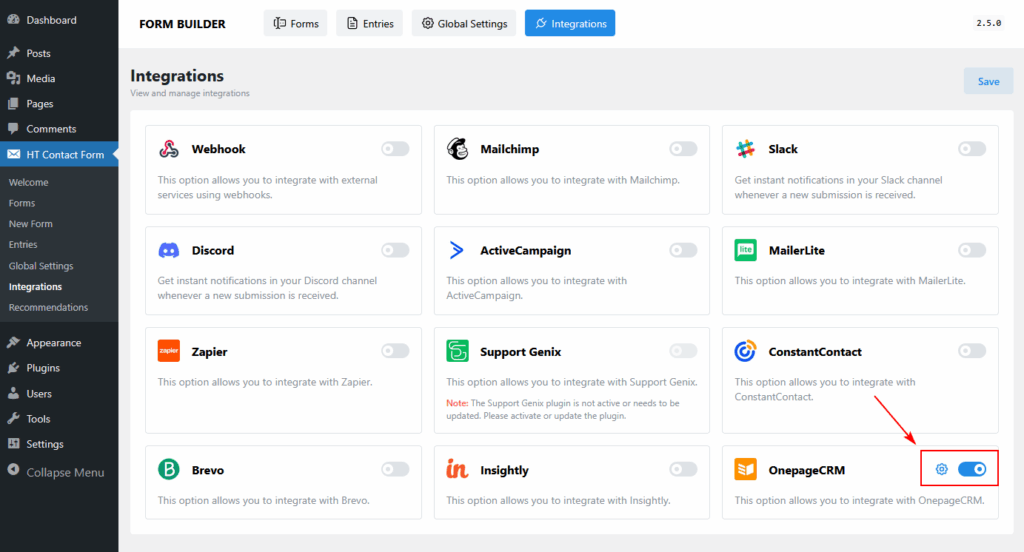
- From your WordPress dashboard, go to HT Contact Form → Integrations
- Find OnepageCRM and toggle it ON
- A popup will appear asking for credentials
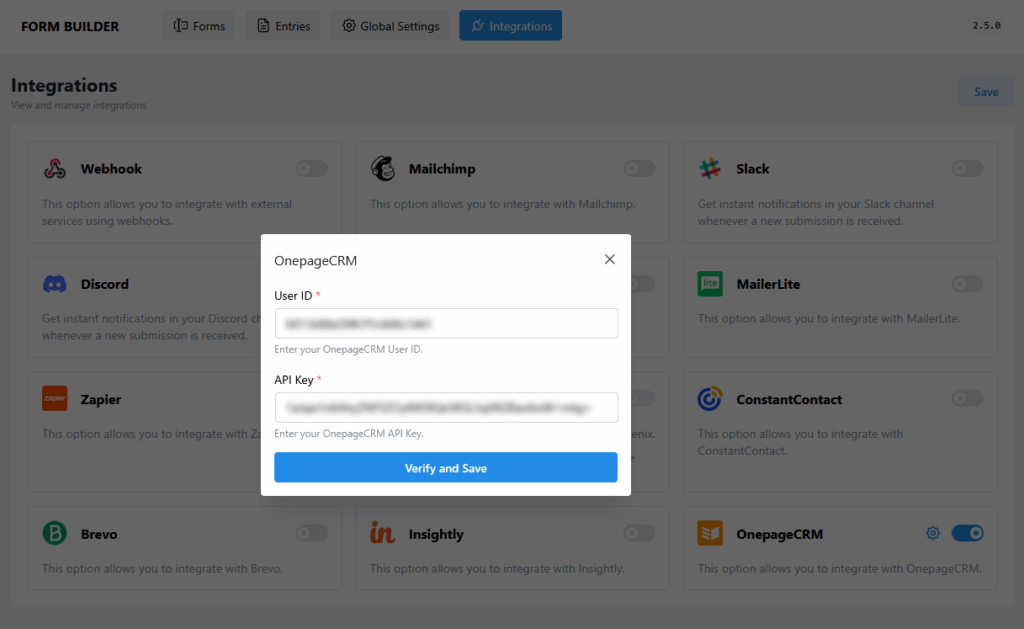
Step 2: Enter Credentials and Save
- User ID: Paste the User ID from OnepageCRM
- API Key: Paste the API Key (will be hidden for security)
- Click Verify and Save
Add OnepageCRM to a Specific Form
- Go to HT Contact Form → Forms
- Click Edit on your chosen form
- Go to the Integrations tab (top right)
- Click Add New → OnepageCRM
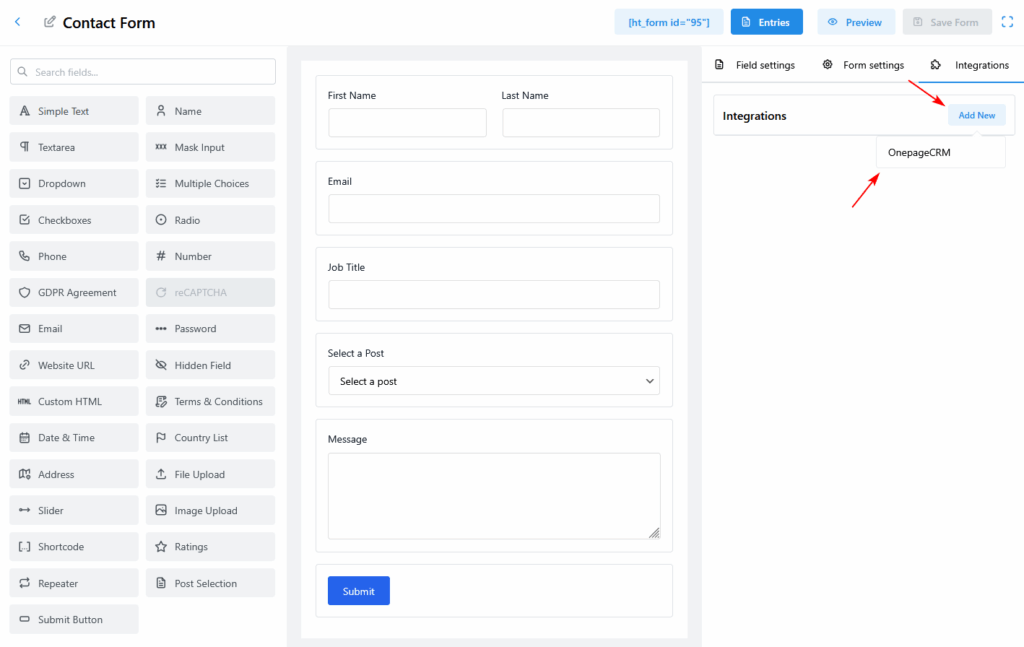
Now the OnepageCRM setup panel appears on the right side.
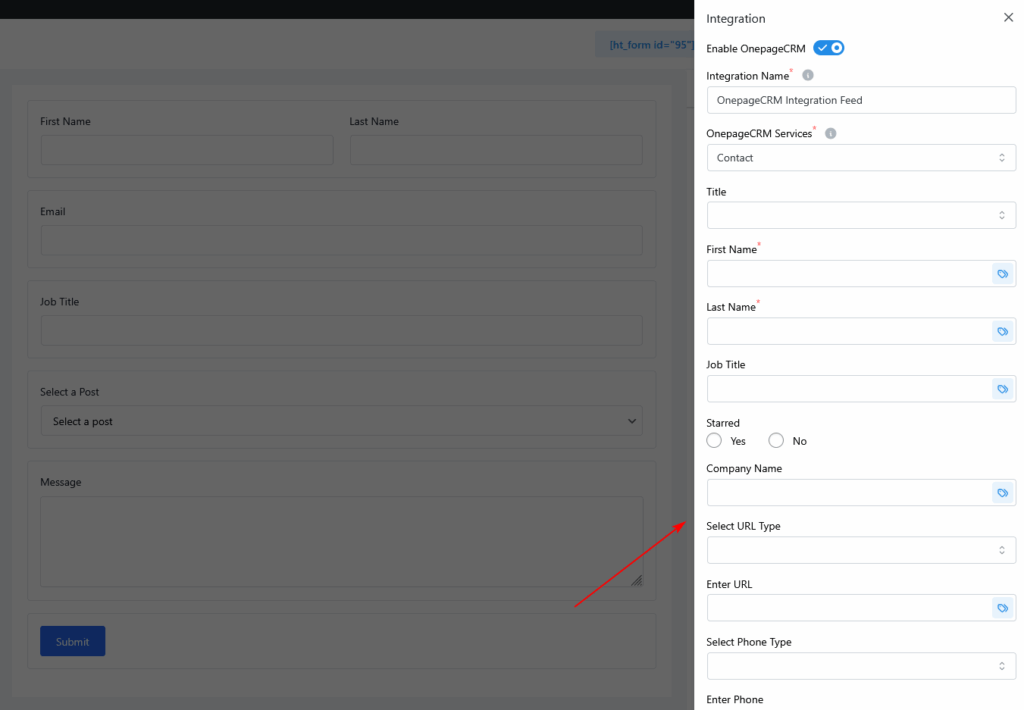
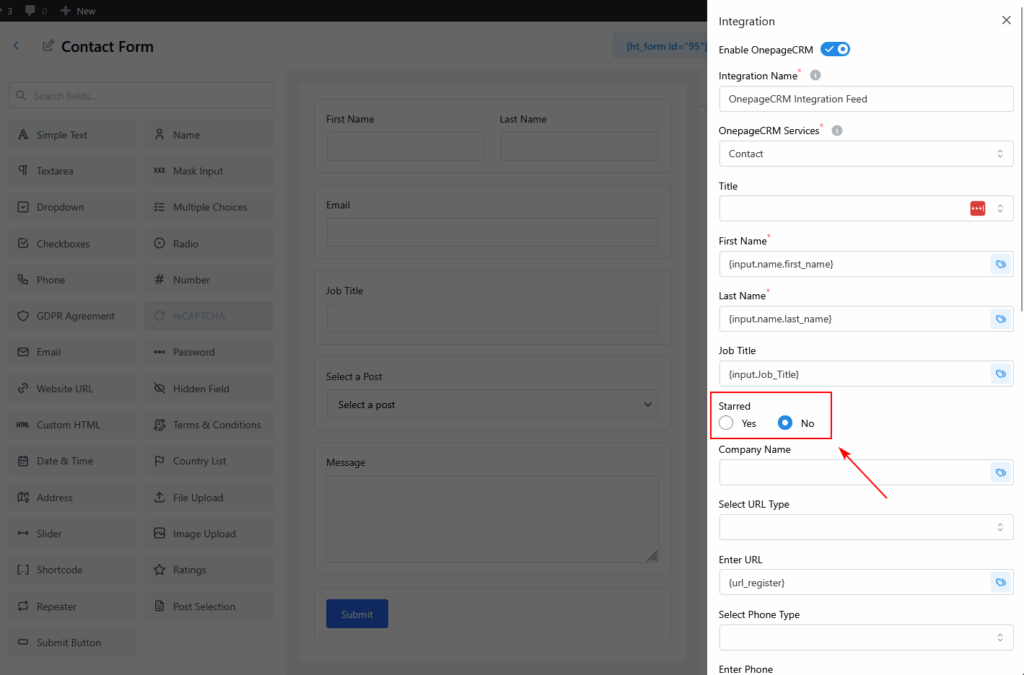
Configure OnepageCRM Integration Feed
Basic Setup
- Enable OnepageCRM toggle – Turn it ON
- Integration Name – Give it a name (e.g., “Lead Capture Feed”)
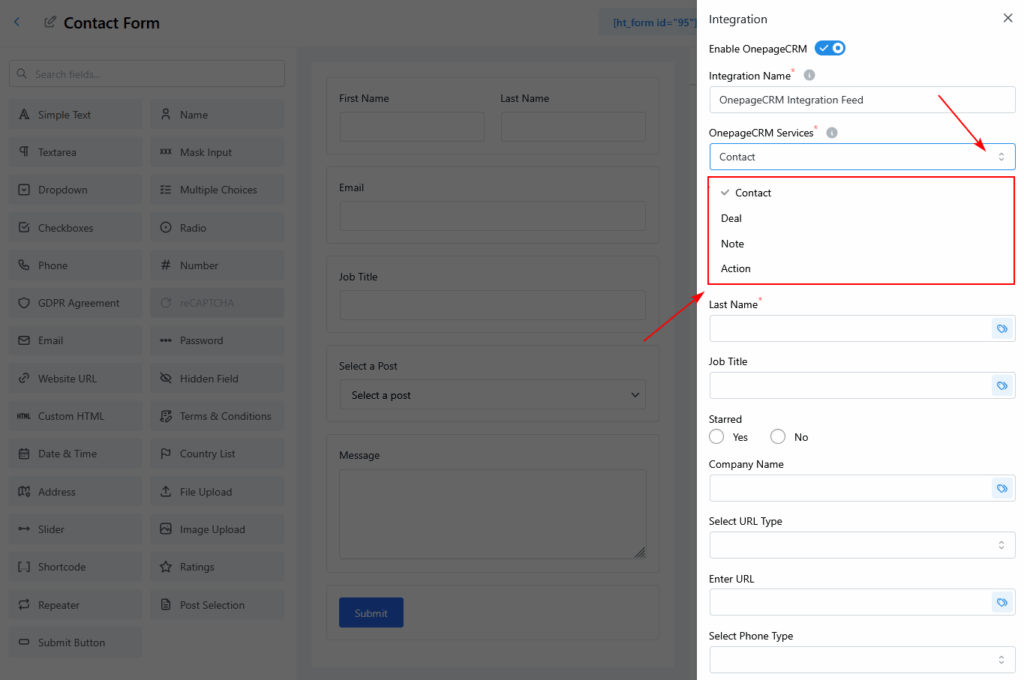
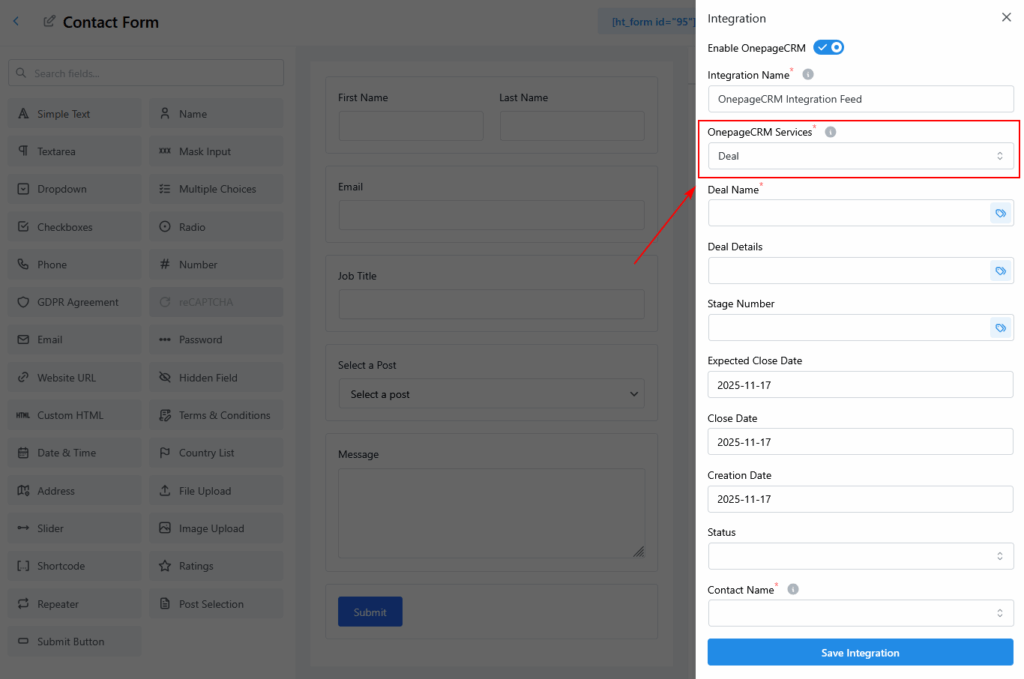
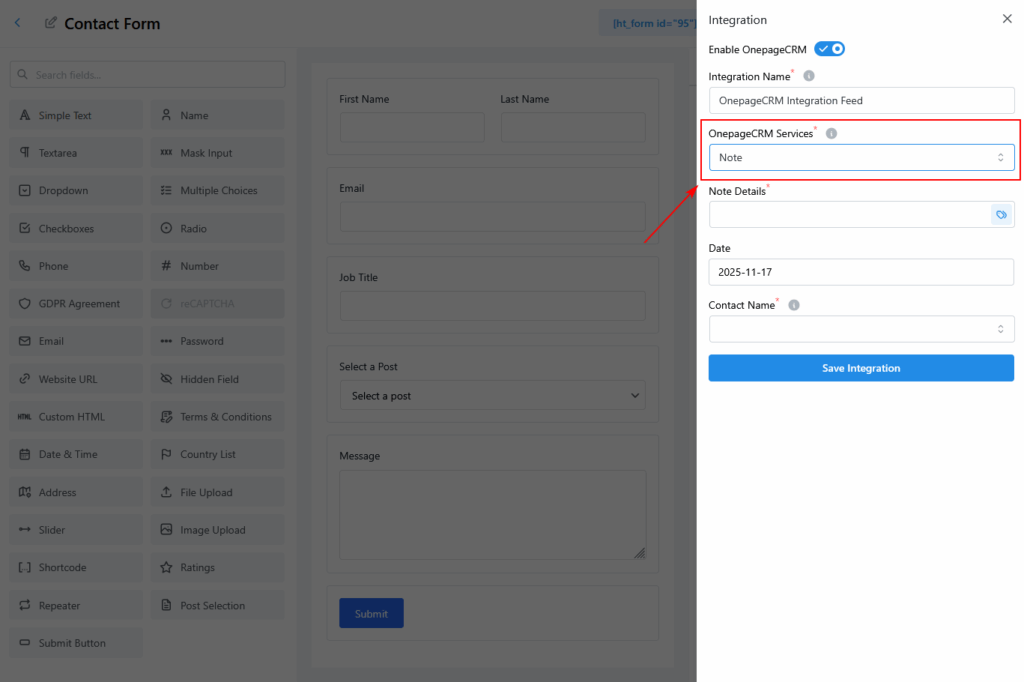
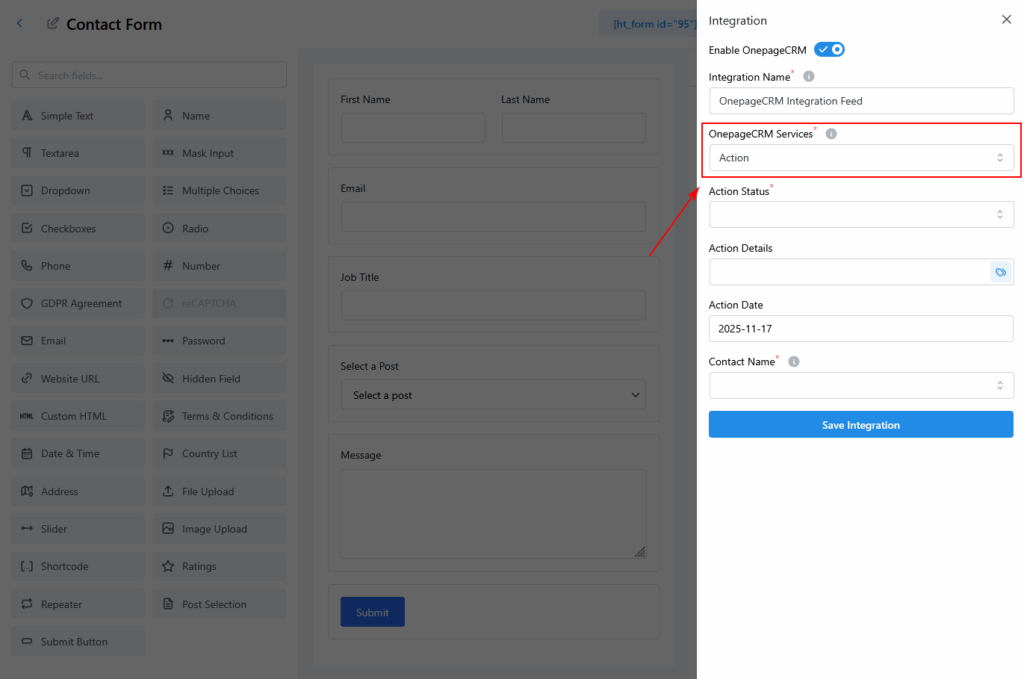
- Service Type – Choose from:
- Contact (create contact only)
- Deal (create contact + deal)
- Note (add note to existing contact)
- Action (create follow-up tasks)
Field Mapping Options
Map your form fields to OnepageCRM fields using dropdowns or smart tags.
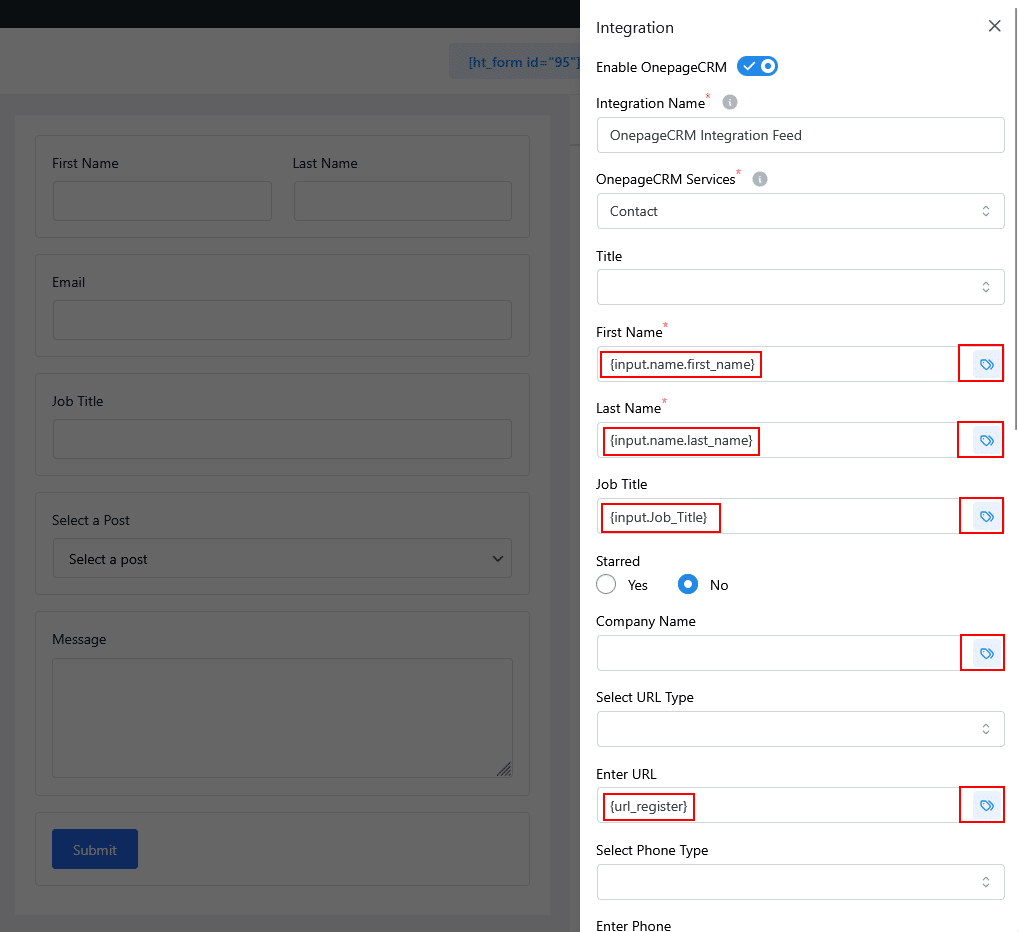
Standard Contact Fields
| OnepageCRM Field | Notes |
|---|---|
| First Name | Required for contacts |
| Last Name | Optional |
| Required (use form’s email field) | |
| Job Title | Optional |
| Company Name | Optional |
| Phone | Choose phone type + value |
| URL | Choose URL type + value |
| Address, City, State, Zip | Supports full address breakdown |
| Country Code | Optional |
| Background / Notes | Great for custom notes |
Add Contact Meta Information
You can also assign metadata to contacts:
- Starred: Yes / No
- Contact Status: e.g., Lead, Customer, Qualified
- Lead Source: e.g., Website, Event, Email
Add Deal (Optional)
If you selected Deal service:
| Field | Description |
|---|---|
| Deal Name | Use smart tags (e.g. {company} - Project) |
| Deal Details | Can map to a form field (Name) |
| Deal Status | Choose: Pending, Win, Lost |
| Pipeline & Stage | Pulled from your OnepageCRM account |
| Expected Close Date | Date format (e.g., 2025-12-31) |
Add Notes (Optional)
Use this section to log information with every submission.
Example note with smart tags:
New form submission:
Name: {name.first} {name.last}
Email: {email}
Message: {textarea.message}
Submitted from: {post.title} on {date}
Create Action (Optional)
If using the Action service:
- Action Type: e.g., Call, Email, Follow-up
- Date: Choose due date
- Assignee: Who should handle the action
Smart Tags Examples
| Tag | Description |
|---|---|
{email} | Email field from form |
{name.first} | First name |
{dropdown.service} | Dropdown selected value |
{post.title} | Page/post title of form |
{date} | Submission date |
{site.name} | Website name |
Use smart tags in any field to dynamically populate values.
Test Your Integration
- Submit the form with test data
- Log into your OnepageCRM dashboard
- Confirm the contact, tags, deal, and notes are created
- Recheck any missing or misconfigured fields
Troubleshooting Tips
| Problem | Solution |
|---|---|
| Contact not created | Re-check API credentials, form mappings, and service type |
| Deal missing | Ensure “Create Deal” toggle is ON, required fields mapped |
| Tags not applied | Check spelling, format, and smart tag values |
| Custom fields not showing | Create them in OnepageCRM first, then reload integration |
| API credentials invalid | Re-copy and re-paste User ID and API Key from OnepageCRM |
Best Practices
- ✅ Always test with live form submissions
- ✅ Use smart tags for dynamic content
- ✅ Keep integration names descriptive
- ✅ Don’t forget required fields: Email is always required
- ✅ Secure your API credentials
Example Setup
Form Fields:
- Name, Email, Phone, Message
OnepageCRM Setup:
- Service: Contact
- Status: Lead
- Tags: Website, Contact Form
- Notes:
Inquiry from {post.title} on {date}
Quick FAQ
Q: Does it work with OnepageCRM’s free trial?
A: Yes, as long as API access is available.
Q: Can I sync existing entries?
A: No, only new submissions will sync.
Q: What if OnepageCRM is temporarily unavailable?
A: Form entries still save in WordPress and sync later when available.
Q: Can I create multiple integrations per form?
A: Yes — you can configure separate feeds with conditions.
Conclusion
The OnepageCRM integration keeps your CRM updated automatically — saving time, reducing errors, and improving your sales workflow. Configure it once, test it, and start syncing new contacts effortlessly.