The File Upload field allows users to submit files directly through your form.
It supports various file types, size limits, and customizable display options for better control and user experience.
File Upload Field Settings:
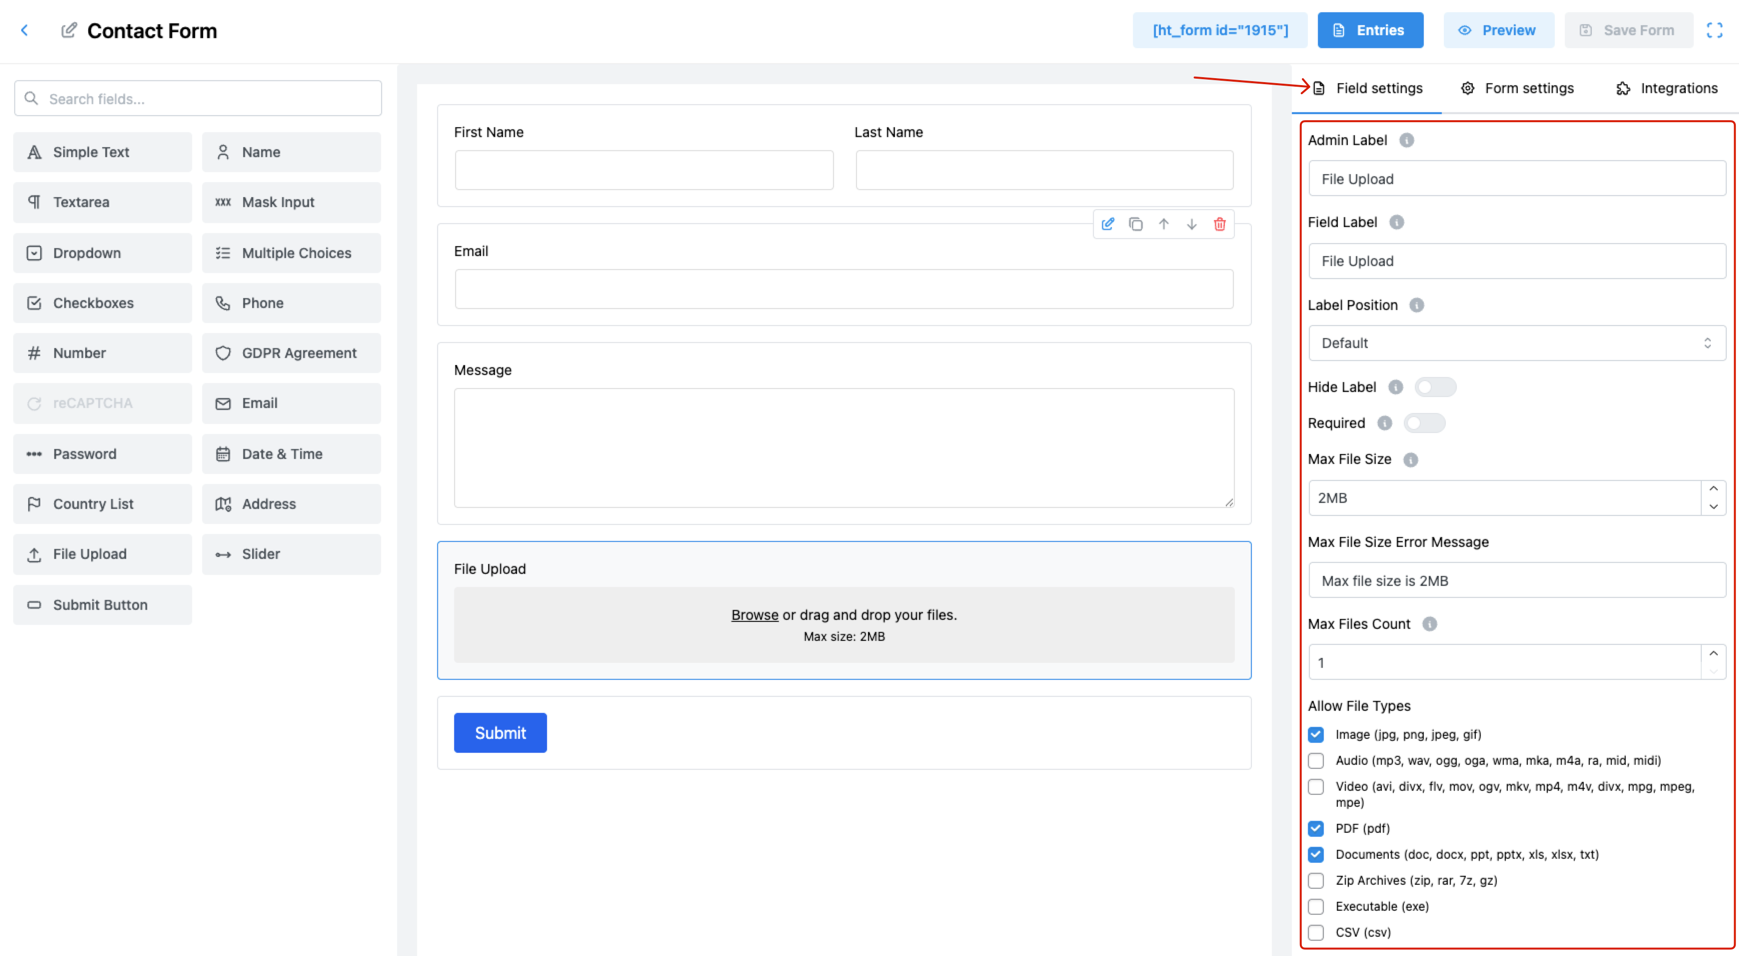
1. Admin Label
Set the internal name for the file upload field.
This label is only visible in the admin area for identification.
2. Field Label
Define the field name that users will see on the front-end form.
✅ Helps users understand what type of file is expected.
3. Label Position
Choose where the label will appear in relation to the field:
- Default
- Top
- Right
- Bottom
- Left
🧩 Match this to your form’s layout and design preferences.
4. Hide Label
Enable this to hide the field label from the front-end.
✅ Ideal for minimal designs relying on placeholder guidance.
5. Required
Toggle ON to make file upload mandatory for form submission.
✅ Prevents incomplete submissions when file input is essential.
6. Max File Size
Set a limit for the maximum file size a user can upload.
💡 Example: 2MB, 5MB, 10MB
7. Max File Size Error Message
Customize the message shown if a user uploads a file larger than allowed.
✉️ Helps clarify why the file was rejected.
8. Max Files Count
Limit how many files a user can upload with this field.
💡 Common values: 1, 3, 5
9. Allow File Types
Choose which file formats are acceptable. Supported categories include:
- 📷 Images: jpg, png, jpeg, gif
- 🎵 Audio: mp3, wav, ogg, m4a, etc.
- 🎞️ Video: mp4, avi, mov, mkv, etc.
- 📄 Documents: doc, docx, ppt, pdf, xls, txt
- 📦 Zip Archives: zip, rar, 7z
- ⚙️ Executables: exe
- 📊 CSV files: csv
✅ Select only the necessary types to enhance security and reduce server load.
10. Allow Types Error Message
Set a custom message to display if the user uploads a disallowed file type.
🛑 This message ensures users understand acceptable formats.
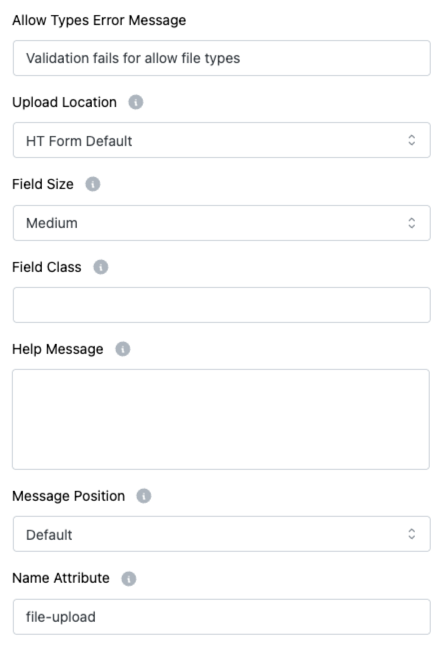
11. Upload Location
Determine where uploaded files will be stored:
- HT Form Default
- (May include custom or predefined folders depending on plugin settings)
🗂️ Helps organize user uploads efficiently.
12. Field Size
Control how large the file input appears:
- Small
- Medium (Default)
- Large
🎨 Match this with the design aesthetics of your form.
13. Field Class
Add a custom CSS class for the file upload input.
🎨 Use this for styling adjustments via your theme or custom CSS.
14. Help Message
Provide users with helpful instructions about what to upload.
✅ Example: “Upload only PDF or JPG files under 2MB.”
15. Message Position
Decide where to display the help or error message:
- Default
- Next to Label as Tooltip
- Below Input Element
🧭 Helps maintain a clear and user-friendly interface.
16. Name Attribute
Set the form name attribute for backend reference during submission.
👉 Essential for accessing the uploaded file in your database or backend system.
Pro Tips:
- Use a help message + file type restrictions to minimize user errors.
- Keep max file size and file count reasonable to prevent overload.
- Always set a unique name attribute for accurate data handling.