The HT Contact Form plugin allows you to connect your forms with GetResponse, automatically adding subscribers to your email marketing campaigns. With support for campaigns, tags, custom fields, and autoresponder day cycles, you can build sophisticated marketing automation directly from form submissions.
Key Features
- Campaign Selection: Choose which GetResponse campaign (list) to add subscribers to
- Custom Field Mapping: Map form fields to GetResponse contact properties
- Tag Assignment: Apply tags for segmentation and targeting
- Day of Cycle: Set autoresponder starting day for automation sequences
- Smart Tags: Dynamic field values using form data
- Duplicate Handling: Automatic subscriber updates
Prerequisites
Before using the GetResponse integration, make sure you have a GetResponse Account (free or paid) and your GetResponse API Key.
Getting Your API Key
- Log in to your GetResponse account
- Go to Menu → Integrations and API → API
- Click Generate API Key
- Copy your API key
Note: Keep your API key secure and don’t share it publicly. This key grants access to your GetResponse account.
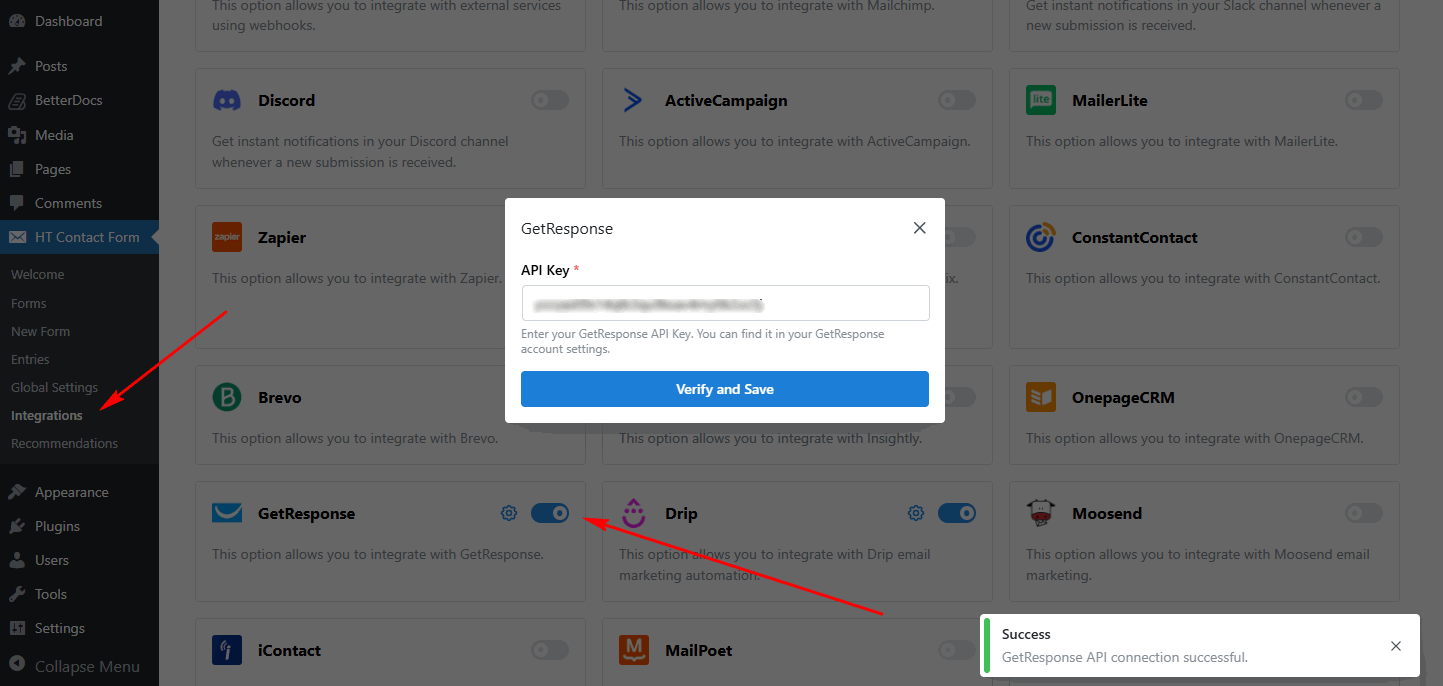
Step 1: Configure Global Settings
First, you need to configure the GetResponse API Key in the global settings.
- Go to HT Contact Form → Settings → Integrations
- Find GetResponse and click Configure
- Enter your API Key
- Click Verify to test the connection
- Click Save Settings
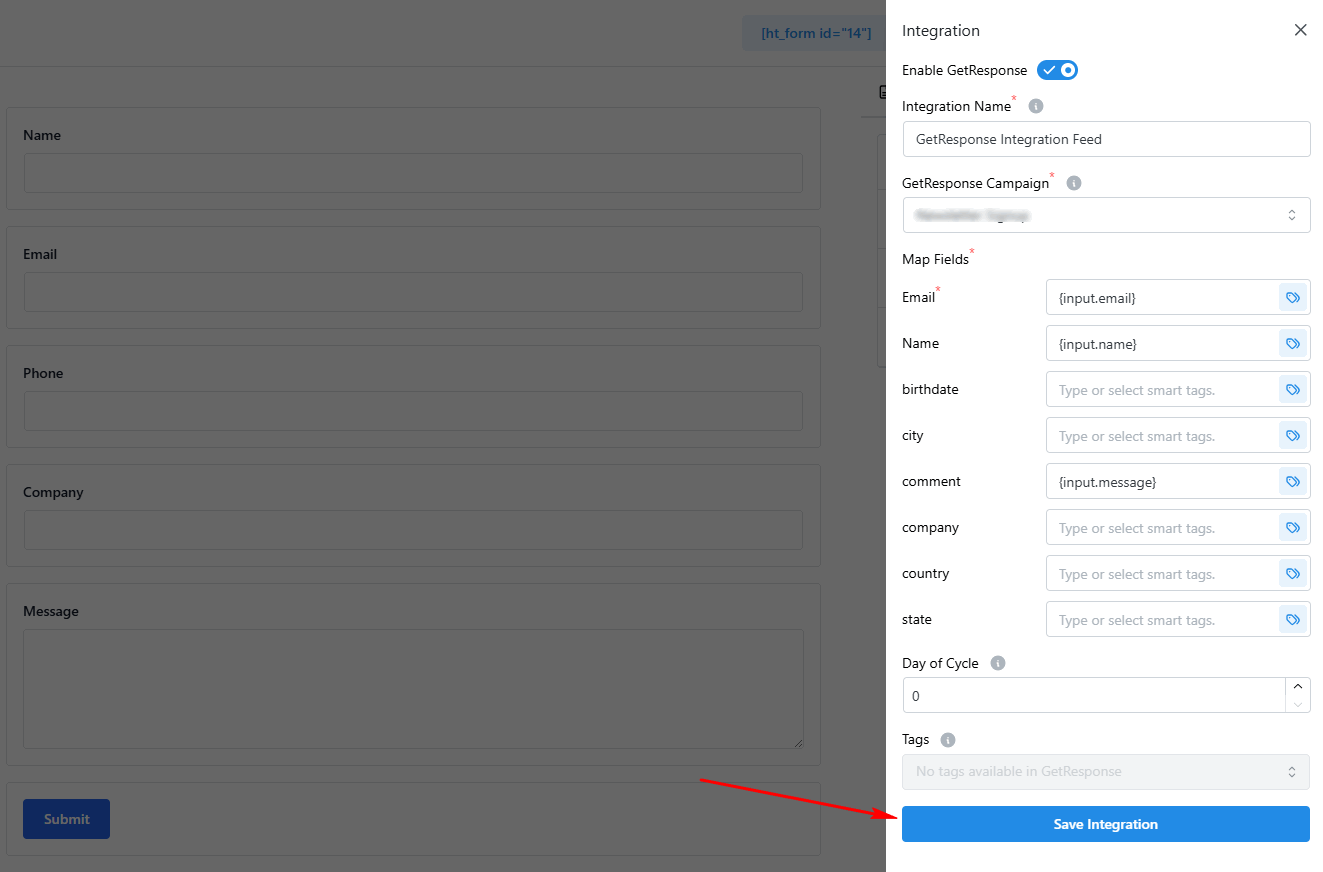
Step 2: Add GetResponse Integration to Your Form
Once the global settings are configured, you can add the GetResponse integration to any form.
- Edit your form
- Go to the Integrations tab
- Click Add New → GetResponse
- Select a Campaign from the dropdown
- Configure field mappings and tags
- Set Day of Cycle if using autoresponders
- Click Save Integration
Integration Settings Overview
| Setting | Required | Description |
|---|---|---|
| Campaign | Yes | Select the GetResponse campaign (list) |
| Field Mapping | Yes | Map form fields to contact properties |
| Tags | No | Assign tags to new subscribers |
| Day of Cycle | No | Set autoresponder starting day (0-1000) |
Field Mapping
Map your form fields to GetResponse contact properties:
Required Fields
| Field | Description |
|---|---|
| Subscriber email address (required) |
Standard Fields
| Field | Description |
|---|---|
| name | Subscriber’s full name |
Custom fields from your GetResponse account appear automatically and can be mapped using smart tags.
Example Field Mapping
email: {input.email}
name: {input.full_name}
company: {input.company_name}
phone: {input.phone}
job_title: {input.job_title}
Tags Configuration
Tags help you segment your list for targeted campaigns. Apply one or more tags when subscribers are added.
Selecting Tags
- Click the Tags field in integration settings
- Select from existing tags in your GetResponse account
- Multiple tags can be selected
- Tags are applied when the subscriber is created
Tag Use Cases
| Tag | Purpose |
|---|---|
website-signup | Identify source of subscription |
lead-magnet-ebook | Track which content they downloaded |
webinar-attendee | Segment webinar registrants |
high-interest | Mark engaged leads |
Day of Cycle
Day of Cycle determines where in your autoresponder sequence a new subscriber starts.
Configuration Options
| Value | Result |
|---|---|
| 0 | Start from Day 0 (first message) |
| 1-1000 | Start from specific day |
| Empty | No autoresponder enrollment |
Recommended Settings
| Scenario | Recommended Setting |
|---|---|
| New subscribers | 0 (start from beginning) |
| Re-engaged contacts | 5+ (skip intro messages) |
| Existing customers | 10+ (advanced content only) |
| Event-specific | Match event timing |
Smart Tags Reference
Use {input.field_name} to include form values dynamically.
| Smart Tag | Description |
|---|---|
{input.email} | Email field value |
{input.name} | Name field value |
{input.phone} | Phone field value |
{input.company} | Company field value |
{input.custom_field} | Any custom field |
You can also use smart tags in the Tags field for dynamic tagging:
Tags: newsletter, {input.interest}, {input.source}Complete Configuration Example: B2B Lead Generation
Here’s an example of setting up GetResponse integration for B2B lead capture with qualification.
Form Fields: Name, Email, Company, Job Title, Phone, Interest (dropdown)
Integration Configuration
Campaign: B2B Leads
Field Mapping:
  email: {input.email}
  name: {input.name}
  company: {input.company}
  job_title: {input.job_title}
  phone: {input.phone}
Tags: lead, website-inquiry, {input.interest}
Day of Cycle: 0
Result: Fully qualified leads with interest-based tagging enrolled in welcome sequence.
Common Use Cases
- Newsletter Signups: Capture email subscribers from your website with a simple form and add them directly to your newsletter campaign.
- Lead Generation: Collect detailed lead information and segment them with tags based on form responses for targeted follow-up.
- Webinar Registrations: Register attendees and add them to webinar-specific campaigns with appropriate tags and autoresponder sequences.
- Content Downloads: Offer lead magnets (ebooks, guides) and add downloaders to nurture sequences starting at the right day in your automation.
- Event Sign-ups: Collect event registrations and tag attendees based on their interests or ticket type.
- Multi-Step Funnels: Use different tags for different funnel stages to create sophisticated marketing sequences.
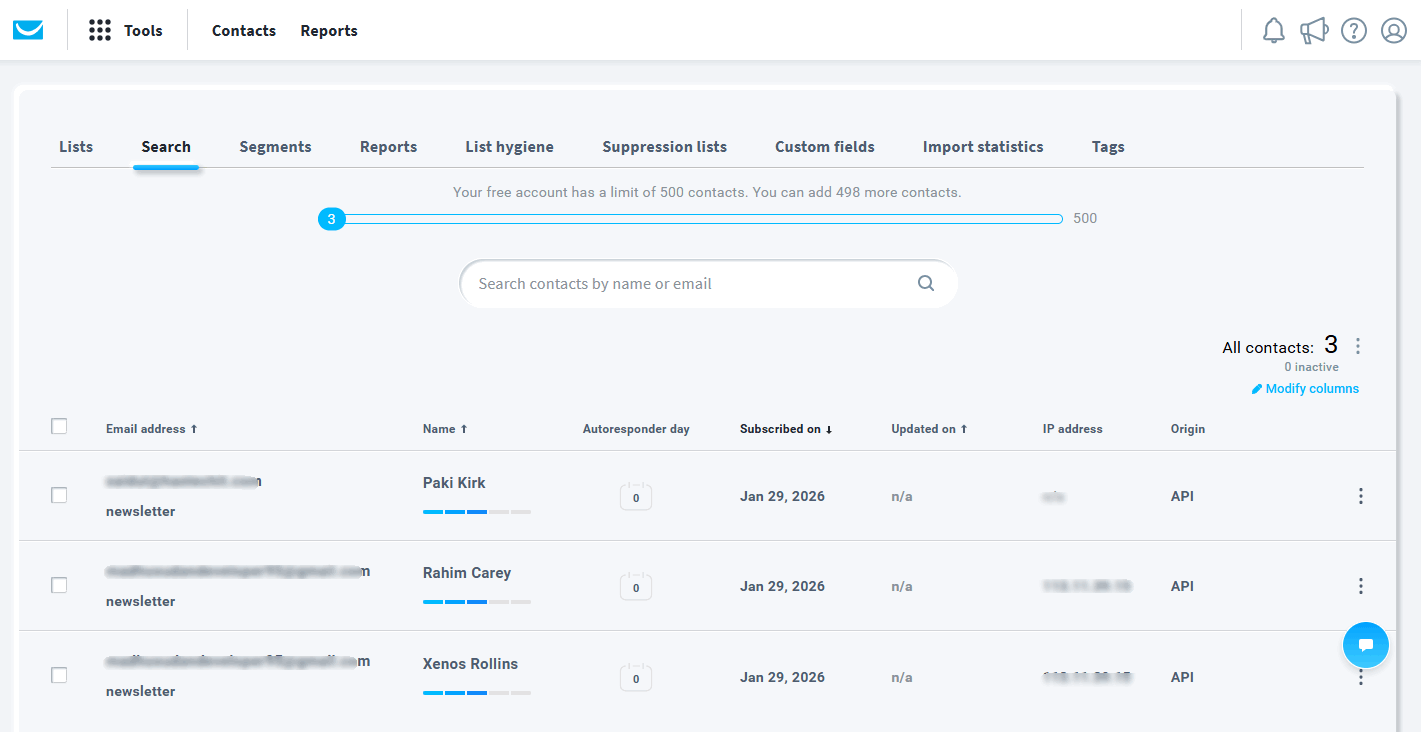
Duplicate Handling
When an email already exists in GetResponse, the integration handles it seamlessly:
- Contact information is updated with new values
- New tags are added (existing tags preserved)
- Day of cycle is applied to active sequence
- No duplicate contacts are created
Troubleshooting
Subscribers Not Appearing
Problem: Form submits but subscriber doesn’t appear in GetResponse.
Solutions:
- Verify API key is valid
- Check campaign selection
- Confirm email field is mapped
- Look for errors in form submissions
Custom Fields Not Saving
Problem: Custom field data not appearing in GetResponse.
Solutions:
- Ensure fields exist in GetResponse first
- Check smart tag syntax (
{input.field_name}) - Verify field mapping configuration
- Test with known working values
Tags Not Applied
Problem: Subscriber created but tags are missing.
Solutions:
- Confirm tags exist in GetResponse
- Check tag selection in integration
- Verify API permissions
- Check for typos in tag names
Day of Cycle Not Working
Problem: Autoresponder not starting at correct day.
Solutions:
- Verify campaign has autoresponder enabled
- Check day number is valid (0-1000)
- Ensure autoresponder sequence exists
- Test with day 0 first
Frequently Asked Questions
Q: Can I add subscribers to multiple campaigns?
A: Each integration instance adds to one campaign. Create multiple integrations for multiple campaigns.
Q: What happens to existing subscribers?
A: Their information is updated and new tags are added. They’re not duplicated.
Q: Can I use GetResponse automation rules?
A: Yes, subscribers added via this integration trigger GetResponse automations just like any other signup.
Q: Is double opt-in supported?
A: Double opt-in is configured in GetResponse campaign settings, not in this integration.
Q: How quickly are subscribers added?
A: Typically within seconds. May take longer during high volume.
Q: Can I map dropdown/radio values?
A: Yes, use smart tags to map any form field value.
Q: What if GetResponse is down?
A: The integration will retry. Form submission still succeeds; subscriber is queued.
Best Practices
Campaign Organization
- Create specific campaigns – Separate campaigns for different purposes
- Name clearly – Use descriptive campaign names
- Archive old campaigns – Keep your list clean
- Set up welcome emails – Configure in GetResponse
Tagging Strategy
- Use consistent naming –
source-website,content-ebook - Don’t over-tag – Keep tags meaningful
- Document your tags – Maintain a tag glossary
- Review regularly – Remove unused tags
Autoresponder Setup
- Plan your sequence – Map out the customer journey
- Test thoroughly – Send test emails
- Monitor metrics – Track open/click rates
- Iterate – Improve based on performance
That’s it! Thank you for choosing HT Contact Form to enhance your email marketing workflow. If you need additional assistance, feel free to contact our support team. Our dedicated support team would be more than happy to assist you.