Overview
The Chained Select Field allows you to create a series of interconnected dropdown menus, where each selection filters the options available in subsequent dropdowns. This field is ideal for hierarchical data, such as Country → State → City, or Category → Subcategory → Product selections.
Key Features
- Multi-Level Dropdowns: Create unlimited levels of dependent dropdowns.
- CSV Data Source: Upload CSV files or link to remote URLs for dynamic data.
- Automatic Filtering: Child dropdowns update instantly based on parent selections.
- Two Layout Options: Vertical or horizontal dropdown arrangement.
- Save & Resume Support: Selections are preserved when saving drafts.
Common Use Cases
- Location Selection: Country → State/Province → City → Zip Code for shipping or registration forms.
- Vehicle Selection: Year → Make → Model → Trim for automotive forms.
- Product Configuration: Category → Subcategory → Product → Variant for e-commerce stores.
- Organization Hierarchy: Department → Division → Team → Employee for internal directories.
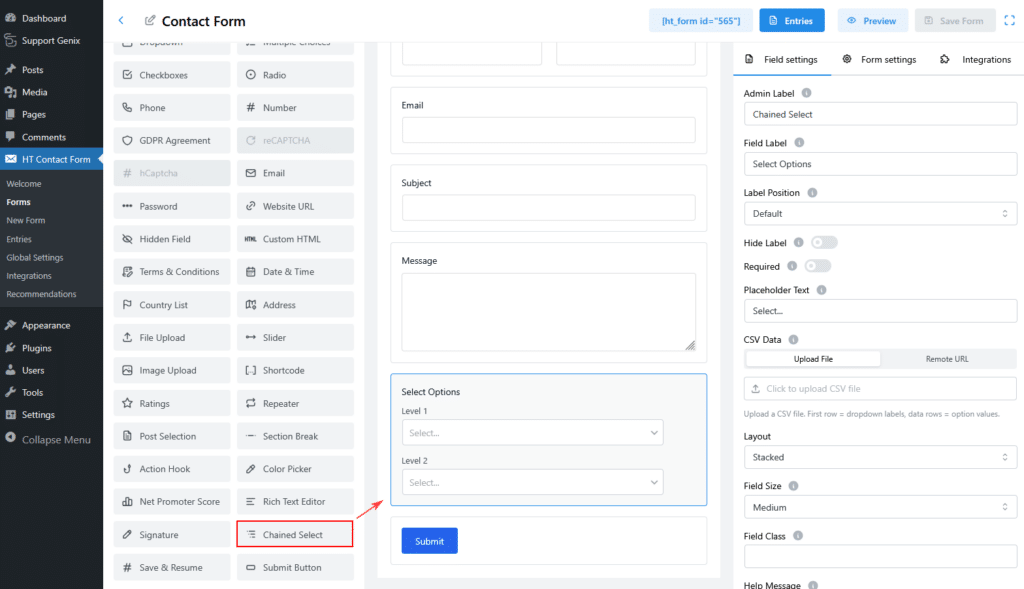
How to Add a Chained Select Field
Step 1: Add the Field to Your Form
- Go to HT Form → Forms in the WordPress admin.
- Edit an existing form or create a new one.
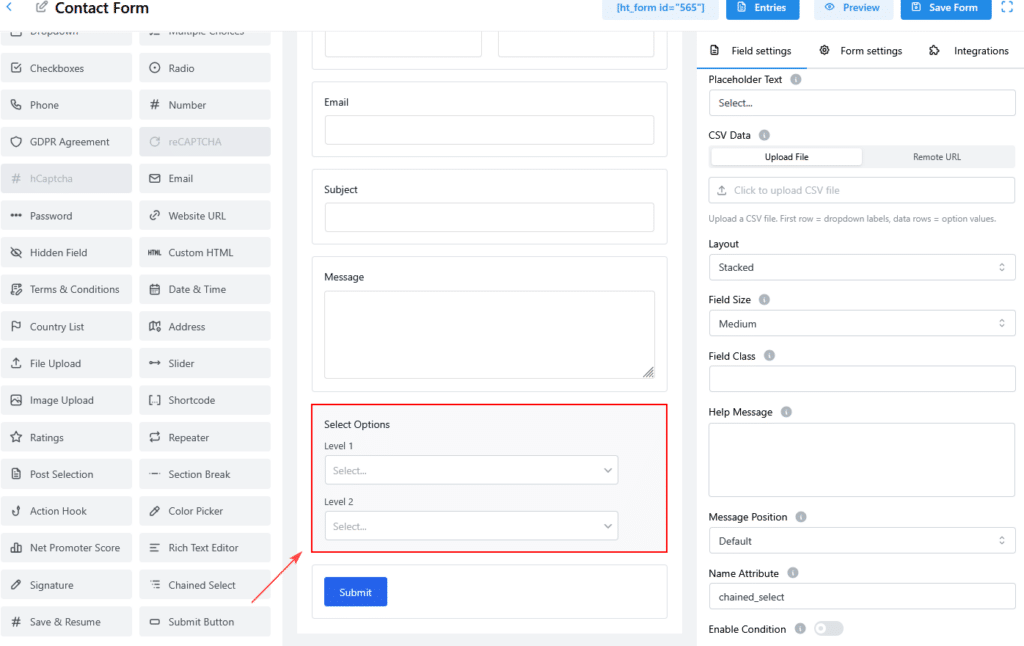
- In the Form Builder, find Chained Select in the elements panel.
- Drag and drop the field onto your form.
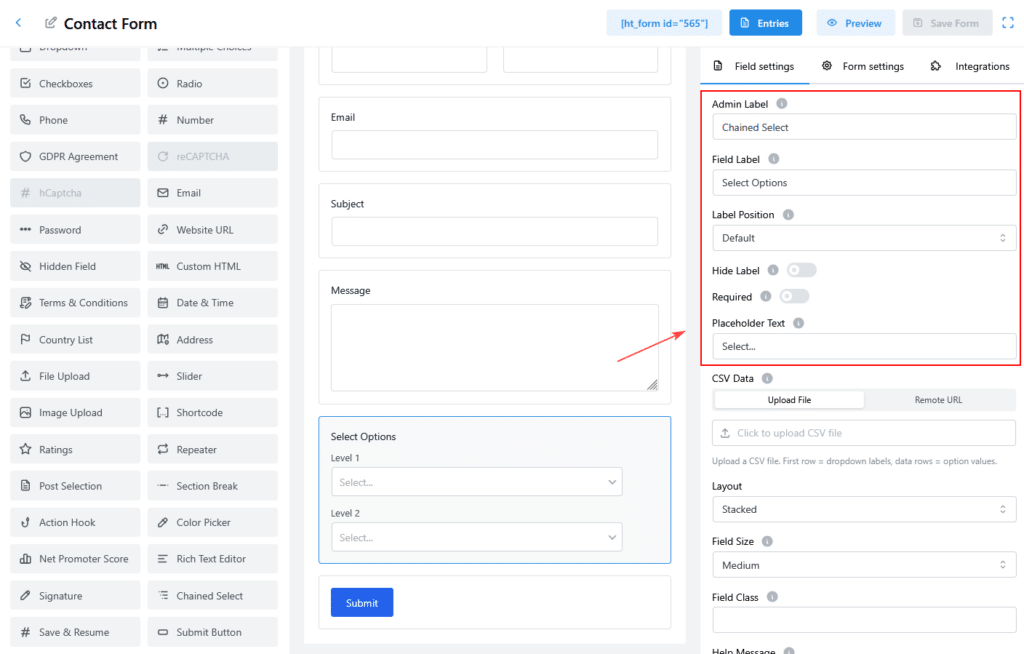
Step 2: Configure Basic Settings
Admin Label
- Purpose: Internal field identifier.
- Example: “Location Selector”, “Vehicle Picker”.
Label
- Purpose: Text displayed above the dropdown.
- Example: “Select Your Location”, “Choose a Vehicle”.
Placeholder
- Purpose: Text shown in unselected dropdowns.
- Default: “Select…”
- Example: “Choose an option”.
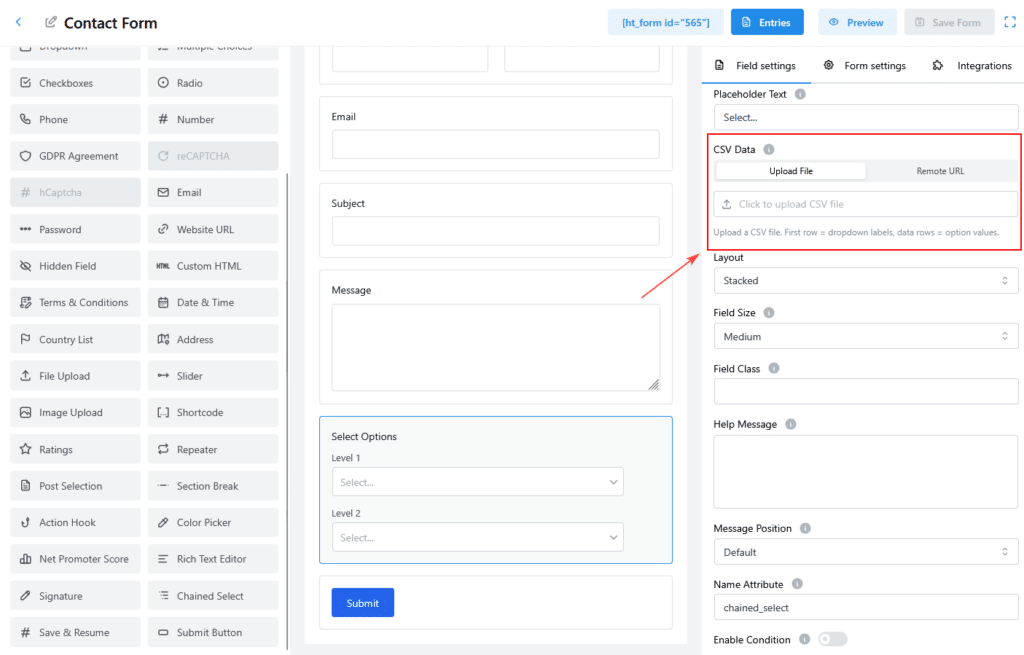
Data Source Configuration
Option 1: File Upload
- Click Upload CSV.
- Select your CSV file (ensure it’s within the size limit).
- The file will be parsed immediately, and you’ll see the detected columns.
Option 2: Remote URL
- Enter the URL of your CSV file.
- Click Fetch Data to load it.
- Use Refresh to update the data if the file changes.
CSV Format Requirements
Basic Structure
Your CSV file must have:
- Header Row: Column names are used as dropdown labels.
- Data Rows: Values for each dropdown level.
Example: Location Data
Country,State,City
USA,California,Los Angeles
USA,California,San Francisco
Canada,Ontario,Toronto
Canada,Quebec,Montreal
This creates a 3-level dropdown: Country → State → City.
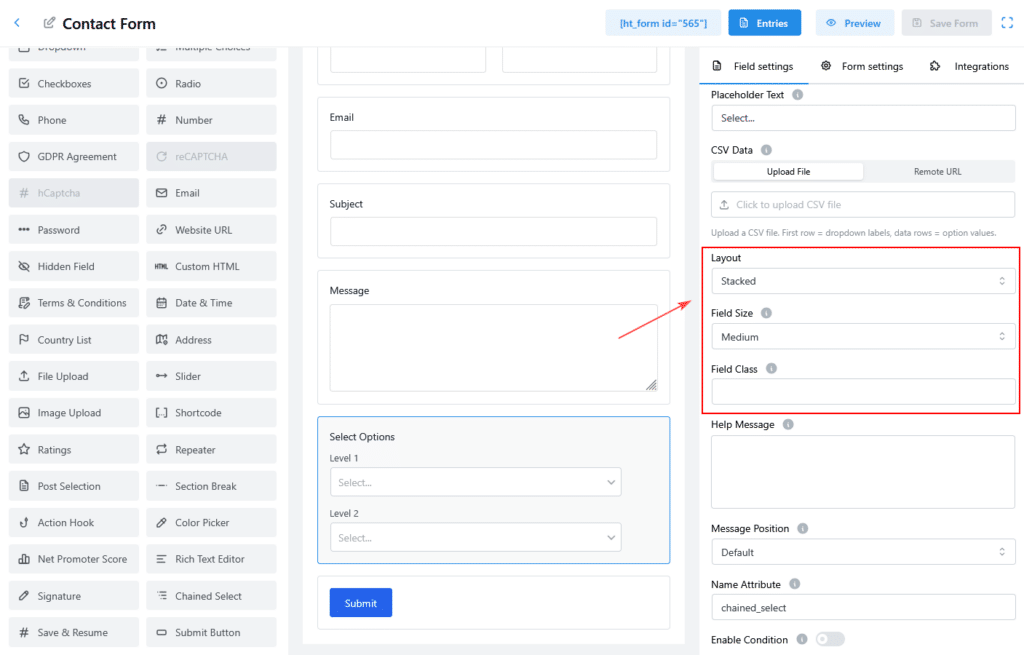
Layout Configuration
Layout Options
| Layout | Description | Best For |
|---|---|---|
| Vertical | Dropdowns stacked vertically. | Mobile forms. |
| Horizontal | Dropdowns displayed side by side. | Desktop forms. |
Field Size Options
| Size | Appearance |
|---|---|
| Small | Compact dropdowns |
| Medium | Standard size |
| Large | Prominent dropdowns |
How Filtering Works
Level 1 (First Dropdown)
Displays all unique values from the first CSV column.
Level 2 (Second Dropdown)
Filters options based on the selected value from the first dropdown.
Subsequent Levels
Each level filters based on all previous selections, displaying only the relevant options.
Complete Configuration Examples
Example 1: Location Selector
Scenario: Shipping address form with country/state/city selection.
Configuration:
- Admin Label: Shipping Location
- Label: Select Your Location
- Data Source: File Upload (locations.csv)
CSV:
Country,State/Province,City
USA,California,Los Angeles
USA,New York,New York City
Canada,Ontario,Toronto
Example 2: Product Selector
Scenario: Product selection with categories, subcategories, and products.
Configuration:
- Admin Label: Product Finder
- Label: Find Your Product
- Data Source: Remote URL (https://example.com/products.csv)
CSV:
Category,Subcategory,Product
Electronics,Phones, iPhone 13
Electronics,Phones, Galaxy S21
Clothing,T-Shirts, Basic Tee
Clothing,Jeans, Skinny Fit Jeans
Viewing Submissions
Chained Select data is displayed as a sequence of selected values:
- Example: “USA → California → Los Angeles”.
- Exporting Entries: Data is stored as a JSON array, e.g.,
["USA", "California", "Los Angeles"].
Advanced Tips
Dynamic Data Updates
For frequently updated data, use Remote URL as the data source. This allows you to refresh the data without re-uploading the CSV.
Conditional Logic Integration
You can show or hide other fields based on Chained Select choices. For example, display shipping options if the user selects a specific country.
Optimizing Large Datasets
For large CSV files (over 1000 rows), consider breaking data into smaller chunks or using Remote URL to fetch data dynamically.
Troubleshooting
CSV Not Parsing Correctly
- Solution: Ensure the file is UTF-8 encoded and columns are consistent across all rows.
Remote URL Not Loading
- Solution: Verify the URL is publicly accessible and that the file is in CSV format.
Dropdowns Not Filtering
- Solution: Ensure your CSV follows the correct structure and that there are no empty cells.