Support Genix is a WordPress helpdesk plugin designed for managing customer tickets directly from your WordPress site. Integrating it with HT Contact Form allows you to automatically send form submissions as support tickets — improving response time and customer satisfaction.
This guide walks you through how to enable and configure the integration.
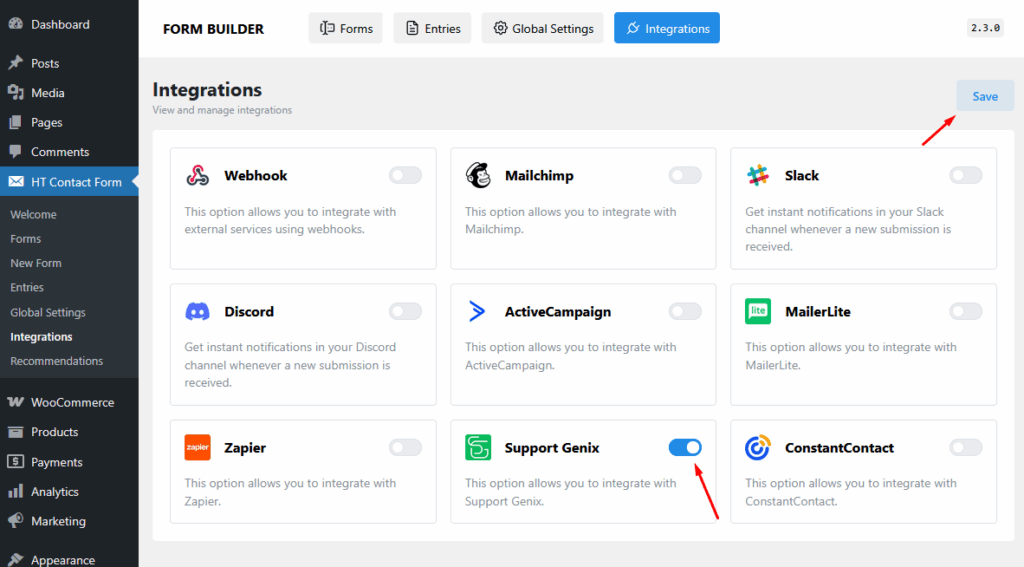
Step 1: Enable Support Genix Integration
To begin the integration:
- From your WordPress dashboard, navigate to
HT Contact Form → Integrations. - Find the Support Genix integration.
- Toggle the switch to enable it.
- Click Save and continue.
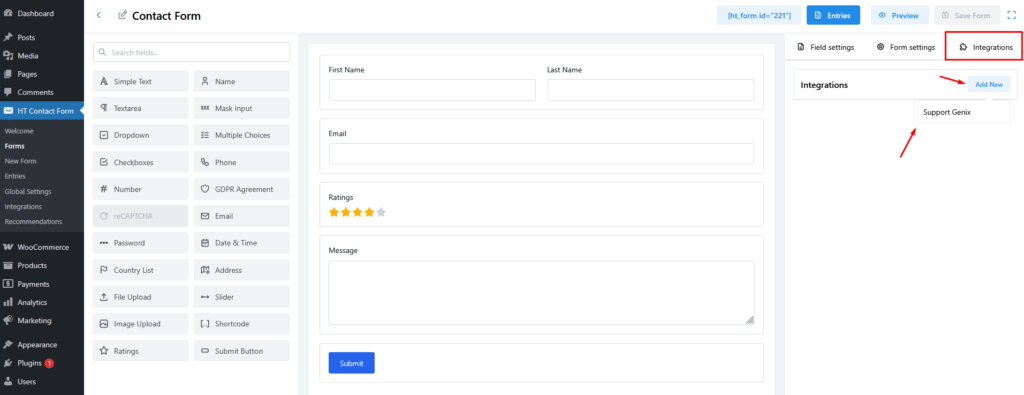
Step 2: Attach Support Genix to a Specific Form
Once enabled:
- Go to
HT Contact Form → Formsand open the form you want to connect. - Click the Integrations tab on the top right.
- Then click Add New.
- From the dropdown, select Support Genix.
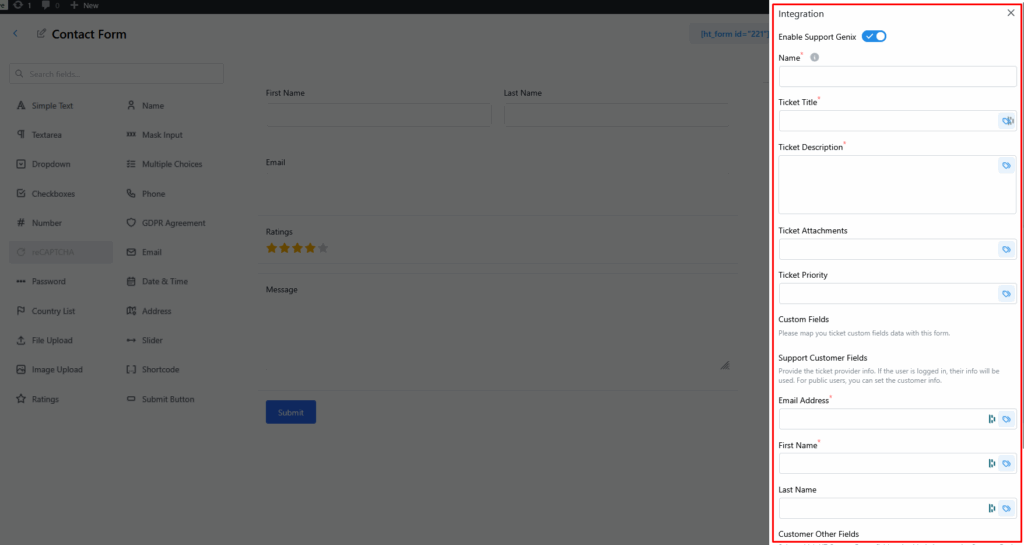
Step 3: Configure the Support Genix Integration Settings
A sidebar will appear with multiple fields to map and configure. Let’s go through them:
Enable Integration
Turn on the Enable Support Genix toggle at the top.
Name
Give this integration a recognizable name. For example: “Product Support Integration”.
Ticket Field Mapping
Map your form fields to corresponding ticket fields in Support Genix:
- Ticket Title – Choose the field that should act as the subject.
- Ticket Description – Select the form field that holds the main message.
- Ticket Attachments – Map to an Image Upload or File Upload field in your form (optional).
Support Customer Fields
Map the form fields that collect customer data:
- Email Address – Required
- First Name – Required
- Last Name – Optional
These fields will automatically populate the Support Genix ticket user information.
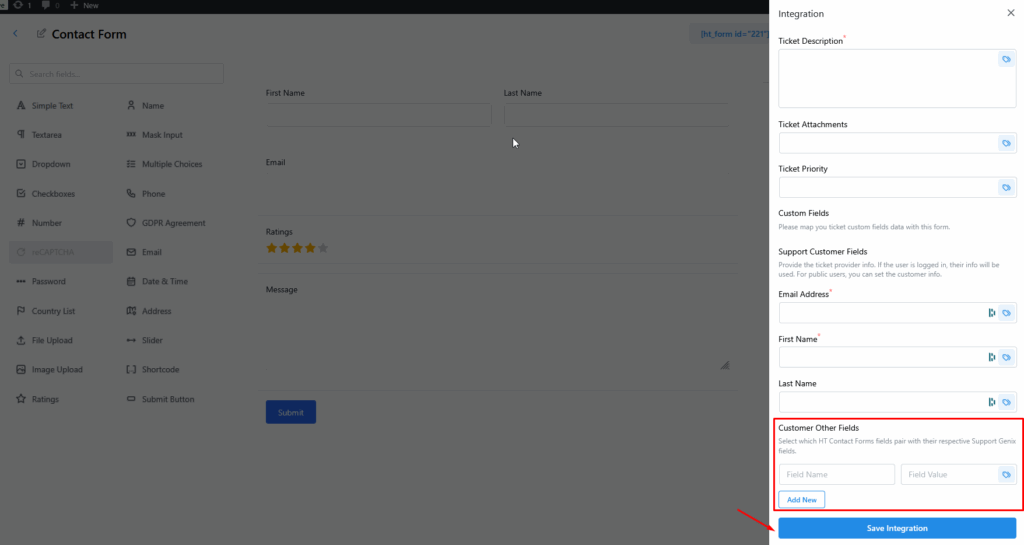
Custom Fields (Optional)
If you’ve added custom fields in Support Genix, you can map those as well using the “Custom Fields” section.
At the bottom, there is also a section titled Customer Other Fields to map additional HT Contact Form fields with Support Genix fields.
Step 4: Save and Test the Integration
- Once all required fields are mapped, click Add Integration or Save Integration at the bottom.
- Submit a test form entry from the frontend.
- Go to your Support Genix dashboard and verify that the ticket was created successfully.
Pro Tips for Better Workflow
- Use the Image Upload or File Upload field type in your form to allow users to attach screenshots or documents directly to tickets.
- Name integrations clearly for easy maintenance when managing multiple forms.