How to Edit WordPress Pages: Editing Tips and Strategies
Are you struggling to edit your WordPress pages effectively? You’re not alone! Many website owners find the editing process confusing at first.
WordPress offers multiple ways to modify your content with ease. This guide will walk you through each method step by step. You’ll learn how to use the Block Editor for basic changes.
We’ll also cover the Classic Editor for traditional editing needs. For advanced designs, we’ll explore popular page builders like Elementor and Divi.
Both beginners and experienced users will find valuable techniques here. Master these editing skills to create professional-looking pages quickly.
Your WordPress site deserves to look its best! Ready to transform your pages? Let’s dive into how to edit WordPress pages the right way.
Key Takeaways
- Transform basic content into visually engaging professional pages using editor tools.
- Master both traditional editors (Classic) and modern options (Gutenberg, Elementor, Divi).
- Create professional-looking pages without design or coding experience.
- Organize page content effectively using blocks and widgets for better layouts.
- Use WordPress page builders for complex designs beyond the basic editor capabilities.
- Choose the right editor based on your specific page editing needs and skill level.
What Are the Basic WordPress Elements
Before learning how to edit pages on WordPress, it’s essential to understand the dashboard layout. Users should familiarize themselves with the admin menu organization first.
The WordPress edit page interface includes several key sections to be aware of. Beginners should practice with test pages before editing live content.
We will explore the basic elements that you will most likely interact with, such as:
- Posts & Pages,
- Themes, and
- Editors.
Whether you’re a beginner or an experienced WordPress user, it’s essential to know the basics of how to edit WordPress pages of your website. Let’s get started!
Posts & Pages
WordPress allows you to create two main types of content – Posts and Pages.
Posts are typically used for dynamic and time-sensitive content like blog articles or news updates. They are displayed in reverse-chronological order, with the newest blog posts appearing first.
Pages, however, are meant for static content like your homepage, contact page, about us, or privacy policy. They are used for non-changing information that remains constant on your website.
When you edit pages in WordPress, remember that they differ from posts. Many businesses update their main pages seasonally for relevance. The editing pages in WordPress follows similar steps across different themes.
Theme
The WordPress theme is a crucial element that determines your website’s overall design and layout. It controls how your site looks and feels to visitors.
WordPress includes default themes already installed. You can also choose from many free themes. Premium themes are available in the WordPress theme repository. Themes help you customize your website’s appearance easily.
You do not need to change the code. A theme builder offers more control and flexibility. It is better to use a theme builder or similar tool. Without one, you might need to edit code manually.
Editor
The editor is the interface through which you create and edit your content in WordPress. The default editor in WordPress is called Gutenberg, also known as the WordPress Block Editor.
It uses a block-based approach, where each element of content is represented as a block.
You can add many types of content blocks in WordPress. These include paragraphs and images. You can also insert buttons and videos. Galleries and other elements are available too. It helps you build engaging content. You do not need any coding knowledge.
Editing in WordPress depends largely on the editor’s familiarity. The learning curve varies by editor when editing pages in WordPress. Different editors offer varying levels of design flexibility. Some plugins provide additional editing functionality beyond standard editors.
How to Edit WordPress Pages Using the Block Editor (Gutenberg)
With the Gutenberg Block Editor, you can easily create and edit content using a block-based approach, making it simple to design visually appealing and engaging pages without the need for complex coding.
To edit your WordPress site using the Gutenberg Block Editor, follow these steps:
1. Navigate to “Posts” or “Pages” in the WordPress dashboard and select “Add New” to create a new post or page. Alternatively, you can open an existing post or page from the list to edit it.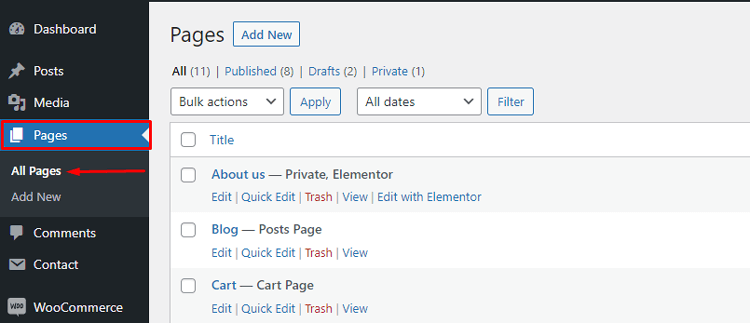
2. Once you are on the page editing screen, you can start adding or editing content. To change WordPress site title, click on the “Add title” block and enter the desired page title. For existing content, you can edit the title by clicking on it to change WordPress site title.
3. Press “Enter” to move to the first line after the title and start typing to add the main content of your page. Each content element in Gutenberg is represented as a block. To customize a block, click on it and select the settings from the sidebar. You can adjust various aspects, such as text alignment, font size, color, and more.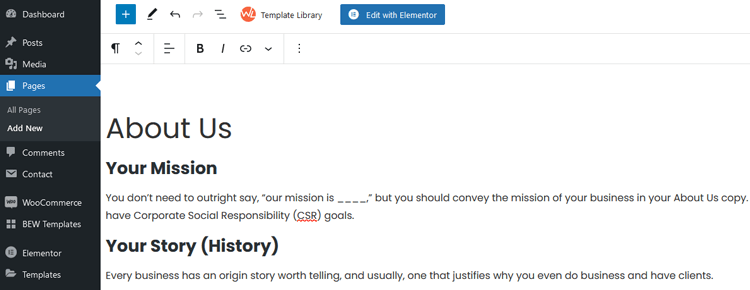
4. To add an image to the page, click on the plus icon and select the “Image” block from the popup. You can also add other content elements by using the search field in the left sidebar.![]()
5. Once you’re satisfied with the page content, click on the “Publish” button to make the changes live on your website. If you want to preview how the page will appear to site visitors on different devices, you can click on the “Preview” option in the top bar.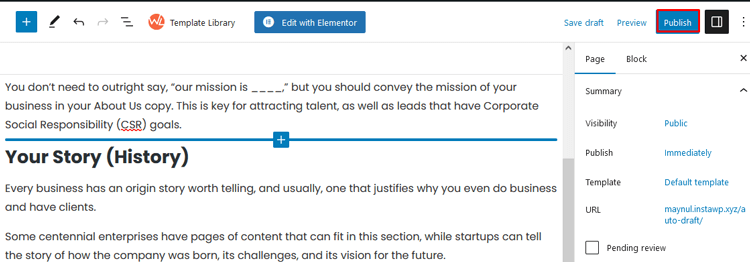
ShopLentor – WooCommerce Builder for Elementor & Gutenberg
A versatile page builder to build modern and excellent online stores with more than 100k Active Installations.
How to Edit WordPress Pages Using the Old Classic Editor
The Classic Editor is simple and works well for basic content. Modern page builder plugins like Gutenberg, Divi, or Elementor offer more advanced features. These tools help you create complex layouts with ease. They give you better design flexibility and control.
To edit your WordPress site using the old Classic WordPress Editor, you can follow these steps:
Step 1: Ensure the Classic Editor is Enabled
After the introduction of Gutenberg, the Classic Editor is available as a plugin. Make sure the Classic Editor plugin is installed and activated to use the old editor. Alternatively, you can use the Gutenberg block called “Classic” to access the Classic Editor in the form of a block.
Step 2: Access the Editor
Log in to your WordPress dashboard and navigate to “Posts” or “Pages.” Click on “Add New” to create a new post or page or select an existing post/page from the list to edit.
Step 3: Editing with TinyMCE
The Classic Editor is powered by TinyMCE, a web-based editor built with HTML and JavaScript. It provides a What-You-See-Is-What-You-Get (WYSIWYG) interface. This interface allows you to customize various aspects of your page’s appearance.
Step 4: Customize Content
Use the Classic Editor to control the appearance of your content, including heading tags (H1, H2, H3, etc.), font styles (bold, italics, strikethrough), and lists (bulleted and numbered). You can also adjust alignment, text and background colors, insert tables, and add media like images and videos.
Step 5: Use Custom Styles
The Classic Editor also supports custom styles, enabling you to customize the design and behavior of your page and its elements.
Both the new block editor and the classic editor in WordPress provide options to directly edit code(HTML) if you need to edit code in a specific post or page.
How to Edit WordPress Pages Using the Page Builders
The Gutenberg Block Editor is useful for simple pages and blog posts. It works well for basic layouts and quick content updates. However, it may not suit complex homepage designs. It also struggles with creating elaborate landing pages.
To achieve this, you can use a page builder. WordPress page builders help you build pages the way you want. You do not need any coding skills to use them. Most builders offer drag and drop content elements. You can create pages in real time. These tools support front end editing for quick changes.
The builders that display the same thing you see as the end result are known as WYSIWYG (What You See Is What You Get). Using WYSIWYG mode can make editing your WordPress blogs and pages much easier.
The most widely used WYSIWYG WordPress page builders are Elementor and Divi Builder. Let’s explore how to edit WordPress pages of your website using these page builders.
Editing WordPress Pages Using Elementor
Elementor is a highly popular WordPress page builder with a user base of 5 million+ people. With Elementor you can create pages without writing any code. You can also modify themes using a visual editor.
It helps you develop full websites with stunning designs. Everything is done with simple drag and drop tools.
To edit your WordPress site using Elementor page builder, follow these steps:
Step 1: Install Elementor
In your WordPress dashboard, go to “Plugins” > “Add New” and search for “Elementor” in the search bar.
Click “Install Now” and then “Activate” the plugin. Alternatively, you can get Elementor for free from the official website.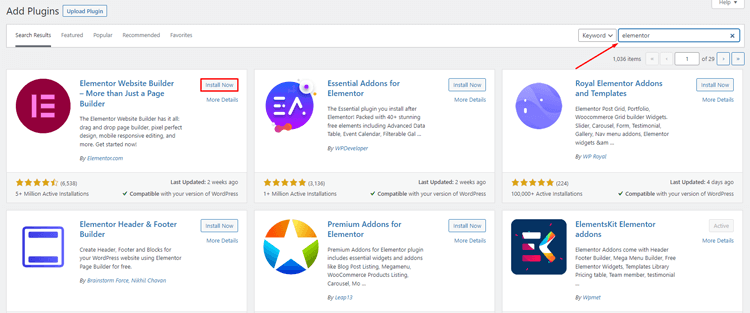
Step 2: Open a Page
Go to “Pages” and either add a new page or open an existing one.
Click on “Edit with Elementor” to begin editing the page in the Elementor page builder.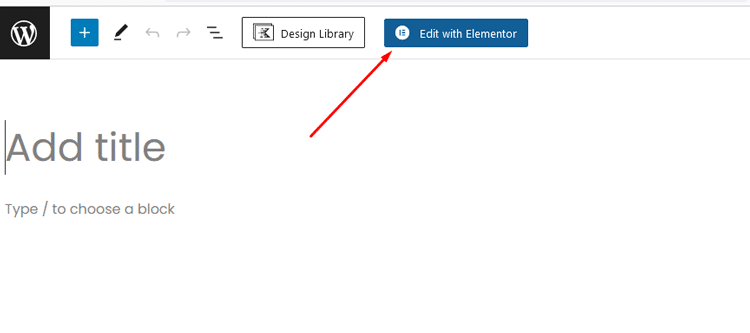
Step 3: Add and Customize Content
Use the drag-and-drop feature to add widgets. From the left sidebar, drag and drop any content widget into the right side. 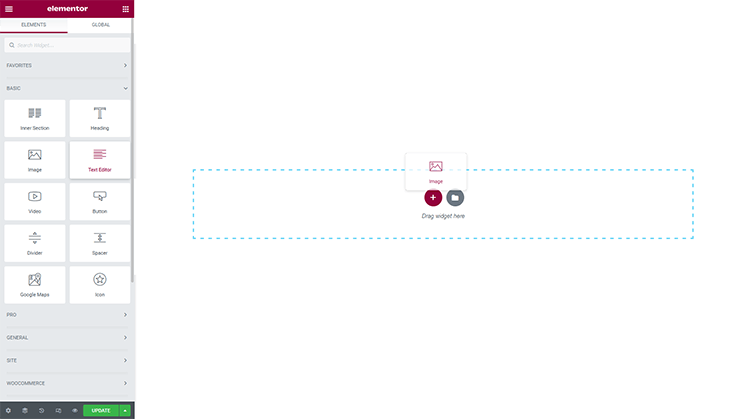
To add a new row, click on the plus icon.
To edit or add content, click on the text and start typing.
Use the sidebar style tab to customize the appearance. You can adjust settings like typography, margin, padding, and colors. You can also modify shadow, border, background color, and animations.
You can add as many content widgets to your page as you need, and each widget has multiple customization options.
Step 4: Publish or Save
Once you’re satisfied with the changes, click “Publish” to make the page live or “Save Draft” to publish it later.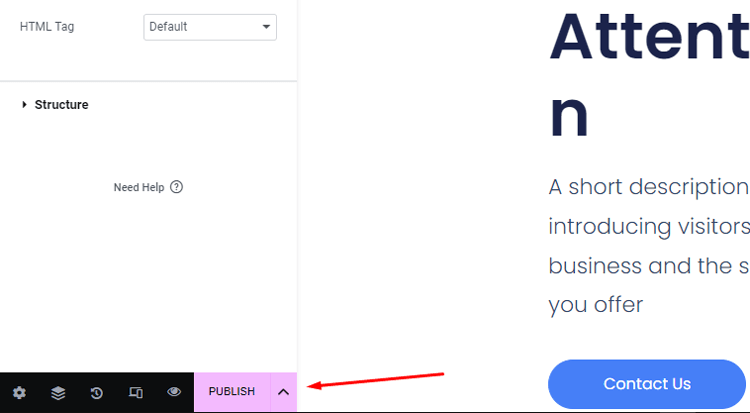
To edit WordPress pages more effectively with Elementor, consider using a plugin. There are many Elementor page builder plugins available on the market such as HT Mega. is a popular choice among users. It offers several modern and helpful functionalities.
These include a template library and a theme or template builder. You also get a post duplicator for easy content copying. It contains 110 total widgets for various uses. Among them, over 84 widgets are entirely free to use.
HT Mega Elementor Addons
The ultimate Elementor page builder addons to build stunning websites.
Editing WordPress Pages Using Divi Builder
Divi is a WordPress builder that has a large community of over 700,000 users. It offers a variety of customization options, advanced features, and pre-built layouts.
Unlike Elementor, Divi is a premium-only page builder, meaning there is no free version available. However, you can test out the live demo on their website for free.
To edit your WordPress site using Divi page builder, follow these steps:
Step 1: Install Divi
Visit the Elegant Themes website, download the Divi Theme file (which includes the Divi Builder), and install it in your WordPress dashboard by going to “Plugins” > “Add New” > “Upload Plugin.”
Step 2: Access Divi Builder
Go to any page and click the “Use Divi Builder” button to enter the editing screen.
Step 3: Choose a Template
You can either start building the page from scratch or select a pre-built template that comes for free with Divi Builder.
Step 4: Add and Customize Content
Use the plus icon to add rows, columns, or content elements.
Edit the content by selecting the widget and customizing it using the settings popup.
The Divi package offers a range of options for links, colors, spacing, shadow, filters, animation, and scroll effects.
Step 5: Save Changes
After making all the edits, click the “Save” button on the right to save your changes.
Frequently Asked Questions
Q. Can I use the new Gutenberg Block Editor to edit my WordPress pages?
Yes, the Gutenberg Block Editor is the default editor in newer versions of WordPress. It allows you to create and edit pages using blocks, which are individual content elements. You can easily add, rearrange, and customize blocks to design your page.
Q. How do I add images or media to my WordPress page?
To add images or media to your WordPress page, click on the (+) icon in the Gutenberg Block Editor to add a new block. Search for the “Image” or “Media & Text” block and select it. You can then upload an image from your computer or choose one from your media library. For media, you can embed videos or add audio files.
Q. Can I preview my changes before publishing the page?
Yes, you can preview your changes before publishing the page. In the Gutenberg editor, click on the “Preview” button in the top-right corner to see how the page will look to your site visitors. This allows you to check for any errors or make further adjustments before making the changes live.
Q. How do I save my changes after editing a WordPress page?
In the Gutenberg editor, your changes are saved automatically as you make them. However, if you want to save a draft without publishing it, you can click on the “Save Draft” button. To publish the changes and make them visible on your site, click on the “Publish” button.
Q. How do I add links to my WordPress page?
To add links to your WordPress page, highlight the text or image that you want to turn into a link. Click on the link icon in the Gutenberg Block Editor and enter the URL you want to link to. You can also choose to open the link in a new tab if needed.
Q. Can I customize the design of my WordPress page?
Yes, you can customize the design of your WordPress page using the Gutenberg Block Editor and other page builder plugins. Each block comes with its own set of customization options, allowing you to change colors, fonts, alignments, and more. Additionally, you can use page builder plugins like Elementor or Divi for more advanced design options and layouts.
Q. Are there any limits to the number of pages I can create or edit in WordPress?
There are no specific limits to the number of pages you can create or edit in WordPress. You can create as many pages as your website requires without any restrictions.
Q. Can I schedule page updates in WordPress?
Yes, you can schedule page updates in WordPress. In the Gutenberg editor, click on the three dots in the top-right corner and select “Options.” From there, you can set a specific date and time for your page updates to be published automatically. This is helpful when you want to make changes at a later date without manually publishing them.
Conclusion
Editing WordPress pages doesn’t have to be complicated once you understand the available tools. This guide has walked you through multiple editing options to suit different needs and skill levels.
The Gutenberg Block Editor offers an intuitive way for beginners to create basic pages with minimal effort.
For those who prefer traditional methods, the Classic Editor remains a reliable option for straightforward content creation.
Meanwhile, advanced users can leverage powerful page builders like Elementor and Divi to design complex, professional layouts without coding knowledge.
Remember that each editing method has its own strengths, Gutenberg for simple content, Classic Editor for basic formatting, and page builders for elaborate designs.
Choose the approach that best matches your specific project requirements and comfort level.
With the techniques covered in this article, you’re now equipped to confidently edit and enhance your WordPress pages.
Why not apply these skills to transform your website today?