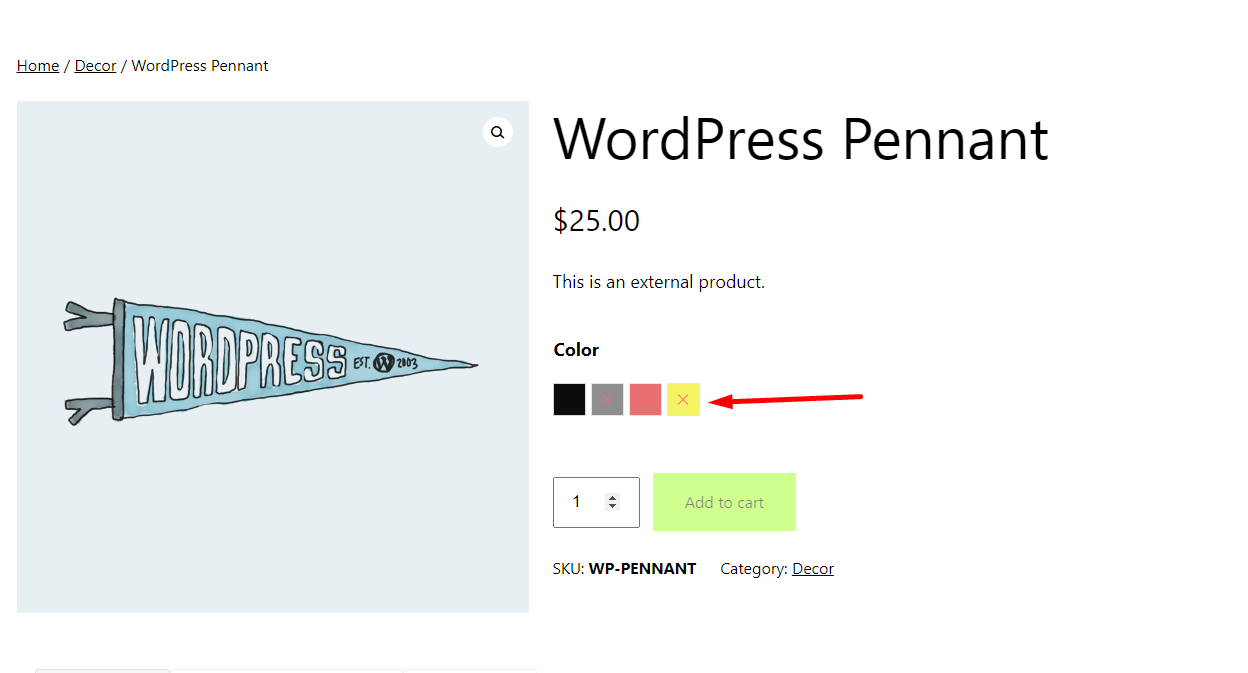
Now that you have defined the product attributes, it's time to set up product variations to display the variation swatches on your website's front-end.
- To configure product variations, navigate to “Products” and select “All Products.”
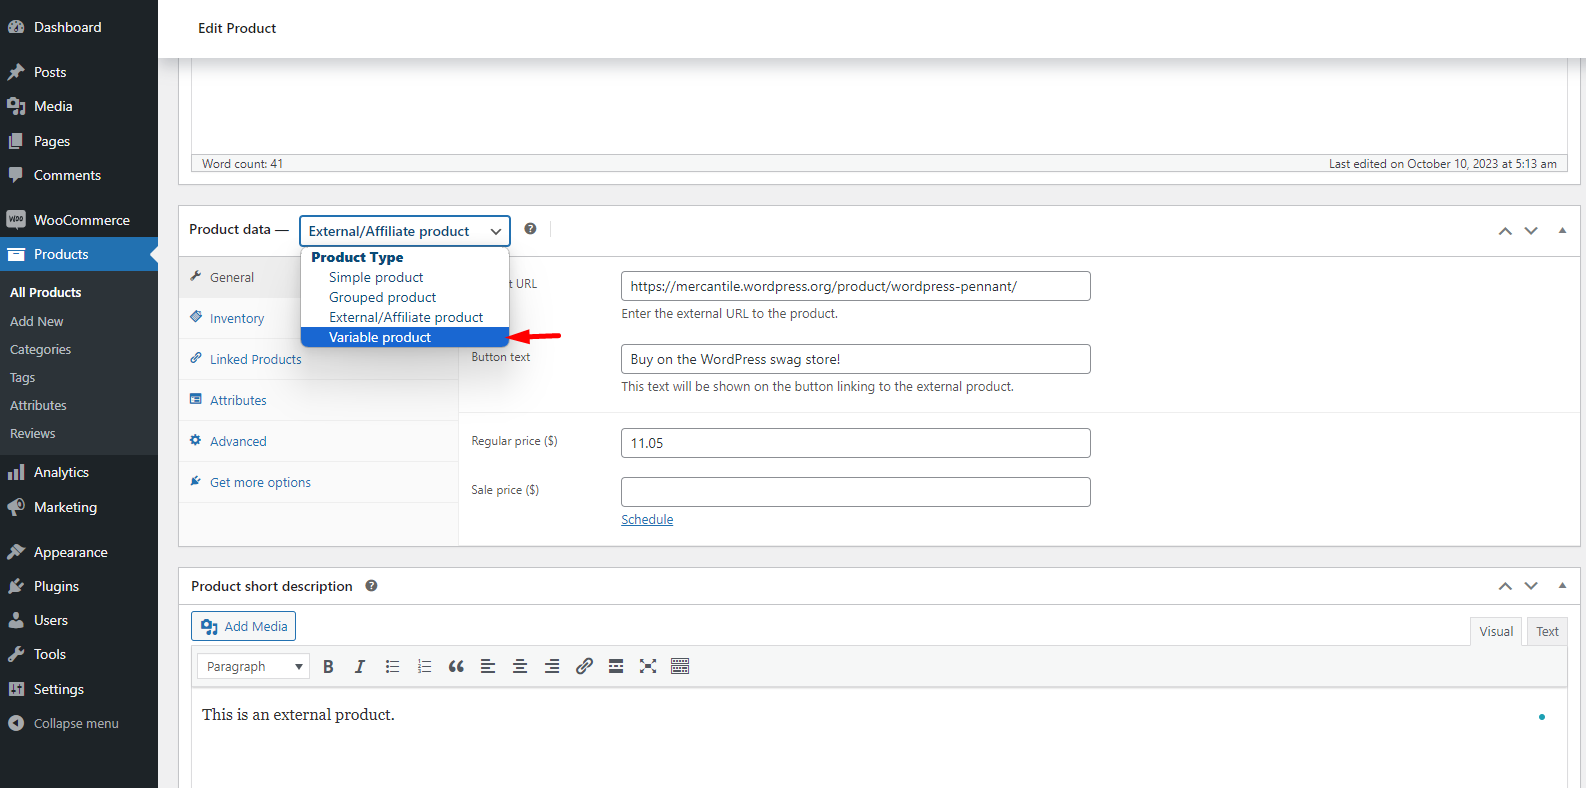
- Locate the product for which you want to set up variations and click on “Edit” to proceed.

- In the product data section, choose “Variable Product” as the product type.
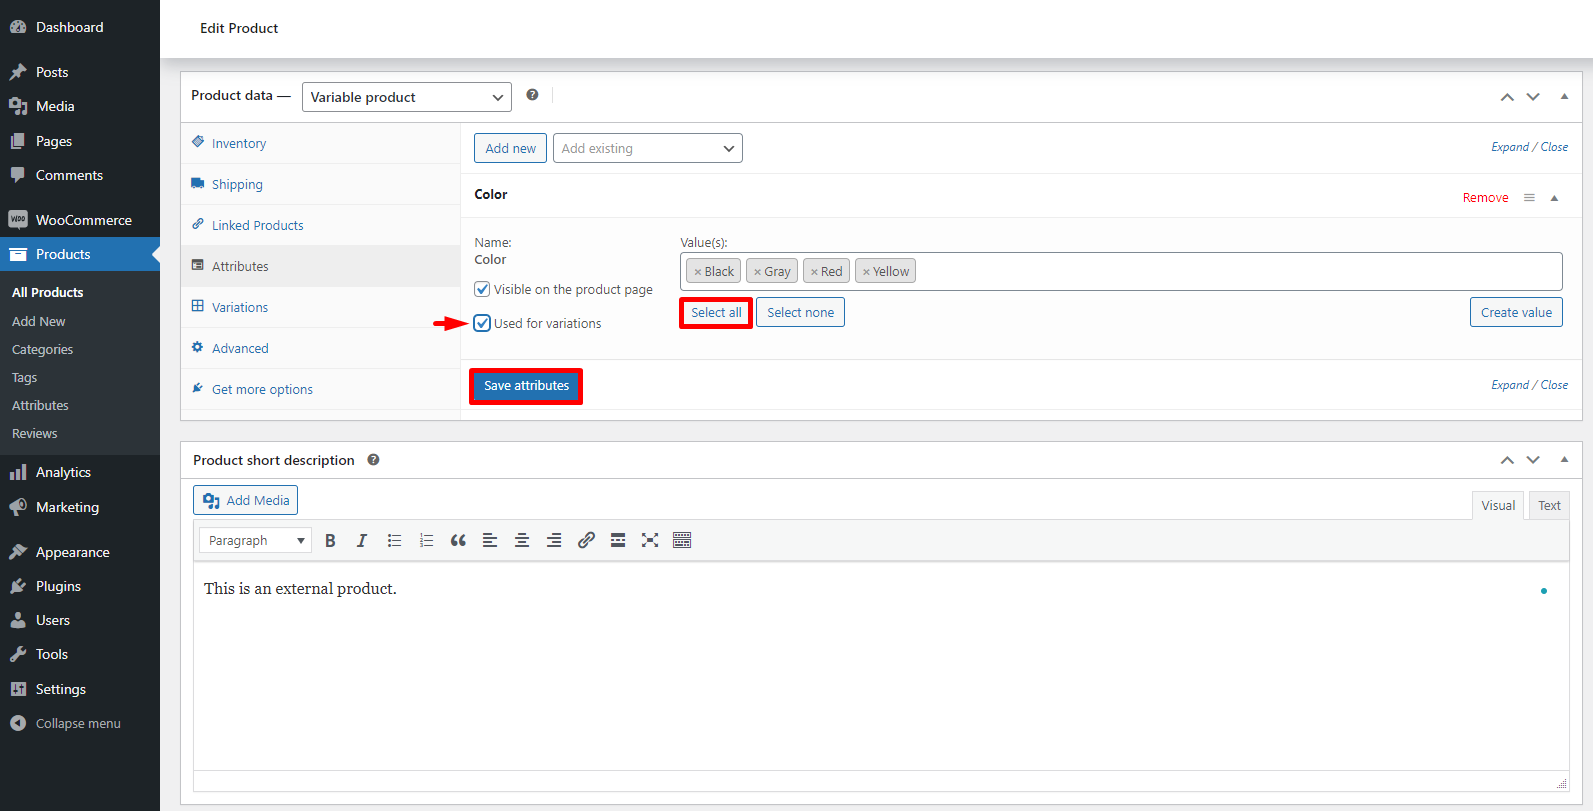
- Navigate to the “Attributes” tab and choose the attributes you wish to display on the front-end.
- Click on the “Add” button to include them in the list.

- After adding the attributes, click the “Select All” button to add all variants to the product.
- Make sure the “Used For Variation” button is checked.
- Click the “Save Attribute” button to save the changes.
- After saving the attributes, proceed to the “Variations” tab.
- Click on the “Add Manually” button to generate the variations.
- This action will add variations to the product based on the attributes you previously selected.


- For each variant, customize the image and price by opening the drop-down menu.
- Select the desired variation from the drop-down menu.
- Set a custom price for the variant by entering the amount in the “Regular Price” field.
- Add an image for the variant by clicking the image button.
- Repeat this process for other variants as needed.

- After editing the fields, click on the “Save Changes” button located at the bottom, then proceed to “Update” the product.