How to Install WordPress on Localhost: Easy and Fast Setup
Have you ever wanted to install WordPress on a localhost environment? You can test how your website looks before launching it online. If so, we have got the perfect guide for you.
Installing WordPress on localhost creates a sandbox environment. Here, developers and designers can experiment freely. You can test themes, plugins, and customizations without affecting a live website.
This safe testing environment works for everyone. Professional developers use it to test their work. Beginners use it to learn WordPress development.
Don’t worry if you are new to web development. Our comprehensive steps make it easy to achieve your goal. This guide covers WordPress setup on both Windows and Mac systems. We provide clear, actionable steps for creating and testing websites risk-free.
Let’s dive right in and explore how to install WordPress on localhost!
Key Takeaways
- Create a safe local WordPress development environment.
- Master WordPress installation on Windows and Mac systems.
- Understand essential components: web server, PHP, and MySQL.
- Learn performance optimization for local installations.
- Troubleshoot common installation challenges.
Prerequisites for Installation
Before installing WordPress locally, it’s helpful to understand what you’ll need. Local development gives you complete control over your testing environment. You can break things, experiment freely, and never worry about affecting a live website.
The process of installing WordPress on your local host website is simple, but it is necessary to remember that specific components are required for it to function properly.
WordPress does not function independently on your local machine and needs-
- A web server (Apache or Nginx)
- PHP (version 7.4 or higher recommended)
- MySQL or MariaDB database
The interplay of these components creates the local environment in which WordPress runs.
How to Install WordPress on Localhost: Step By Step
Follow this step-by-step guide to install WordPress on localhost. You’ll have complete freedom to experiment, test ideas, and build your dream website risk-free.
Whether you’re a beginner or an experienced developer, we will assist you in installing WordPress on both Windows computers and Macs.
Installing WordPress on Windows
This section, I will guide you on how to install and configure WordPress on a Windows operating system. Specifically, how to set up and configure a virtual host using XAMPP on Windows 10.
Step 1: Download and install XAMPP
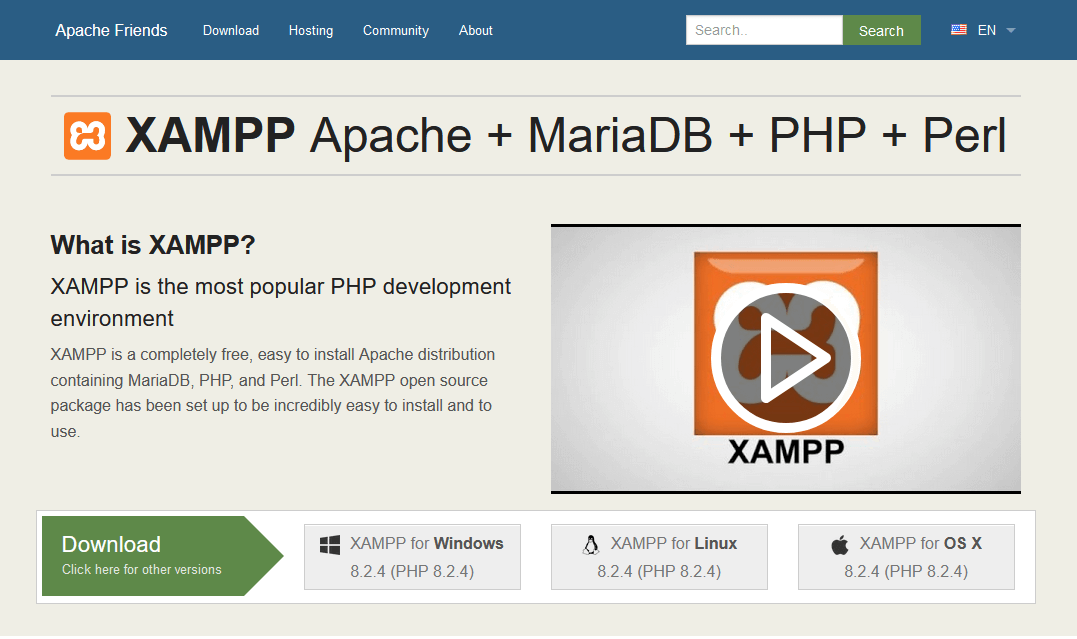
- Go to the Apache Friends website (apachefriends.org) and download XAMPP, which provides a complete server stack for running WordPress locally. It includes Apache (web server), MySQL (database), and PHP (programming language).
- On the XAMPP download page, you’ll find various options compatible with different PHP versions. Choose the option that works best with the latest PHP version.
- Once the download is complete, run the installer to install XAMPP software on your local computer system. Follow the installation instructions provided.
- After installation, open the XAMPP control panel. This control panel allows you to view and manage the status of various services.
- Make sure to checkmark the options for Apache and MySQL. These two services are essential for running WordPress locally.
- Start both Apache and MySQL services by clicking on their respective “Start” buttons in the XAMPP control panel. This step is necessary for the successful installation of WordPress on your local machine.
By completing these steps, you will have downloaded and installed XAMPP software, ensuring the proper environment is in place for running the localhost website.
Step 2: Install and Setup WordPress Localhost
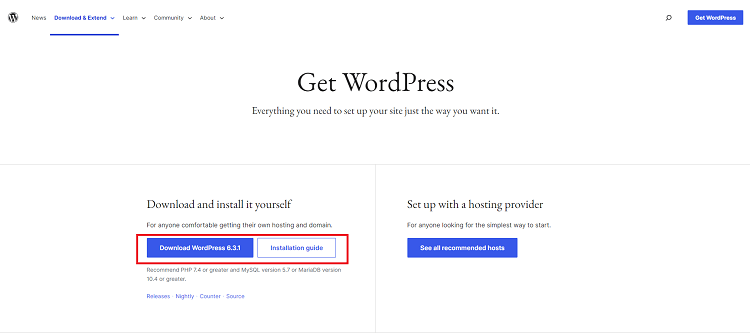
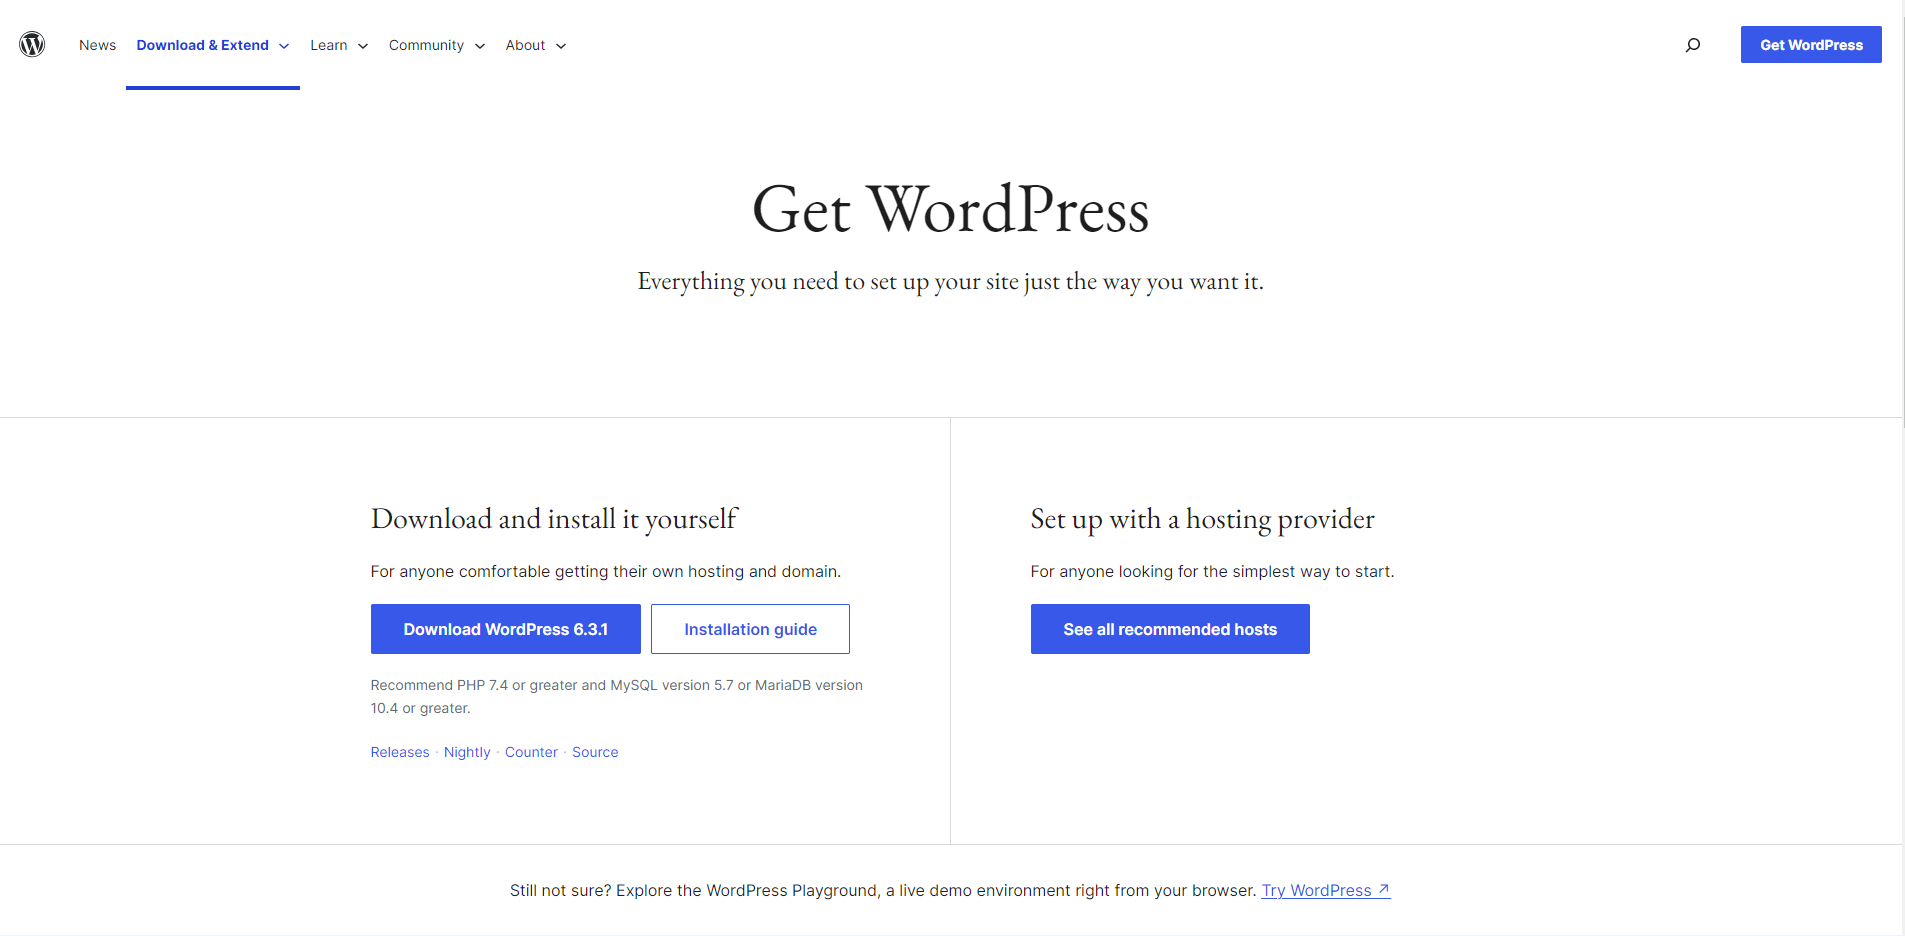
- Download WordPress setup from the official website (https://wordpress.org/download/).
- Extract the downloaded zip file directly into the “/htdocs” folder in the XAMPP directory (typically C:\xampp\htdocs). Rename the extracted “wordpress” folder to your project name (e.g., “newwpsite”).
Note: Ensure that the Apache and MySQL services in the XAMPP control panel are running. Start these services if they are not already running.
- Access the phpMyAdmin portal by visiting the URL: http://localhost/phpmyadmin/
- In the phpMyAdmin portal, create a new database for your WordPress site.
- Open a web browser and visit the following URL to begin the WordPress installation setup: http://localhost/newwpsite/wp-admin/setup-config.php
- Select the desired language and click “Continue”.
- On the next screen, you need to add the database credentials to the wp-config.php file. Open the wp-config.php file in a code editor and define the database credentials as follows:
// ** MySQL settings - You can get this info from your web host ** //

/** The name of the database for WordPress */

define( 'DB_NAME', 'newwpsite' );

/** MySQL database username */

define( 'DB_USER', 'root' );

/** MySQL database password */

define( 'DB_PASSWORD', '' );Note: Always use strong credentials and follow security best practices when deploying on a live server. When you unzip WordPress into htdocs, the folder name will be your site path (e.g., newwpsite)
- Save the wp-config.php file.
- Return to the WordPress installation wizard in your web browser. Enter the database name, username, and password you defined earlier. Optionally, you can set a custom table prefix. Click “Submit” when finished.
- The next screen will confirm the successful database configuration. Click “Run the installation” to start the WordPress localhost installation process.
- On the next screen, provide information about your website, such as the site title, username, password, and email address. These details will be used to access the WordPress admin dashboard.
- After entering the required information, click the “Install WordPress” button. This will initiate the WordPress localhost installation process.
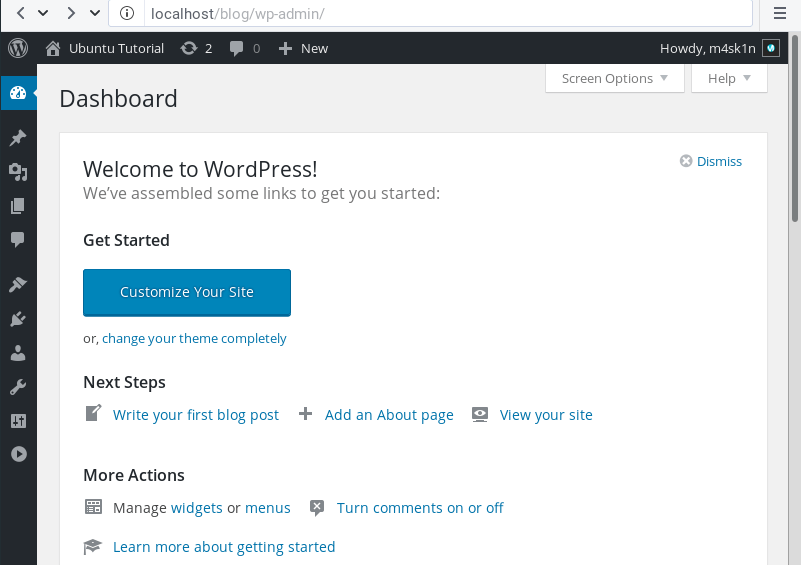
- Once the installation is complete, you will see a success message and a button to launch the WordPress dashboard login page.
That’s all you need to do to install WordPress locally on your Windows machine using XAMPP. You can now access your local WordPress site and start customizing it for your needs.
Installing WordPress on MAC
To install WordPress on macOS using MAMP, you’ll first need to understand your specific development workflow requirements. Leverage macOS native tools for a seamless local environment setup.
Mac users can use WordPress locally by setting up a stack, similar to Windows. The process may have slight variations, but it remains the same overall.
To install WordPress on macOS using MAMP requires understanding your specific development workflow. Leverage macOS native tools for seamless local environment setup.
Step 1: Download and Install MAMP
- Visit the MAMP official website and download the MAMP setup for macOS.
- Once the download is complete, run the installation wizard to install MAMP on your Mac.
- The Pro version is optional, and you can start with the free version.
- After installation, open the MAMP control panel and start the server.
- Click on “Open WebStart page” in the MAMP control panel to launch “phpMyAdmin”.
Step 2: Install WordPress Locally on Mac
- Download the WordPress setup for Mac from the official website (https://wordpress.org/download/).
- Unzip the downloaded WordPress file and place the WordPress folder inside the “htdocs” folder, which is located within the MAMP document root folder (/Applications/MAMP/htdocs/).
- You can also rename this folder to match the name of your WordPress site.
- To create the database, go to phpMyAdmin using the WebStart page in the MAMP control panel. The procedure for phpMyAdmin is the same as in Windows.
- Create a new database and configure the
wp-config.phpfile with the following credentials:
/** The name of the database for WordPress */
define( 'DB_NAME', 'your_database_name' );

/** MySQL database username */
define( 'DB_USER', 'root' );

/** MySQL database password */
define( 'DB_PASSWORD', 'root' );

/** MySQL hostname */
define( 'DB_HOST', 'localhost' );
Note: The default MAMP MySQL username is ‘root’ and the password is also ‘root’.
Now open a browser and go to the following URL to run the WordPress installation wizard:
http://localhost:8888/your-site-folder/
(Replace “your-site-folder” with the actual name of your WordPress folder.)
Follow the on-screen instructions to complete the installation.
The remaining steps for installing WordPress locally are similar to the Windows process, including entering your site title, username, password, and email address.
Congratulations! You have successfully installed WordPress locally on your Mac using MAMP. You can now start building and customizing your local WordPress site.
ShopLentor – WooCommerce Builder for Elementor & Gutenberg
A versatile page builder to build modern and excellent online stores with more than 100k Active Installations.
Tips for Improving the Performance of Your Local WordPress Installation
If you want to build your own website, understanding how to install WordPress on localhost is the first step. A local server allows you to run your WordPress website offline without a live internet connection.
Here are some tips for improving the performance of your local WordPress installation:
- Use caching: Install a caching plugin to store static versions of your web pages and reduce server processing time. Caching can significantly improve the loading speed of your site.
- Optimize your database: Use a plugin to clean up and optimize your WordPress database. Removing unnecessary data, such as post revisions, spam comments, and unused metadata, can help improve database performance. Use the same name for both the database and the WordPress folder.
- Minify and combine files: Minify your CSS and JavaScript files to reduce their size and remove any unnecessary characters or spaces. Additionally, consider combining multiple CSS or JavaScript files into a single file to minimize the number of requests made to the live server.
- Enable GZIP compression: GZIP compression reduces the size of your website’s files before they are sent to the browser, resulting in faster loading times. You can enable GZIP compression by adding code to your web server’s configuration file or using a caching plugin that offers GZIP compression functionality.
- Optimize images: Compress and optimize your images before uploading them to your local WordPress installation. You can use image optimization tools like TinyPNG, Imagify, or Smush to reduce file sizes without significant loss of quality.
- Disable unnecessary services: If you have unnecessary services or background processes running on your local machine, they can consume resources and impact WordPress performance. Close any unused applications or services to free up system resources for your WordPress localhost installation.
- Upgrade your local server environment: Ensure that you are using the latest versions of your web server software (e.g., Apache or Nginx), PHP, and database (e.g., MySQL or MariaDB). Upgrading to the latest versions can provide performance improvements and bug fixes.
- Monitor resource usage: Use a resource monitoring tool to track the usage of CPU, memory, and disk space on your local machine. Identifying any bottlenecks or high resource consumption can help you optimize your setup accordingly.
By implementing these tips, you can enhance the performance of your local WordPress installation, creating a smoother and faster development environment.
Common Troubleshooting Issues and Solutions
While installing WordPress locally is generally a smooth process, you may encounter some common troubleshooting issues. Here are a few common problems and their solutions:
- Port conflicts: Sometimes, the port used by the web server (e.g., Apache or Nginx) may conflict with another application running on your computer. To resolve this, you can either change the port used by the web server or identify and stop the conflicting application. (If you encounter port conflicts, you can change the default ports (80 for Apache, 3306 for MySQL) through the ‘Config’ buttons in the XAMPP Control Panel. After changing ports, you’ll need to access your site using the new port number (e.g., http://localhost:8080 instead of http://localhost)).
- Database connection errors: If you encounter issues connecting WordPress to the database, ensure that the database server is running correctly. Also verify that you have provided the correct credentials (database name, username, and password) in your WordPress configuration file (wp-config.php). Additionally, check if the database user has the necessary permissions to access the database.
- File permission issues: Improper file permissions can prevent WordPress from functioning correctly. Make sure that the web server has the necessary read, write, and execute permissions on the WordPress files and folders. Typically, setting the permissions to 755 for folders and 644 for files should work.
- Missing PHP extensions: WordPress relies on certain PHP extensions to function properly. If you encounter errors related to missing extensions, you may need to enable them in your PHP configuration file (php.ini). Common extensions include mysqli, gd, and curl. Restart the web server after making any changes to the PHP configuration.
- Memory limit issues: Large or complex WordPress installations may require more memory than the default limit. If you encounter memory-related errors, you can increase the memory limit by modifying the memory_limit parameter in your PHP configuration file (php.ini) or by adding a directive in your .htaccess file. Ensure that your system has enough available memory for the increased limit.
- Permalink issues:If you’re getting an error message from WordPress saying that it can’t find a certain page or post, you may need to check your permalink settings. Make sure your settings are set to “Post name” or a custom structure.
- Cache-related problems: If you have caching plugins or server-level caching enabled, it might interfere with the proper functioning of WordPress during installation or updates. Clear any caching mechanisms, disable caching plugins temporarily, or use private browsing mode to bypass cached content.
If you encounter any other specific issues during the installation of WordPress on your local host, referring to the official WordPress documentation, online forums, or seeking assistance from the WordPress community can provide valuable insights and solutions.
HT Easy GA4
#1 📈 Google Analytics Plugin for WordPress
🚀 Supercharge your WordPress website with analytical insights. (Including WooCommerce Report)
Frequently Asked Questions on How to Install WordPress on Localhost
What is the benefit of installing WordPress on localhost?
Installing WordPress on localhost allows you to create and test websites locally without the need for a live internet connection. It provides a safe and controlled environment for experimenting with themes, plugins, and customizations before deploying them to a live website.
Can I install WordPress on my computer without technical knowledge?
While some technical knowledge is beneficial, installing WordPress on localhost is designed to be user-friendly, and step-by-step guides are available. Following these guides can help individuals with little technical expertise successfully install WordPress on their local machines.
Which operating systems are compatible with installing WordPress on localhost?
WordPress can be installed on localhost using various operating systems such as Windows, Mac OS X, and Linux. There are specific installation methods and software packages available for each operating system.
Do I need internet access to install WordPress on localhost?
No, internet access is not required to install WordPress on localhost. The installation process and the functioning of the local WordPress site can be performed offline.
Can I use my existing web server to install WordPress on localhost?
Yes, you can use your existing web server to install WordPress on localhost. You need to ensure that your web server meets the minimum requirements for running WordPress and that you configure it correctly to work with your local installation.
Can I import an existing live WordPress site to my localhost installation?
Yes, it is possible to migrate an existing live WordPress site to your localhost. You would need to export the database and files from the live site, set up a local database, import the database dump, and transfer the files to your local environment.
Can I access my local WordPress installation from other devices on my network?
Yes, you can access your local WordPress installation from other devices on the same network by using your computer’s IP address and the appropriate port number.
Is it possible to install multiple WordPress sites on localhost?
Yes, you can install multiple WordPress sites on localhost by creating separate directories for each installation and configuring them individually. Each installation will have its own database and set of files.
Can I update WordPress and plugins on my local web host installation?
Yes, you can update WordPress and plugins on your local web host installation. The update process is similar to updating a live website. However, it’s always recommended to create backups before performing any updates.
Can I transfer my local web host installation to a live website?
Yes, you can transfer your local web host installation to a live website by migrating the database and files to the web server. This involves exporting the database, modifying the site URL references, transferring the files to the web server, and configuring the necessary settings for the live website.
Final Thoughts and Wrap Up
Now that you’ve learned how to install WordPress on localhost, the process should feel less overwhelming. From downloading XAMPP to creating a database in phpMyAdmin, each step helps you build a secure local environment.
And if you’re wondering how to run multiple WordPress sites on localhost, simply create separate folders and databases for each site.
While it may seem tricky initially, you’ve now unlocked a space to develop and test WordPress projects confidently. Remember to update your XAMPP software for better performance and fewer security risks.
Ready to start building? Use your local site to experiment freely before going live. Explore our blog for guides, tools, and expert insights!