Do you need to add tax in WooCommerce? If so, this guide is for you. We will walk you through how to add tax in WooCommerce step-by-step. This process can seem a little daunting at first, but we promise it’s not as difficult as it seems! In addition, we will provide some tips on how to handle taxes in WooCommerce.
What are taxes, and why do they matter in WooCommerce?
Taxes are something that every business owner has to deal with, and WooCommerce is no exception. In fact, taxes can be a bit complicated in WooCommerce because there are so many different settings and options. However, understanding taxes is important because they can have a big impact on your business.
The first thing to understand is that taxes are simply charges that the government imposes on certain transactions. In most cases, these taxes are imposed on the sale of goods and services.
In WooCommerce, there are two main types of taxes that you need to be aware of: sales tax and value-added tax (VAT). Sales tax is imposed on the sale of physical goods, and VAT is imposed on the sale of digital products. Depending on your location, you may need to collect both types of taxes.
In addition, you may also need to charge taxes on shipping charges. Fortunately, WooCommerce makes it easy to configure your taxes so that you can comply with all the applicable laws. With a few clicks, you can add the taxes that you need to charge and start collecting them from your customers.
By keeping track of your taxes, you can ensure that you are complying with the law and avoid any penalties or interest charges.
How to add tax in WooCommerce?
As we’ve said, WooCommerce makes it simple to add taxes to your store. However, you might be intimidated by the various possibilities and settings that are available. Now we’ll go through every phase of integrating taxes into WooCommerce.
Go to WooCommerce Settings
To begin, you’ll need to turn on taxation for your store. Open the WooCommerce settings page in your WordPress admin area by navigating to WooCommerce Settings.
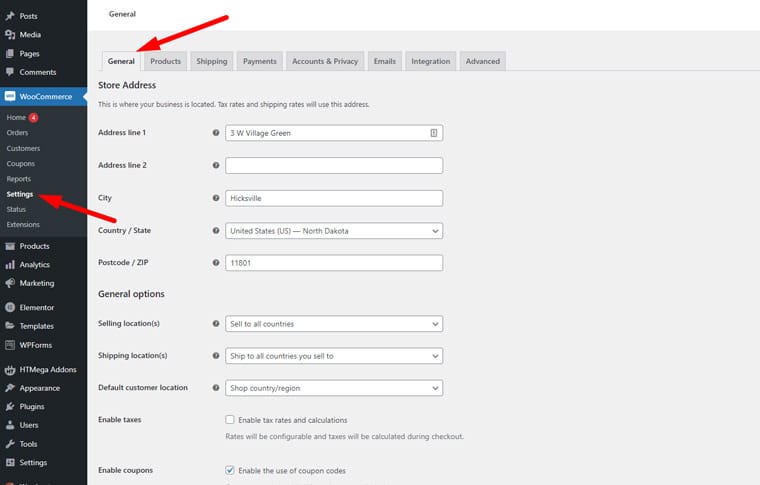
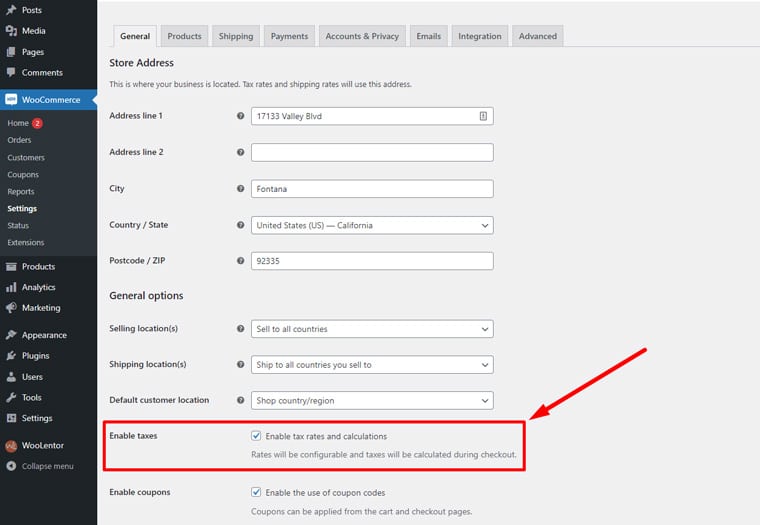
Move to General Tab and Enable Taxes
Select the General tab and look for the option to Enable taxes.
To create a new tab for taxes in your WooCommerce settings, simply check the accompanying box and click on the Save changes button.
Configure Tax Settings from Newly Created Tax Tab
Tax Options
To configure your tax options, go to the new Tax tab in the WooCommerce settings.
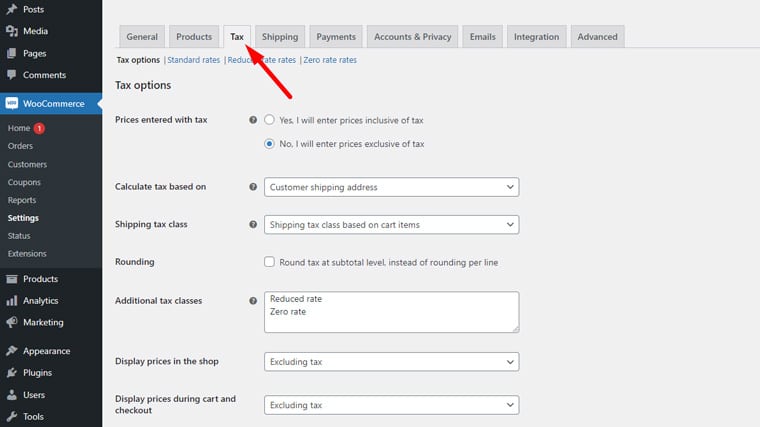
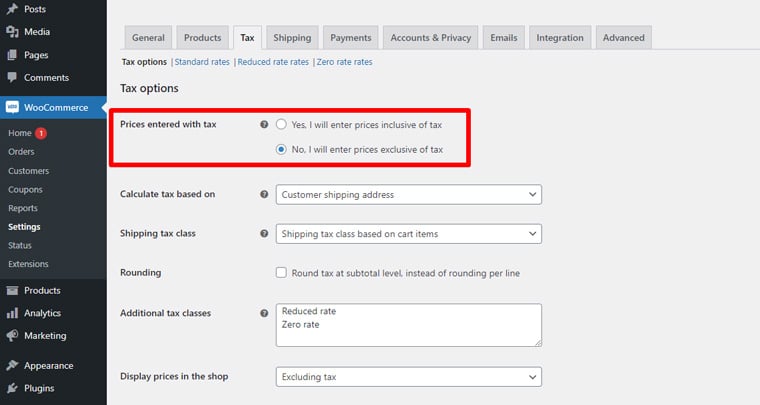
Prices Entered With Tax
Before you can set your product prices, you need to decide whether taxes are included or not. If they’re not included, the system will automatically calculate and add the taxes during checkout.
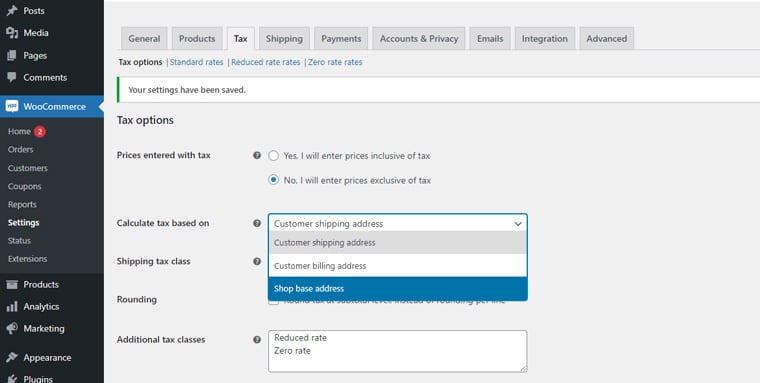
Calculate Tax Based on
You can decide where you want tax calculations to be based. Select one of the three alternatives from the drop-down menu: Customer shipping address, Customer base address, or Shop base address. If you select the third option, taxes will be calculated on your store’s location.
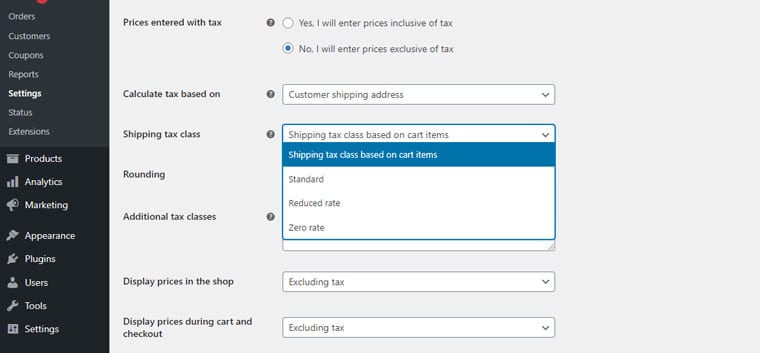
Shipping Tax Class
By default, the shipping tax class is based on what the user has in their cart. So, if they’re buying an item that falls under a different tax rate, the shipping tax will be calculated at a similar rate. If this isn’t allowed where you are located, then choose a different taxes class.
You also have the option to enable tax rounding at the sub-total level instead of per line.
Additional Tax Classes
In WooCommerce, you have the ability to create new tax classes. The default Standard Rate is one option, but there are also two additional choices: Reduced Rate and Zero Rate. If you want to add another class, simply input the name in the designated field (remember that you can only add one class per line).
We’ll show you how to completely set up more taxes rates later on in WooCommerce.

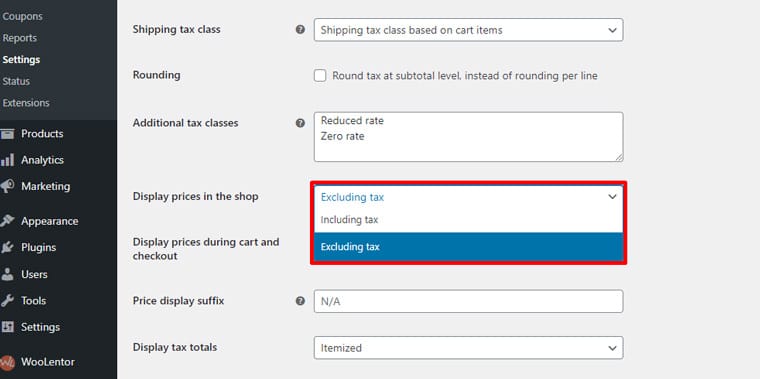
Display Prices in the Shop
You have the ability to decide if the product prices listed on your store’s front page will include or exclude tax.
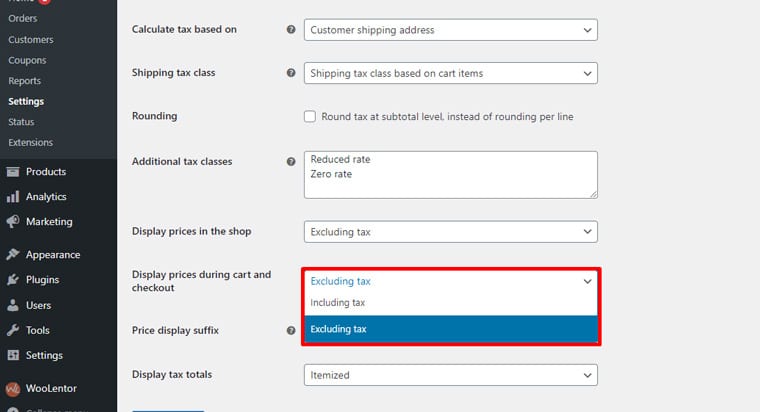
Display Prices During Cart and Checkout
The same settings can be applied to prices displayed in the cart and during checkout.
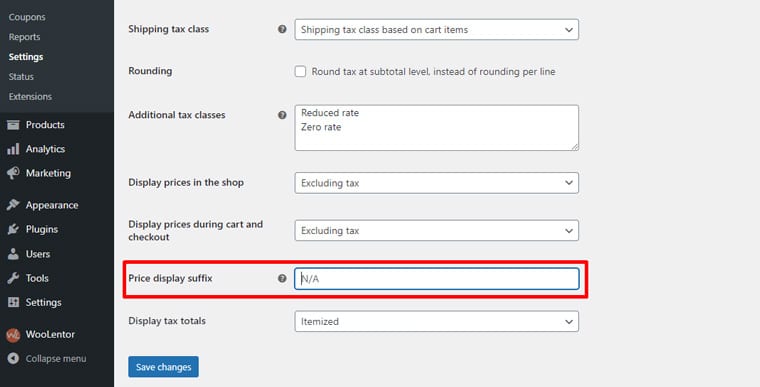
Price Display Suffix
Also, you can fully personalize the text that will show next to your product prices. This way, users understand if the price is included or not taxes. By using WooCommerce, there are two pre-made placeholder options for this: {price_including_tax} and {price_excluding_tax}.
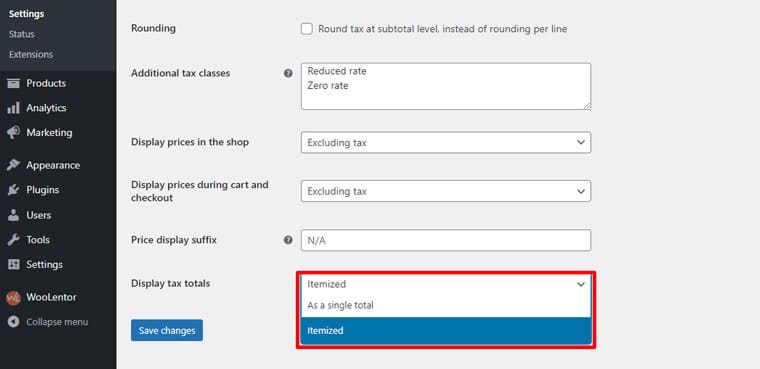
Display Tax Totals
The last thing you’ll see is the Display tax totals option, which allows you to choose whether you would like multiple taxes displayed as a single sum during checkout or an itemized list.
How to Set up Tax Rates?
There are three types of tax classes in WooCommerce: standard rate, reduced rate, and zero rates. You already know how to add a new class, so now let’s move on and learn about how to set up appropriate tax rates for your store.
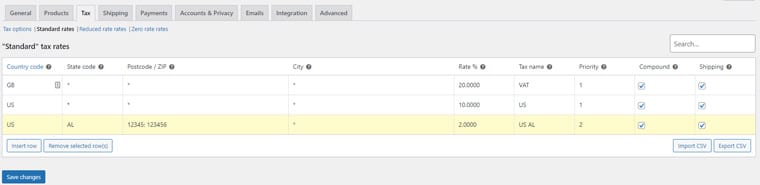
Click on the tax class you want to customize in your tax settings. Here we’ll be using Standard rates.
Click on the “Insert row” option to add a new tax rate, then fill out the relevant information in the provided fields. The attributes for each tax rate are as follows:
- Country Code: For the rate, provide a 2-digit country code. You can use ISO 3166-1 alpha-2 code to discover the official codes for each nation. If you don’t want to choose one, leave this field blank.
- State Code: If you want this rate to only apply to a certain state, please enter that state’s two-digit code. If you would like the rate to apply universally, there is no need to fill out this field.
- ZIP/Postcode: Please enter the postal codes in order to calculate the rate. You may use a semi-colon (;) to separate each code, as well as wildcards and ranges. For example, you could enter “50” in order to apply the rate that starts with those two digits.
- City: Select the city (or cities) where this tax rate is to be implemented.
- Rate: Enter the tax rate, which should be used in four decimal places. For example, for a tax rate of 20%, you might type “20.000.”
- Tax Name: Select a name for your tax rate, such as “Sales Tax” or “VAT.”
- Priority: Use this tax rate by choosing a priority. Remember that you can only have one matching rate per priority, but if you want to define multiple tax rates for the same area, then each rate needs its own unique priority.
- Compound: Select this option if you want the rate to be applied in addition to all other taxes.
- Shipping: Choose this option if the rate applies to shipping charges.
After you’re finished making changes, click “Save.”
View Tax Reports
Once you’ve set up your taxes, WooCommerce’s tax reporting feature may be used. Go to the Reports section of WooCommerce and choose Taxes.
You can view your tax reports either by date or code. If you select Taxes by date, then you can choose the timeline. On the other hand, if you select Taxes by code, data for each store’s tax rate will be available to you.

Tips for handling taxes in WooCommerce
If you’re running a WooCommerce store, then you’re likely aware of the importance of taxes. After all, taxes are a necessary part of doing business, and if you’re not careful, they can really eat into your profits.
That’s why it’s so important to make sure that you’re handling your taxes correctly in WooCommerce. Here we’ll share some tips to help you do just that.
1. Know the basics of taxes in WooCommerce.
The first thing you need to do is make sure that you understand the basics of taxes in WooCommerce. This includes understanding how taxes are calculated and what tax rates apply to your products.
2. Set up your taxes correctly.
Once you understand the basics of taxes in WooCommerce, you need to make sure that you’re setting up your taxes correctly. This includes ensuring that your tax rates are accurate and that you’re collecting the right amount of taxes from your customers.
3. Keep track of your taxes.
It’s also important to keep track of your taxes so that you can make sure that your customers are paying the right amount of taxes on time. This means keeping good records and being organized with your tax information.
4. Get help if needed.
If you’re having trouble managing your taxes in WooCommerce, don’t hesitate to seek out help from a professional. There are many tax experts who can help you ensure that you’re handling your taxes correctly and minimizing your tax liability.
By following these tips, you can be sure that you’re handling taxes in WooCommerce correctly and minimizing your tax liability.
Frequently Asked Questions
Final thoughts on taxes and WooCommerce
While there are certainly some challenges associated with taxes in WooCommerce, the platform does provide a number of tools to help streamline the process. In particular, the built-in tax settings make it easy to configure taxes for your store, and the automatic price calculation ensures that taxes are correctly applied to all products.
Overall, taxes are an important part of doing business online, and WooCommerce provides everything you need to collect and remit taxes on your sales. By taking the time to understand the tax settings in WooCommerce, you can ensure that you’re compliant with all tax laws and regulations.