Effective customer support can make or break a business. A well-organized support ticketing system helps you manage customer inquiries efficiently, resolve issues faster, and keep your customers happy. In this guide, we’ll walk you through how to set up a professional support ticketing system in WordPress using Support Genix — the all-in-one helpdesk plugin with ticket management, AI chatbots, a knowledge base, and a self-service customer portal.
What is a Support Ticketing System?
A support ticketing system centralizes all customer communication — emails, chat messages, and form submissions — into one platform where every inquiry becomes a trackable “ticket.” Each ticket gets a unique ID, can be assigned to team members, prioritized, categorized, and tracked from creation to resolution.
Key Benefits:
- Organized Communication: Every interaction gets a unique ticket ID — nothing gets lost.
- Faster Resolution: Tickets are prioritized, categorized, and assigned to the right agents automatically.
- Team Collaboration: Multiple agents can work on complex issues with internal notes and shared visibility.
- Customer Satisfaction: Faster response times, consistent service, and self-service options keep customers happy.
Why Choose WordPress for Your Ticketing System?
WordPress powers over 40% of all websites. If your business already runs on WordPress, adding a support ticketing system directly into your existing site is the smartest move:
- Seamless Integration: Add a ticketing system to your existing site without managing a separate platform — plus extend it with WooCommerce, EDD, FluentCRM, and other plugins.
- Cost-Effective: No per-agent or per-ticket fees — unlike SaaS helpdesks that charge monthly per seat.
- Full Data Ownership: All customer data stays secure on your own server. No third-party data concerns.
- Customizable: Tailor the system to your exact business needs with hooks, filters, and custom fields.
Getting Started with Support Genix
Support Genix is a feature-rich helpdesk plugin purpose-built for WordPress. It offers a complete support ecosystem — ticketing, AI-powered tools (Support Genix AI with free credits, OpenAI, and Claude), a knowledge base, multi-channel communication (email, Slack, WhatsApp), a customer portal, and deep integrations with WooCommerce, EDD, Envato, TutorLMS, and other popular platforms.
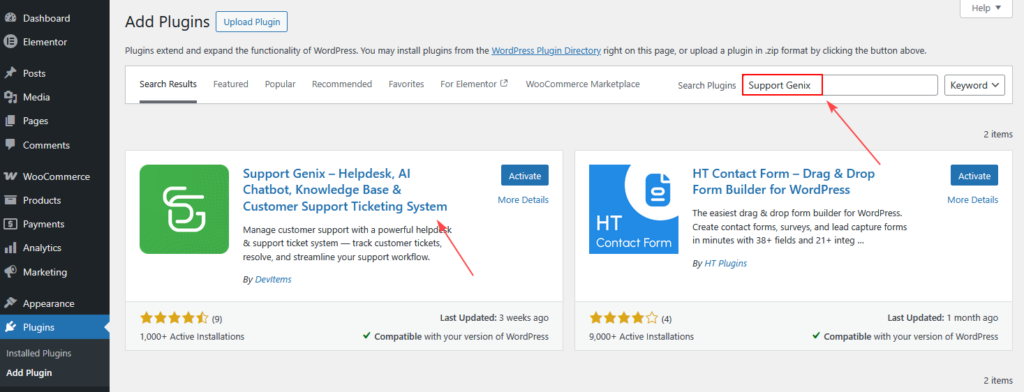
Step 1: Install and Activate
- Log in to your WordPress admin dashboard.
- Navigate to Plugins > Add New.
- Search for “Support Genix” or download from supportgenix.com and upload the plugin ZIP file.
- Click Install Now, then Activate.
Step 2: Run the Setup Wizard
After activation, Support Genix launches an intuitive setup wizard that walks you through the essentials — creating your first ticket categories and tags, and configuring your support portal page.
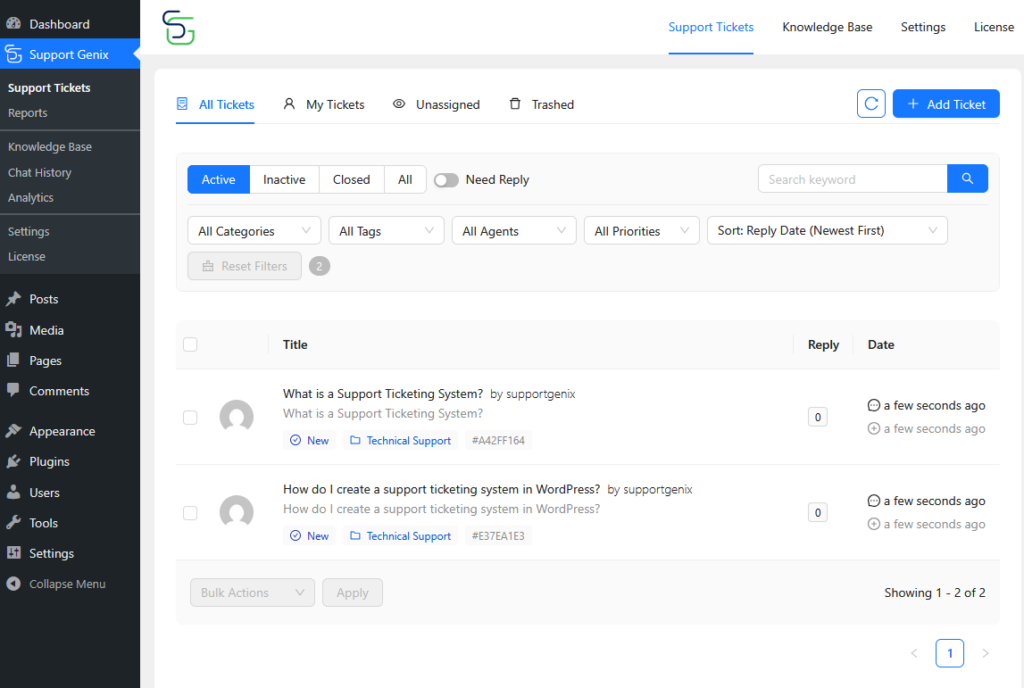
Step 3: Start Managing Tickets
Find Support Genix in your WordPress admin menu — it takes you directly to the tickets dashboard where you can start managing support requests right away.
Setting Up Your Ticketing System
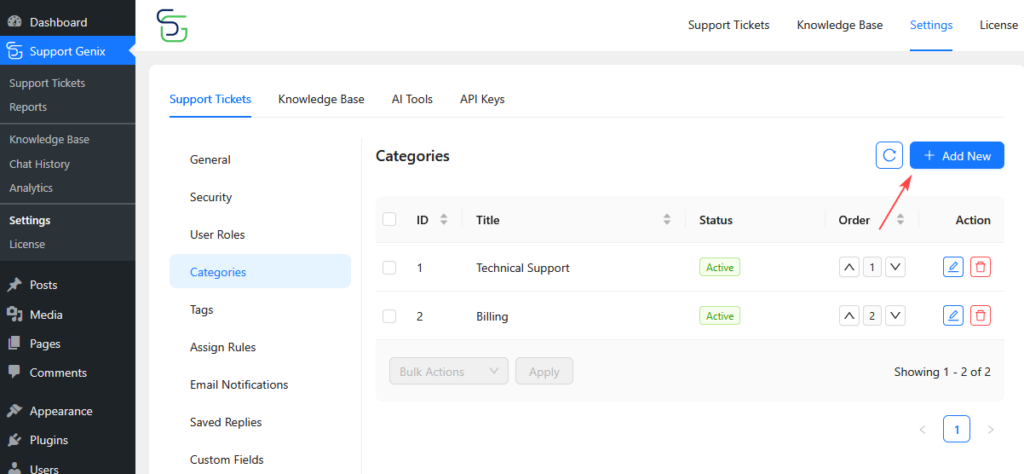
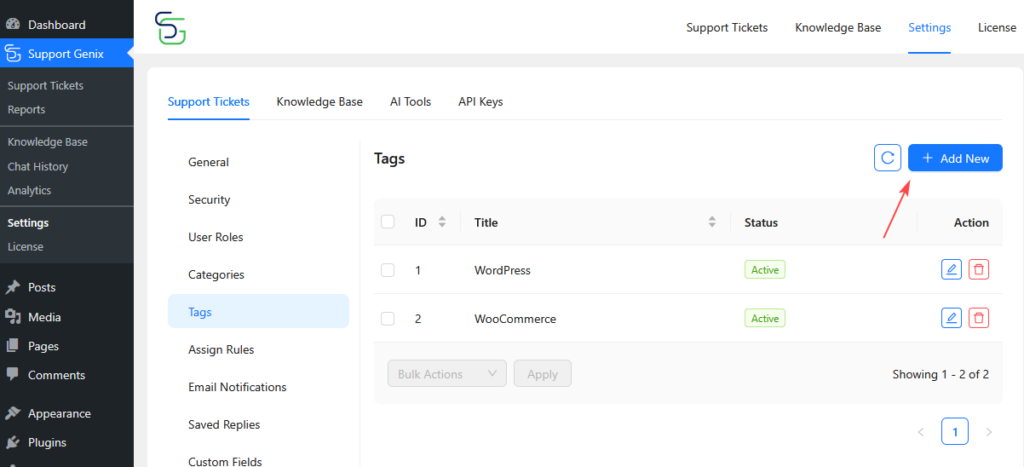
Create Categories and Tags
Organizing tickets from the start is essential for efficient support:
- Categories: Group tickets by issue type (e.g., Billing, Technical Support, Feature Requests). You can set the display order and control which agents have access to specific categories.
- Tags: Add extra labels for quick filtering (e.g., Urgent, Refund Request, Bug Report). Tags make it easy to find and batch-manage related tickets.
Configure Statuses, Priorities, and Custom Fields
- Statuses: Support Genix comes with built-in statuses — New, Active, Inactive, In-progress, Closed, and Re-open. You can customize the status labels to match your workflow terminology.
- Priorities: Three priority levels — Normal, Medium, and High — help your team focus on urgent issues first. All tickets default to Normal, and agents or admins can escalate as needed. You can also set up rules to automatically assign priority based on ticket category.
- Custom Fields: Collect additional info at ticket submission — text inputs, dropdowns, checkboxes, date pickers, and more. You can set conditions to show or hide fields based on other custom field values, so customers only see what’s relevant to their issue.
Managing Tickets Effectively
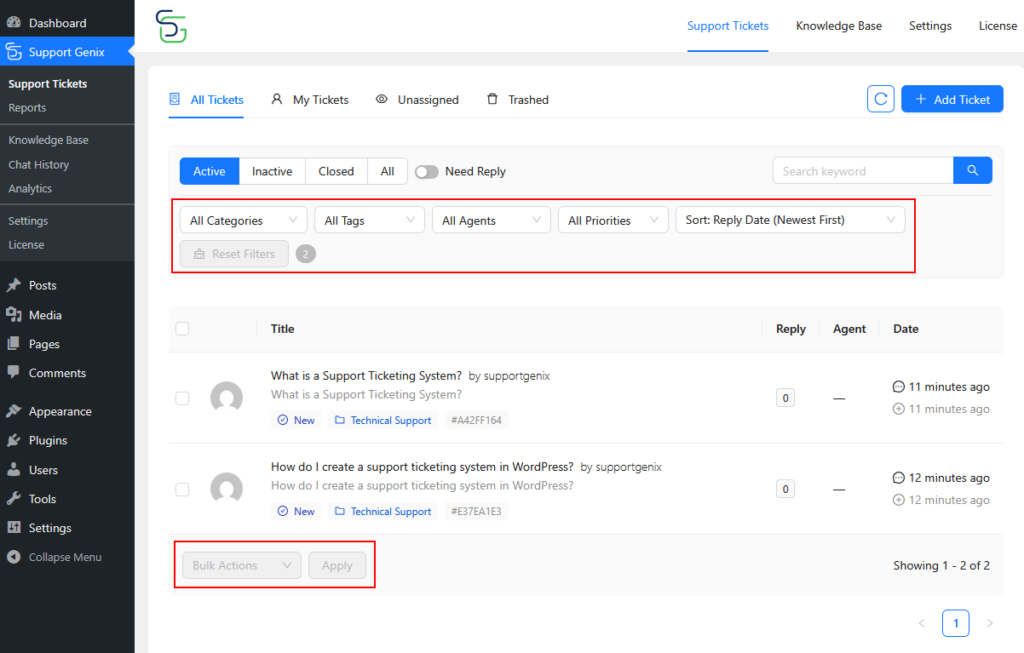
The Ticket Dashboard
The ticket dashboard is designed for speed and efficiency:
- Smart Filters: Sort tickets by status, priority, category, tag, or assigned agent.
- Quick Search: Find any ticket instantly by customer name, ticket ID, or content.
- Bulk Actions: Manage multiple tickets at once — bulk edit, move to trash, or delete.
- Current Viewers: See which agents are viewing a ticket to avoid duplicate responses.
Responding to Tickets
- Rich Text Editor: Compose replies with formatting, images, and file attachments.
- Canned Responses: Insert pre-written replies for common questions with a single click.
- Internal Notes: Add private notes visible only to your team — perfect for leaving context without notifying the customer.
- AI Ticket Reply: Let Support Genix AI, OpenAI, or Claude draft or improve your replies in seconds. Support Genix AI includes free credits to get started.
- Bulk Replies & Bulk Notes: Respond to multiple tickets at once or add internal notes in bulk for handling recurring issues efficiently.
- Auto-Close: Automatically close inactive tickets after a set number of days. Exclude specific tags to keep important long-running tickets open.
Email Integration
Email-to-Ticket
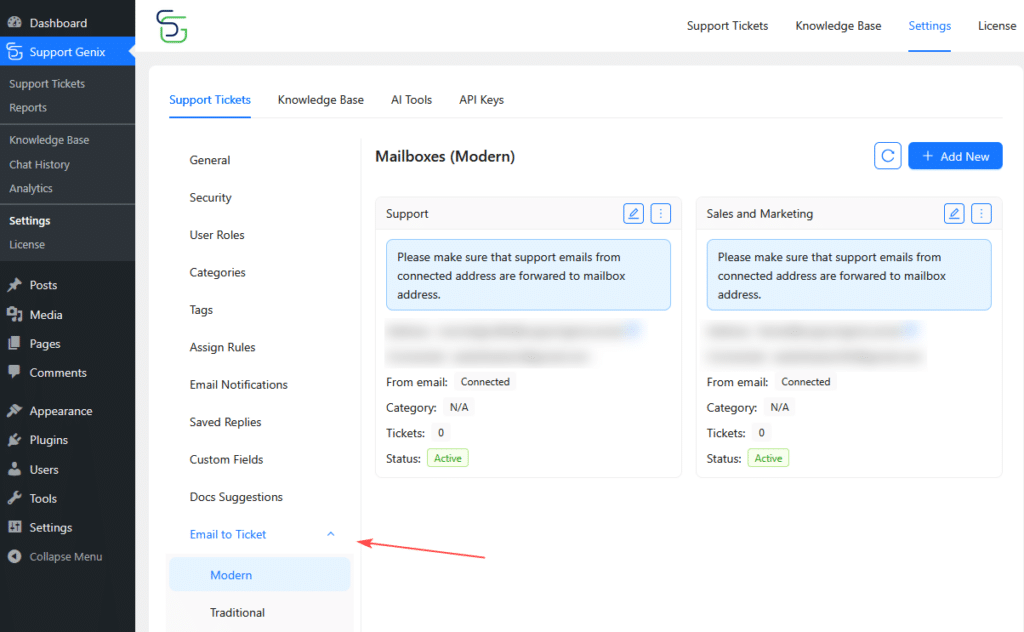
Automatically convert incoming emails into support tickets. Support Genix offers two methods:
- Modern: Forward emails to a system-generated mailbox email address provided by Support Genix, and they’re instantly created as tickets — fast and reliable.
- Traditional (IMAP): Configure your IMAP server credentials and the system reads your email inbox to create tickets automatically.
Both methods support multiple mailboxes, so you can pipe emails from different departments (billing@, support@, sales@) into separate categories. Replies to ticket notification emails are automatically threaded as ticket replies.
Customizable Email Templates
Personalize every notification with customizable templates for all major events — ticket created, reply received, ticket assigned, status changed, and more. Use dynamic placeholders like {{ticket_track_id}}, {{ticket_user}}, and {{ticket_assigned_user}} for professional, branded notifications.
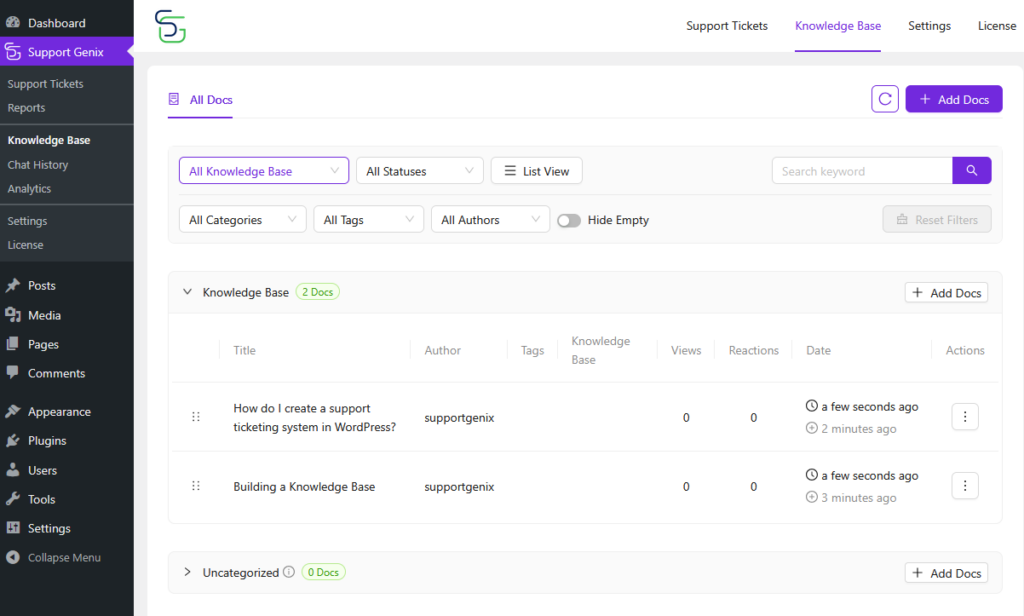
Building a Knowledge Base
A knowledge base empowers customers to find answers on their own — reducing ticket volume and freeing up your agents. Support Genix includes a full-featured knowledge base built right in.
- Create articles organized into hierarchical categories with drag-and-drop ordering.
- Use multiple knowledge base spaces for different products, departments, or audiences.
- Smart article suggestions automatically recommend relevant articles when customers create a ticket — often resolving issues before they’re even submitted.
- AI Docs Writer: Generate knowledge base articles using AI — powered by Support Genix AI, OpenAI, or Claude. Speed up documentation creation significantly.
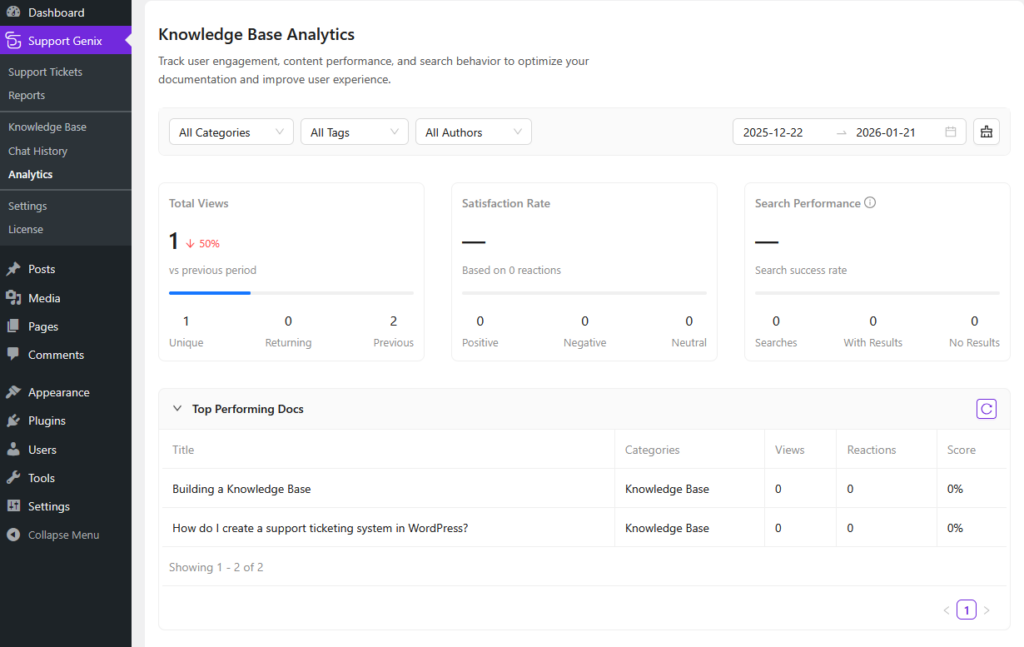
- Built-in analytics track article views, search keywords, and engagement so you can identify content gaps and improve documentation over time.
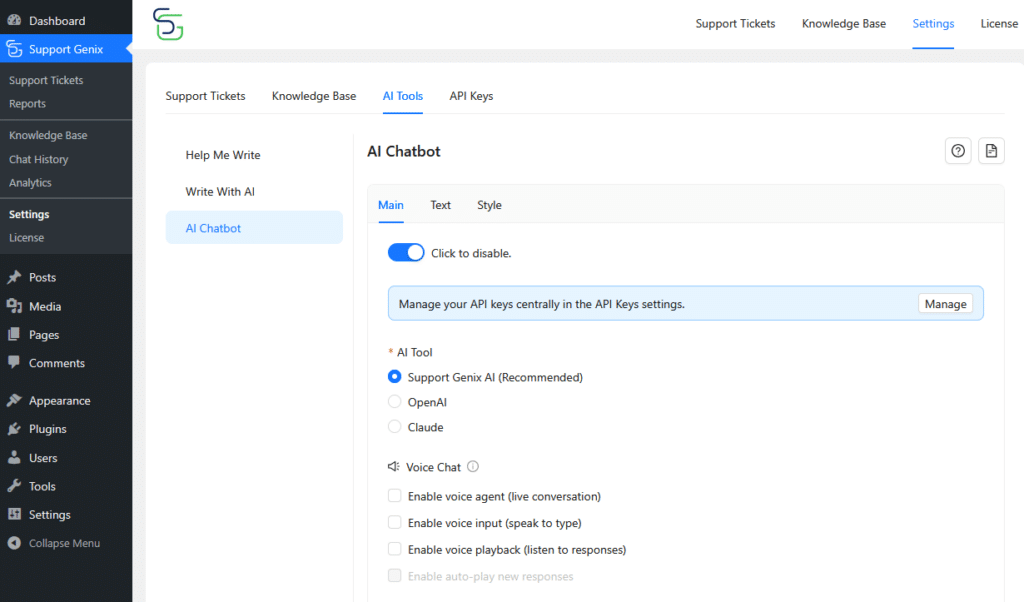
Setting Up the AI Chatbot
Support Genix features an AI-powered chatbot that provides instant customer assistance 24/7. Go to Settings > AI Tools > Chatbot, connect your AI provider — Support Genix AI (includes free credits), OpenAI, or Claude — and customize the widget’s appearance to match your brand.
The chatbot automatically searches your knowledge base to provide accurate, context-aware answers. If the chatbot can’t resolve an issue, customers can create a support ticket directly from the chat so your agents can step in and help.
- Embeddable anywhere: Generate an embed script to add the chatbot to any external website, with domain restrictions and per-embed KB space and category controls.
- Voice support: Integrates with ElevenLabs for text-to-speech and voice agent capabilities.

Creating a Customer Portal
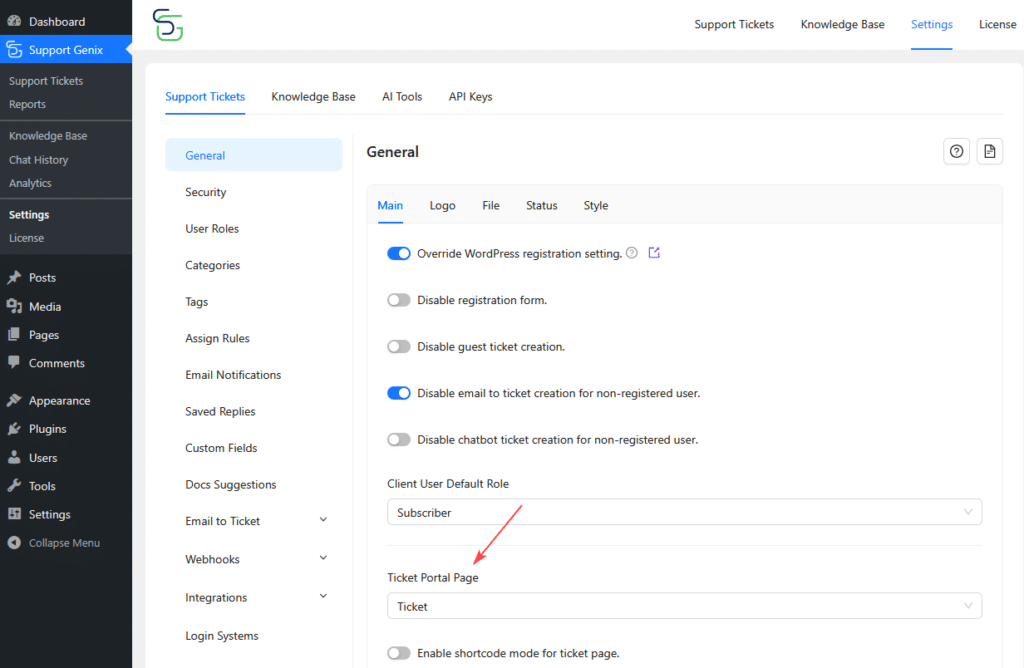
Give your customers a self-service portal where they can submit and track tickets, and manage their profile. Create a WordPress page, add the shortcode [supportgenix_portal], and select that page in Settings > General > Support Portal Page.
- Multiple login options: WordPress login, Login with Google, or Login with Envato.
- Guest ticket support: Customers can submit tickets without creating an account first and track via email link.
- Full ticket management: Create tickets with custom fields and attachments, add replies, and track status.
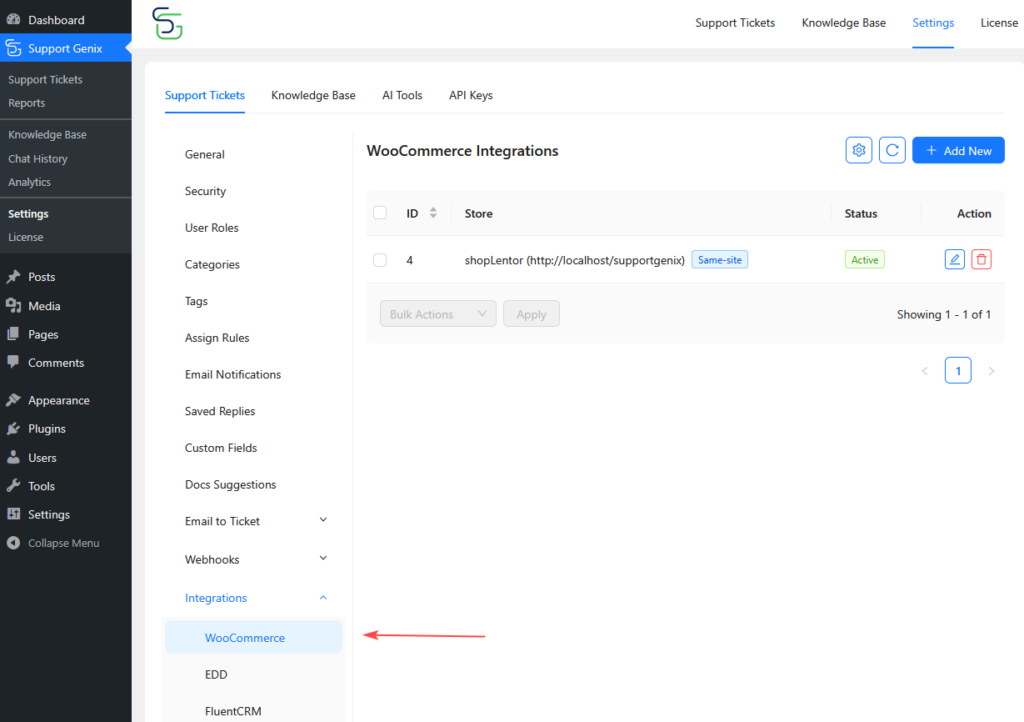
E-Commerce Integrations
Support Genix connects your support system directly to your sales data so agents always have the full picture:
- WooCommerce: Link tickets to orders and view complete purchase history, order details, and status directly within the ticket.
- Easy Digital Downloads (EDD): Display customer downloads, licenses, and purchase details alongside tickets.
- Envato: Verify purchase codes automatically, track support expiry dates, and let customers log in with their Envato account.
Integrations and Multi-Channel Communication
Support Genix connects with the tools your team already uses:
- Slack: Get real-time ticket notifications in your Slack channel — new tickets, replies, and status changes. Agents can respond directly from Slack.
- WhatsApp (via Twilio): Agents receive ticket notifications via WhatsApp and can reply to tickets directly from the conversation.
- Outgoing Webhooks: Automatically send ticket data to external services (CRM, project management, custom apps) on ticket events.
- Incoming Webhooks: Create tickets from virtually any external source — contact forms (Contact Form 7, Gravity Forms, etc.), automation tools like Zapier or Make, CRMs, or your own custom apps. If it can send a webhook, it can create a ticket.
- FluentCRM: Sync support contacts and trigger email marketing workflows based on ticket events.
- BetterDocs: Connect your existing BetterDocs knowledge base with Support Genix and suggest relevant docs when customers create tickets.
- TutorLMS: See a student’s enrolled courses directly inside the ticket, giving agents instant context about which course the student needs help with.
- reCAPTCHA v3: Protect login, registration, and public ticket forms from spam and bots.
Team Collaboration and Automation
Custom Roles and Permissions
Create custom roles with granular permissions — control who can create, view, manage, or delete tickets, restrict access to specific categories, and define capabilities for junior agents, senior agents, team leads, and administrators. Configure roles in Support Genix > Settings > User Roles.
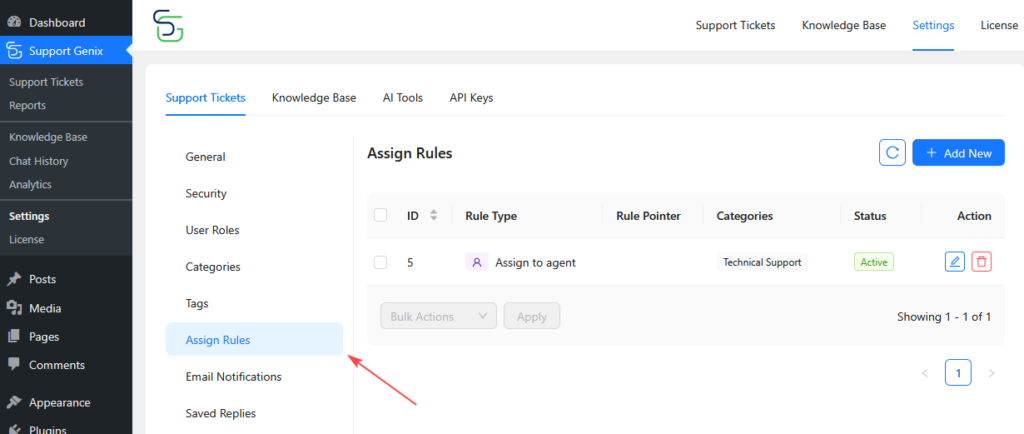
Automatic Ticket Assignment
Set up assignment rules that automatically route tickets to the right agent based on category — ensuring even distribution and faster first-response times. You can also create rules to automatically set ticket priority based on category.
Weekend and Business Hours
Configure your business hours and weekend schedule. When tickets are submitted outside working hours, Support Genix displays portal notices and sends off-hours email notifications — setting proper expectations.
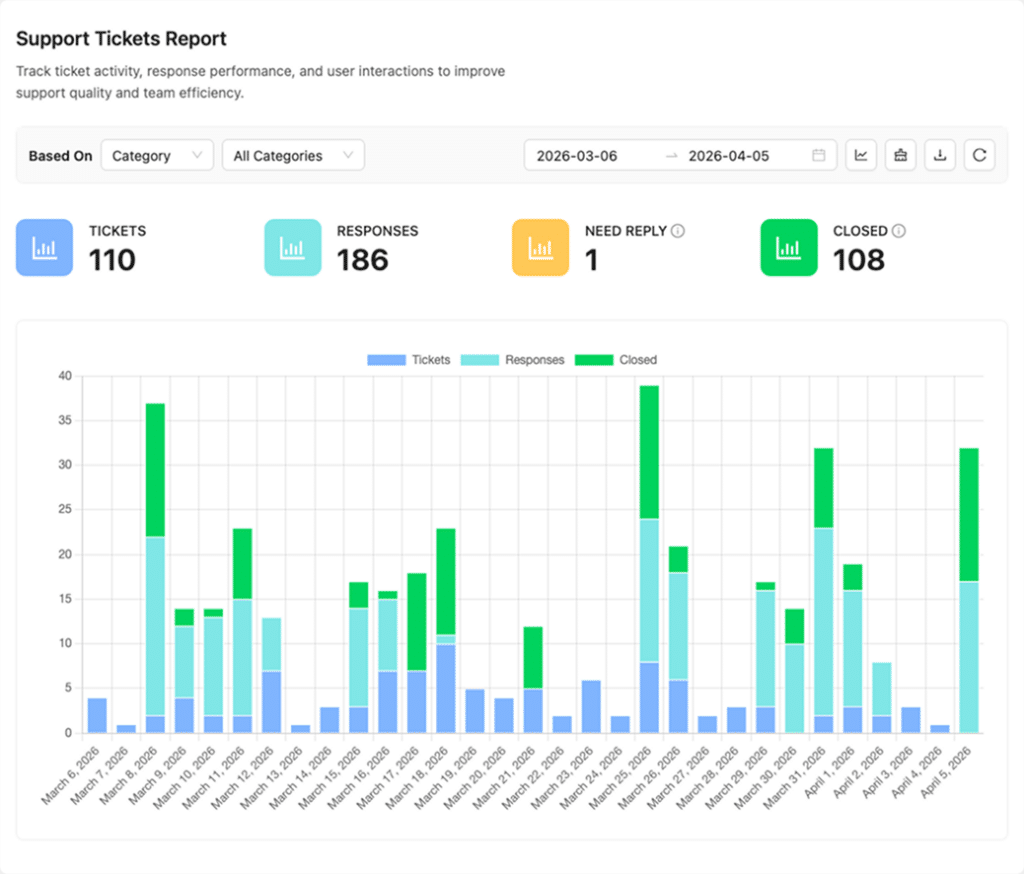
Monitoring and Analytics
Support Genix includes comprehensive analytics to help you optimize your support operations:
- Ticket volume trends, agent performance metrics, and category breakdowns.
- Knowledge base analytics: Article views, search keywords, and content engagement.
- Custom date ranges with CSV/Excel export.
- Scheduled report emails: Automated reports delivered daily, weekly, or monthly to your team — choose specific days, times, and recipients.
Security and Data Protection
Customer support data is sensitive. Support Genix implements enterprise-grade security:
- Full data ownership: All data stays on your server — no third-party cloud dependency.
- Input sanitization & SQL injection prevention: Every input is sanitized and all database queries use prepared statements.
- File upload security: Dangerous file types are blocked, uploaded files are renamed.
- Role-based access control: Granular permissions ensure agents only see what they’re authorized to access.
- CSRF protection & security headers: Nonce verification, XSS protection, and Content Security Policy enabled by default.
Migration from Other Systems
Already using another helpdesk plugin? Support Genix includes built-in migration tools to import your existing tickets and data. Switch without losing any support history.
Best Practices for Support Excellence
- Set response time goals: Aim for under 1 hour for first responses and within 24 hours for follow-ups.
- Build your knowledge base continuously: Turn every recurring question into a KB article. This dramatically reduces ticket volume over time.
- Leverage AI and canned responses: Use AI Ticket Reply and canned replies for speed, but always personalize before sending.
- Communicate clearly: Simple language, no jargon, and always explain what you’re doing and why.
- Review reports regularly: Schedule weekly report emails to identify bottlenecks and areas for improvement.
Troubleshooting Common Issues
- Emails not converting to tickets? Double-check your settings — verify IMAP credentials for traditional email-to-ticket, or confirm that emails are being forwarded to the correct system-generated mailbox address for the modern method.
- Notifications not sending? Verify email templates are enabled and your site can send emails (try FluentSMTP, WP Mail SMTP, etc.).
- Chatbot not responding? Check your AI API key and credits in Settings > AI Tools > Chatbot.
- Portal not displaying? Ensure the
[supportgenix_portal]shortcode is on a published page selected in Settings > General > Support Portal Page. - Permission issues? Check role capabilities in Support Genix > Settings > User Roles.
For any other issues, visit the Support Genix documentation or contact support directly.
Conclusion
With Support Genix, you get a complete helpdesk solution running on your own WordPress site — ticket management, AI-powered tools (AI Ticket Reply, AI Docs Writer, and AI Chatbot), a self-service knowledge base, customer portal, and multi-channel communication with Slack, WhatsApp, and more. Whether you’re handling a few tickets a day or thousands, it scales with your business and integrates seamlessly with WooCommerce, EDD, Envato, TutorLMS, FluentCRM, and other tools you already use.
Get Started in 5 Steps:
- Install Support Genix and run the setup wizard.
- Organize your support with categories, tags, and custom fields.
- Set up email-to-ticket so incoming emails automatically become tickets.
- Launch your knowledge base and AI Chatbot for 24/7 self-service.
- Connect your channels — Slack, WhatsApp, webhooks, and e-commerce integrations.
Ready to transform your customer support? Get started with Support Genix and take your WordPress helpdesk to the next level.