Setting up WooCommerce in WordPress might be a daunting task for first-timers. But with this guide, we will show you How to set up WooCommerce in WordPress and you’ll be able to have your eCommerce store up and running in no time! In this article, we will discuss the basics of setting up WooCommerce, as well as some more advanced topics like payment gateways and shipping. So whether you’re just starting out or you’ve been using WooCommerce for a while and want to learn more, this guide has something for you!
Steps to Get Started with WooCommerce
Step 1: Purchase a Domain Name
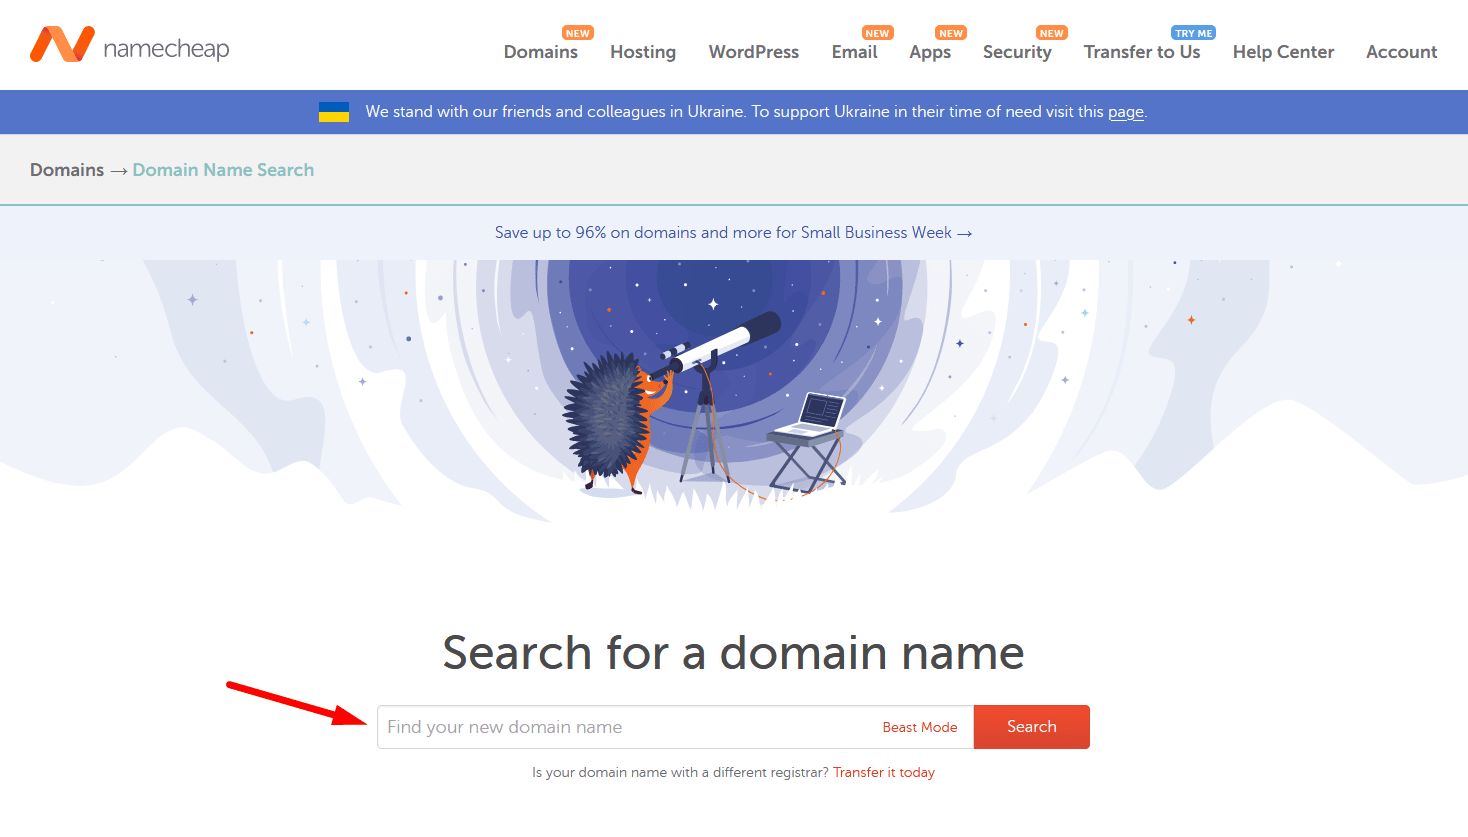
Before you begin setting up your online store, you’ll need to select a domain name. This is the address that customers will use to find your site, so it’s important to choose something that is easy to remember and reflects the products or services that you offer.
Once you’ve selected a domain name, you can register it with a hosting provider. Many hosting providers offer discounts if you also purchase a domain name through them.
To find out if any domains are taken or not available just contact your host provider. Once your domain is registered, you’re ready to move on to step two: Purchase hosting.
Step 2: Choose a Hosting Provider
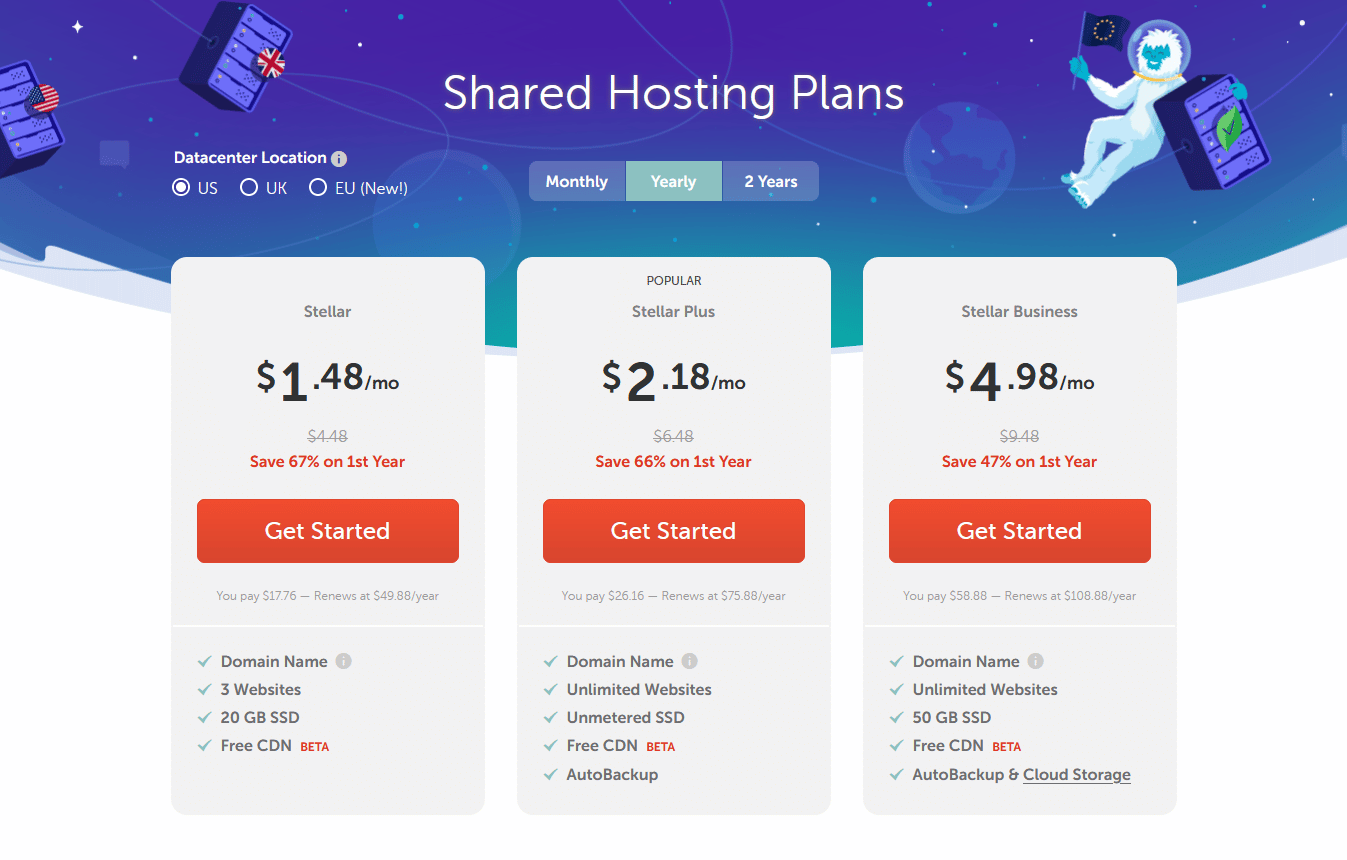
The most crucial step is to select a hosting plan and purchase it. There are many WooCommerce-Compatible hosts available, each with its own strengths and weaknesses. For every budget, there are numerous hosting services available. The cost of hosting services is usually determined by the amount of storage space and bandwidth required, as well as the type of site being created.
It is important to carefully consider your needs before making a purchase. For example, if you plan on hosting a high-traffic website, you will need to select a provider that offers unlimited bandwidth and storage. Once you have selected a provider, you will need to purchase a hosting plan. The cost of hosting plans can vary widely, so it is important to compare prices before making a decision. With a little research, you can find the perfect hosting plan for your website.
Step 3: Set Up WordPress
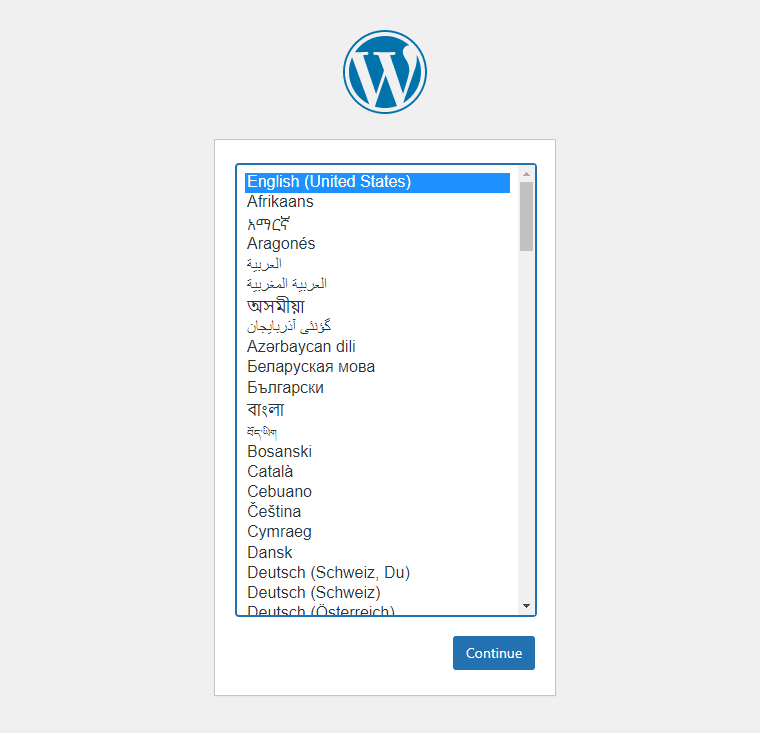
Now that you have your web hosting account and domain name, it’s time to install WordPress. The process is generally straightforward and only takes a few minutes. Many web hosts offer a one-click install option for WordPress, which makes the process even easier. If your host doesn’t offer this option, don’t worry – installing WordPress manually is still a pretty straightforward process.
In most cases, you can follow the instructions provided by WordPress.org. First, you’ll need to download the WordPress files from their website. Next, you’ll need to create a database for WordPress on your web server. Finally, you’ll need to upload the WordPress files to your server and run the install script. After following these steps, you should have a fully functioning WordPress site!
Step 4: Install WooCommerce
Once you have WordPress installed, you’re ready to install WooCommerce. WooCommerce is a plugin that turns your WordPress site into an eCommerce store. WooCommerce is free and open-source, which makes it a popular choice for many online businesses.
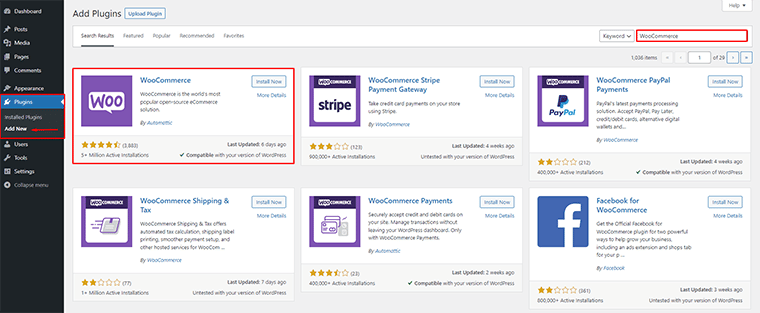
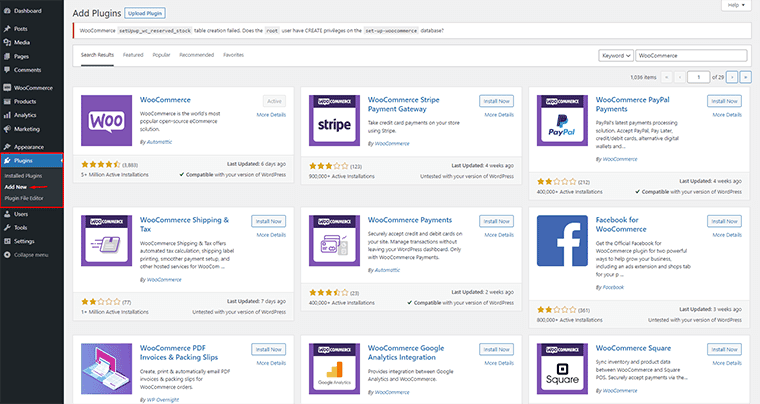
To get started, you’ll need to install WooCommerce. There are two ways to install WooCommerce. The simplest method is to get the WooCommerce plugin that is available to download for free from the WordPress plugin library.
Alternatively, you may install WooCommerce from the WordPress plugins page and then search for it in the search bar. Install and then activate the WooCommerce plugin after finding it on the Plugins page of your WordPress dashboard.
Step 5: Choose a Theme
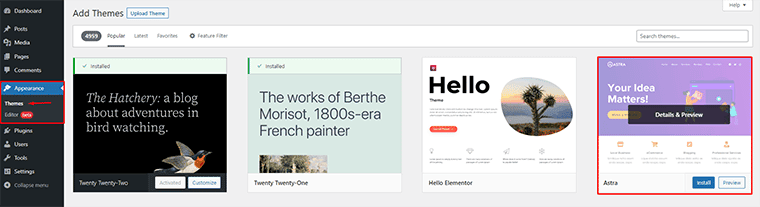
After you have installed the WooCommerce plugin, the next step is to pick a theme. This can be done by going to the Appearance > Themes tab in the WordPress dashboard. On this page, you will see a list of available themes, both free and paid. If you are using a free theme, you can activate it by simply clicking the “Activate” button.
However, if you are using a premium theme, you will need to first purchase it and then upload it to your WordPress site. Once the theme is activated, you can begin the process of setting up WooCommerce.
To make your site look good on all devices, you need to choose a theme that is responsive and SEO friendly. Responsive themes will automatically adjust their layout depending upon the size of screen they are viewed at – whether it’s a Phone or Computer!
Step 6: Complete the Setup Process
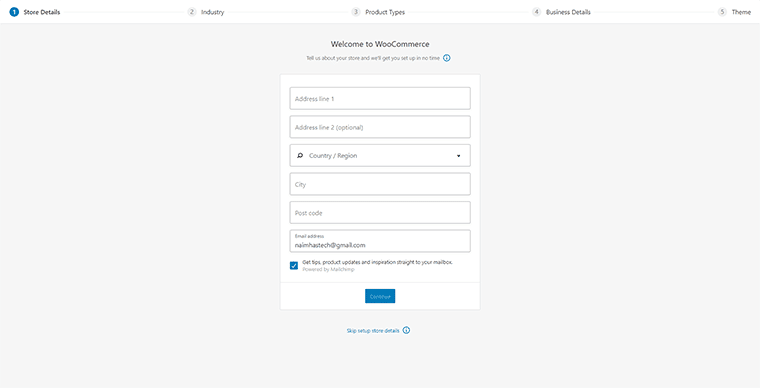
The WooCommerce plugin is already installed and activated but you still need to go through the WooCommerce setup wizard to complete the installation. This wizard will help you quickly set up your store and get it ready to start selling products.
The first step is to choose your preferred currency and country. You can then select the products that you want to sell in your store. After that, you will need to enter your shipping information so that WooCommerce can calculate the shipping costs for your customers. The next step is to choose a payment gateway for your store. WooCommerce supports a wide range of payment methods including PayPal, Credit Cards, and Stripe.
Finally, you will need to enter your contact information so that your customers can reach you if they have any questions or problems. Once you have completed the WooCommerce setup wizard, you can start adding products to your store and start selling!
Step 7: Add Products
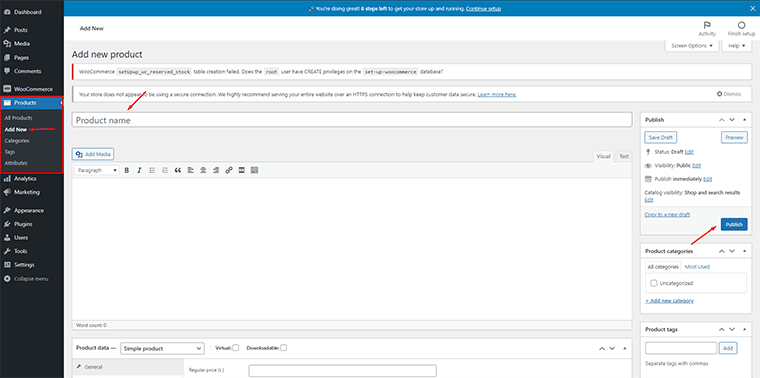
Now that WooCommerce is installed, you’re ready to start adding products to your online store! WooCommerce simplifies the process of adding and managing products in your shop by categorizing them into Simple(which includes both Downloadable and Virtual goods), Grouped, External/Affiliate, and Variable. You can group them based on their type, and make it easy for visitors by making certain types visible only when needed.
For each product, you’ll need to enter a name, description, price, and image. You can also set inventory levels, shipping information, and tax rates. Once you’ve added all the products you want to sell, you’re ready to start taking orders!
Step 8: Setup Payment Options
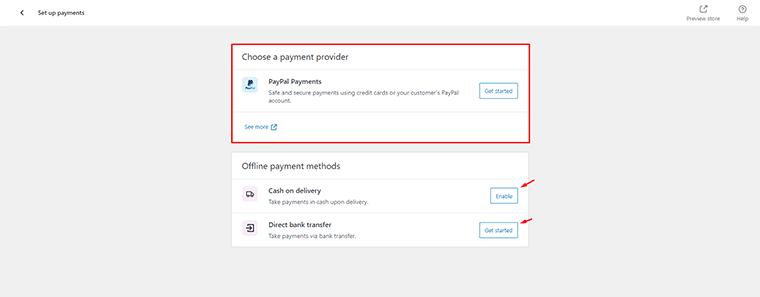
the next step in the WooCommerce setup process is to choose a payment method. The WooCommerce Setup Wizard will walk you through the different payment options, and you can select the ones that best fit your business.
There are many great options available including online and offline transactions with Payment extensions that can be accepted from various sources such as PayPal or Stripe! Woocommerce also offers three different types of transactions for making purchases Offline – Direct bank transfer (which requires no internet connection), check payments, or Cash on delivery.
If you are selling physical products, you will also need to choose a shipping method. Once you have chosen a payment method, you will need to set up your payment gateway. A payment gateway allows your customers to pay for their products using their credit card or bank account. The WooCommerce setup process includes detailed instructions on how to set up a payment gateway. After you have chosen and set up your payment gateway, you will be able to start selling your products online.
Step 9: Add Additional Plugin
The final step in the WooCommerce setup process is to add the additional plugin. This is an optional step, but it’s recommended for anyone who wants to extend the functionality of their WooCommerce store. The additional plugin helps with the checkout process and different payment gateway. They provide support for multiple languages, currencies, and tax rates. There are also plugins that can help with shipping, accounting, customer reviews, ratings, and more.
Take some time to explore the options and see which ones would be most helpful for your business. By taking advantage of the many plugins available, you can make sure your WooCommerce store is running as smoothly and efficiently as possible.
Resources
With your WooCommerce Store growing quickly, you should be marketing it and expanding the business even faster. Here are some tips for boosting website traffic:
- It’s important for SEO (Search Engine Optimization), which boosts traffic by making sure all content appears in search results when people type certain keywords related directly to what they want on the web page;
- Using an email list to create tracks is also a fantastic method to do it! Email marketing may be a smart option, as it’s still one of the most effective methods for reaching target audiences—and
- don’t forget about abandoned carts – fixing them can make a huge impact on increasing conversion rates.
Conclusion
WooCommerce has a lot of potentials. It’s certainly powerful, but it may be even more robust if you know how to use it properly. WooCommerce is a great eCommerce platform and there are always methods for making it better. For example, you can use plugins to add extra features or functionality to your online store.
There are also a number of WooCommerce themes available that can help you customize the look and feel of your site. By taking advantage of these WooCommerce tips and tricks, you can create an online store that is truly unique and capable of meeting the needs of your customers.