
How to Create Drop Down Menu in Your WordPress Site: A Complete Guideline
Creating a well-organized and user-friendly website starts with effective navigation, and a WordPress dropdown menu is an essential part of that. It allows visitors to browse your site more easily by grouping related pages under a parent menu item. Fortunately, WordPress makes it simple and straightforward to create one.
In this article, we’ll guide you through how to create a WordPress dropdown menu with step-by-step instructions. By following these steps, you can add a hierarchically organized navigation menu that not only enhances usability but also gives your website a more professional appearance.
- Key Takeaways
- Overview of DropDown Menus
- Benefits of Creating a Drop Down Menu in WordPress
- How to Create Drop Down Menu in Your WordPress Site: Step-by-step
- Step 1: Build Menu Items
- Step 2: Establish Your Menu Structure
- Step 3: Include CSS in Your Menu
- Step 4: Preview Your Menu
- Step 5: Make Your Menu Public
- Tips for Optimizing Your WordPress Site with a Drop Down Menu
- Recommended Plugins for Creating Menus in WordPress
- Frequently Asked Questions
- Wrapping Up
Key Takeaways
- Customize dropdown appearance with CSS for a better user experience.
Overview of DropDown Menus
Advanced drop down menus in WordPress transcend traditional navigation paradigms. Intelligent menu architectures now blend user experience with strategic content mapping.
Drop-down menus in WooCommerce offer a convenient and organized way for visitors to navigate online stores. With the WordPress dropdown menu, you can create a clear content structure. It helps users find specific categories and subcategories without any confusion.
Cutting-edge WP dropdown menu implementations leverage artificial intelligence and predictive user behavior algorithms to enhance digital navigation experiences.
They provide quick access to subcategories and can even support mega menus for showcasing featured products or additional content.
WooCommerce’s Drop Down menus can be customized to match your store’s branding and are designed to be responsive and mobile-friendly. Integration with product attributes further enhances functionality, enabling customers to select specific variations.
Overall, Drop Down Menus in WooCommerce enhance the user experience, streamline navigation, and contribute to a seamless shopping journey for customers.
Benefits of Creating a Drop Down Menu in WordPress
If you’ve ever visited a website, you’ve probably seen a dropdown menu before. Drop down in WordPress navigation has evolved from simple link collections to sophisticated user experience ecosystems that anticipate and guide user journeys.
These WordPress drop down menus are a fantastic way to organize a lot of menu items in a clean, concise way. Intelligent drop down menu for WordPress design now integrates advanced analytics and user behavior tracking to create more intuitive navigation experiences.
Creating a dropdown menu in WordPress offers several benefits for your website:
Improved Navigation
Dropdown menus enhance navigation by making it easier for users to find content quickly and efficiently. They allow visitors to access specific sections with fewer clicks and less effort, streamlining the overall browsing experience.
A dropdown menu on WordPress improves how users interact with your website by turning basic navigation into a more intuitive and user-friendly experience.
Space Efficiency
A dropdown menu helps save valuable screen space by revealing additional menu options only when a user hovers over or clicks a parent menu item. This approach is especially useful for websites with many pages, as it keeps the layout clean and organized while preventing visual clutter.
Mastering how to create a dropdown menu in WordPress involves understanding user experience principles and adaptive design methodologies. When implemented well, it enhances navigation and ensures a smooth, intuitive browsing experience for users.
Enhanced User Experience
Dropdown menus enhance the overall user experience by providing a streamlined and intuitive navigation system. Visitors can access specific sections of your website with fewer clicks, reducing the effort required to find desired content and improving user satisfaction.
Mobile-Friendly Design
Dropdown menus are highly compatible with responsive website design, and function well across all devices. They automatically adjust to fit smaller screens, making navigation easier and more user-friendly for mobile users.
Customization Options
WordPress offers various customization options for dropdown menus, allowing you to control your menus’ design, styling, and behavior. You can easily configure dropdown animations, colors, fonts, and other visual aspects to match your website’s branding and aesthetics.
Scalability and Flexibility
Dropdown menus can easily accommodate changes and additions to your website’s navigation structure as your content grows. When you add drop down menu WordPress elements strategically, you can significantly improve conversion rates.
By placing key product categories or call-to-action pages in prominent dropdown positions, you can guide visitors toward high-value content. You can add new menu items or submenus easily. This ensures scalability and flexibility as your website evolves without disrupting the layout.
SEO-Friendly Structure
Well-organized dropdown menus can improve your website’s search engine optimization (SEO). Organizing your menu using relevant keywords helps search engines understand your site better.
Structuring content in a clear hierarchy improves visibility in search results. A drop-down menu enhances navigation and supports mobile-friendly design. It also boosts user experience and strengthens your SEO efforts.
HT Mega Elementor Addons
The ultimate Elementor page builder addons to build stunning websites.
How to Create Drop Down Menu in Your WordPress Site: Step-by-step
If you’re running a website on WordPress, a drop-down Menu is one of the most useful elements you can add to your site. Not only does it make your site look more professional, but it also makes it easier for visitors to navigate.
Creating a drop-down menu in WordPress is easier than it seems. Don’t worry, with just a few simple steps, you’ll have it set up in no time. Let’s learn.
Step 1: Build Menu Items
In your WordPress dashboard,
Navigate to the Appearance section on the left-hand sidebar and click on “Menus.” This will take you to the Menus page.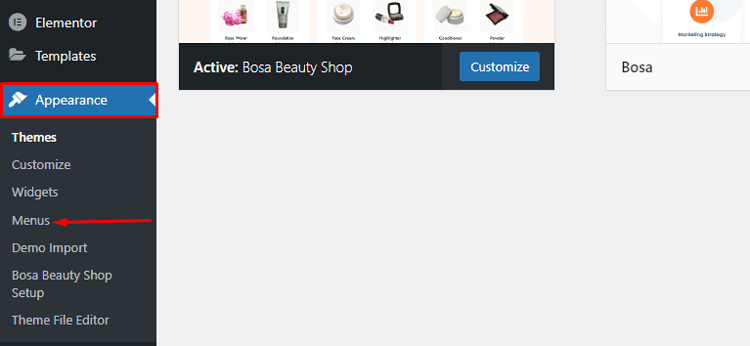
If you haven’t created a menu yet, click on the “Create a new menu” link or enter a name for your menu in the “Menu Name” field, click “Create Menu” button.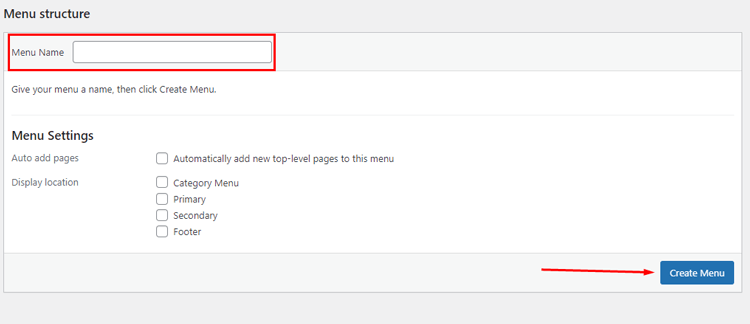
After creating at least one Menu, you can start adding menu items and establishing the structure.
Step 2: Establish Your Menu Structure
Your Menu is currently unorganized and lacks dropdown functionality. However, you can easily solve these issues by dragging and dropping menu items to create submenus and arrange them in a desired order.

After you finish editing your Menu’s structure and adding each dropdown item, don’t forget to save your changes. Keep in mind that some themes may require you to assign the new Menu to a particular location.
You can find relevant options under the “Menu Settings” section. You can check how the Menu works on your website’s front end. If there are any sub-items, they will be displayed as a drop-down menu.
To ensure easier browsing of your website, limit the number of items in your navigation menus to prevent confusion and cluttering.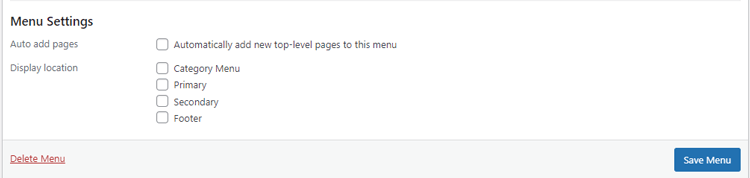
Step 3: Include CSS in Your Menu
Navigate to the Appearance section on the left-hand sidebar and click on “Customize.” This will open the WordPress Customizer.
In the Customizer, you will see a list of customization options for your theme. Look for the “Additional CSS” or “Custom CSS” option. The label may vary depending on your theme. Click on the “Additional CSS” or “Custom CSS” option to open the CSS editor.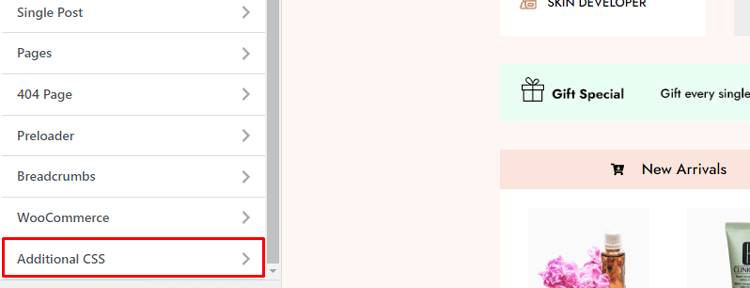
In the CSS editor, you can insert your custom CSS code to target and style the menu items. 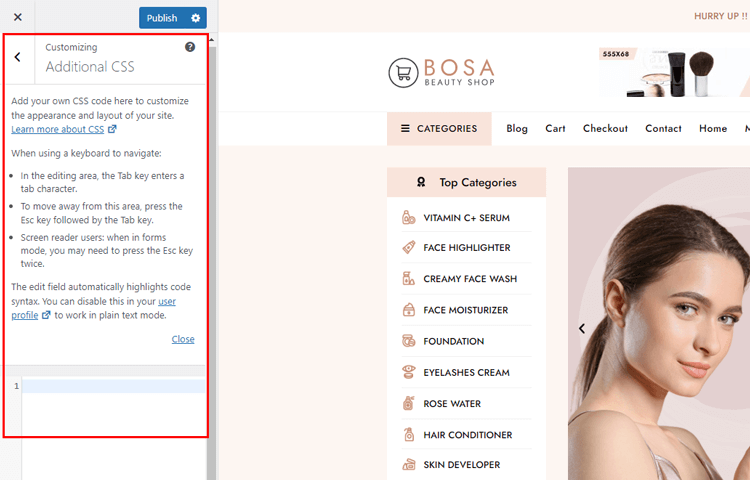
For developers wanting to add advanced styling to WordPress dropdown menus, here’s a useful CSS snippet that enhances the user experience.
For example, if you want to change the font color of the menu items to read, you can add the following CSS code:
.menu-item {
  color: red;
}By following these steps, you can include custom CSS in your WordPress menu through the dashboard. This allows you to customize the appearance of the menu items according to your design preferences.
Step 4: Preview Your Menu
Before finalizing your Menu, consider checking it out in the WordPress Customizer. Here, you can adjust various settings such as opacity, font size, and hover effects and see the changes in real-time. To access the live editor, click on “Manage with Live Preview”.
You can customize your website’s menu items by adding, removing, or changing their order. The Customizer allows you to preview the changes in real-time without having to open a new tab.
Step 5: Make Your Menu Public
To make your new dropdown menu live on your website, all you need to do is click on the “Publish” button. Visitors will be able to use the Menu once it’s live.
If you’ve created multiple menus and want to assign them to different locations, you can also use the Customizer feature. This will allow you to place menus in all the different locations supported by your theme.
ShopLentor – WooCommerce Builder for Elementor & Gutenberg
A versatile page builder to build modern and excellent online stores with more than 100k Active Installations.
Tips for Optimizing Your WordPress Site with a Drop Down Menu
When it comes to optimizing your WordPress site, creating an organized and user-friendly navigation menu is key. Having a dropdown menu can make your site even easier to navigate, especially if you have a plethora of menu items to showcase.
So, How to Create Drop Down Menu in Your WordPress Site? To optimize your WordPress site with a drop-down menu, follow these tips:
Use a WordPress theme that supports dropdown menus:
Choose a theme that offers built-in support for dropdown menus. This ensures compatibility and makes it easier to add and customize your dropdown menu.
Optimize the navigation menu structure:
Keep your dropdown menu organized and logical. Use parent menu items to represent main categories and create submenus for related subcategories. This improves navigation and makes it easier for users to find what they’re looking for.
Customize the Appearance of your dropdown menu:
Use CSS or theme options to customize the visual design of your dropdown menu. Adjust colors, fonts, hover effects, and other styling elements to match your site’s branding and enhance the user experience.
Ensure mobile responsiveness:
Test your dropdown menu on different devices to ensure it is responsive and functions well on mobile screens. Consider using a responsive WordPress theme or a plugin that helps optimize your Menu for mobile devices.
Optimize for speed and performance:
Minimize the number of HTTP requests by optimizing CSS and JavaScript files. Compress and optimize images to reduce file sizes. Implement caching mechanisms and consider lazy loading techniques to improve page load times.
Consider accessibility:
Make your dropdown menu accessible to all users. Ensure it can be navigated using keyboard controls and is screen-reader friendly. Use proper HTML markup and follow accessibility guidelines to ensure inclusivity.
Test and gather user feedback:
Regularly test your dropdown menu and gather user feedback to identify any usability issues. Pay attention to user interactions and adjust the Menu based on their feedback to optimize the user experience.
By applying these tips, you can easily add and optimize a dropdown menu in WordPress. This will enhance navigation, improve user experience, and make your site more accessible for visitors.
Recommended Plugins for Creating Menus in WordPress
One of the most important aspects of running a successful WordPress website is having a user-friendly navigation system. Whether you’re a beginner or a seasoned WordPress user, creating menus can often become a daunting task.
Luckily, there are a plethora of plugins available that can help you simplify the process. These plugins offer easy-to-use features for creating dropdown menus and adding menu items. They let you customize your website’s navigation to suit your unique needs.
With so many options to choose from, we have listed some plugins that can help you to create drop down Menu in your WordPress site.
HT Menu – WordPress Mega Menu Builder for Elementor
Introducing HT Menu – an exceptional addon for Elementor page builder designed to simplify the Menu and Mega menu creation for WordPress websites. Adding Elementor templates and widgets helps create stunning columns and mega menus. You can control menu width and adjust the sub-menu position easily.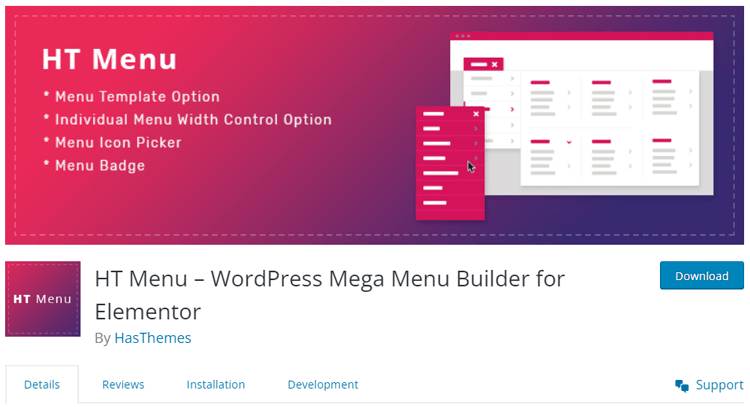
Upgrade to the Pro version for integrated menu icons and badges. Enjoy 10 pre-defined menu layouts to streamline your Mega menu development.
Add Elementor templates to your menus and customize widths. Use unique features like the menu icon picker and badge background color option.
Mega Menu Pro
Create beautifully designed mega menus effortlessly with WP Mega Menu Pro’s visual editor. Its user-friendly drag-and-drop builder simplifies the process. Anyone can create professional-looking navigation elements without coding knowledge.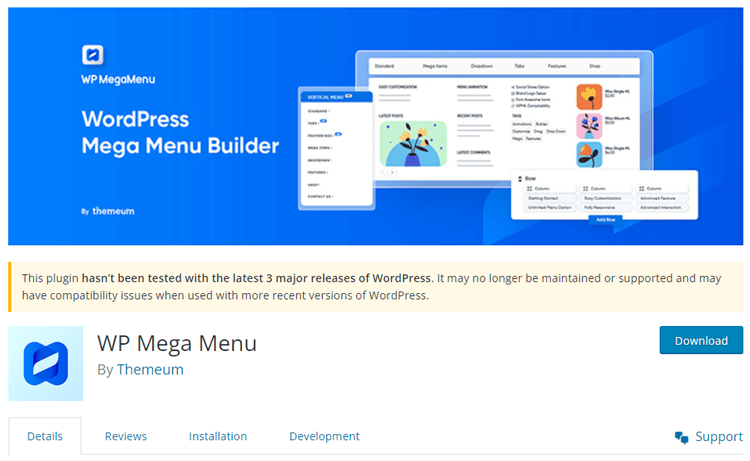
Customize your menus with grid-based layouts, widgets, logos, and social media icons. The plugin is integrated with Font Awesome and Dashicons for added design flexibility.
Plus, with its handy auto-save feature, you can ensure you never lose your work. Enhance your website’s navigation with WP Mega Menu Pro and WooCommerce’s custom product displays and cart icons.
Max Mega Menu
Max Mega Menu is the perfect menu plugin for all WordPress users. It allows easy and quick customization of your website’s navigation.
With over 100 customization options and a drag-and-drop builder, it makes creating responsive Mega Menus simple.
. 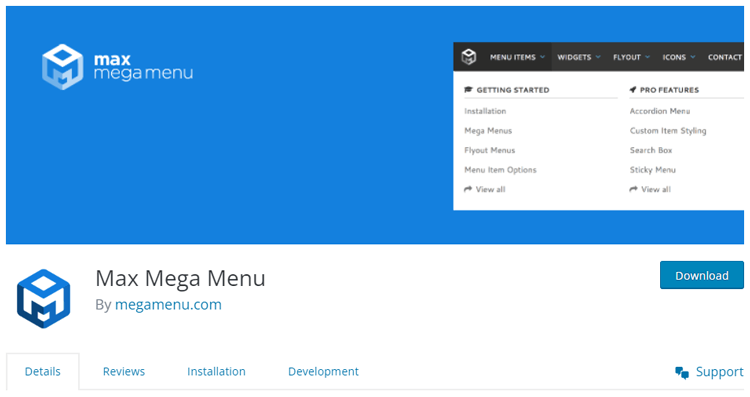
This WordPress plugin allows you to configure multiple menu locations and create horizontal or sticky menus. It easily adapts to all types of websites.
The plugin integrates seamlessly with WooCommerce and Easy Digital Downloads to display cart totals. Max Mega Menu is perfect for both beginners and experienced WordPress users.
Frequently Asked Questions
Q1: How do I create a dropdown menu in WordPress?
To create a dropdown menu in WordPress, follow these steps:
Q2: Can I create multiple levels of dropdown menus?
Yes, WordPress allows you to create multiple levels of dropdown menus. You can create nested dropdown menus with several levels of depth by indenting submenu items under other submenu items.
Q3: How can I customize the Appearance of my dropdown menu?
WordPress provides various customization options to style your dropdown menu. You can modify the colors, fonts, hover effects, and other visual aspects of your menu using CSS. Alternatively, you can use WordPress themes that offer built-in menu customization options.
Q4: Can I add icons or images to my WordPress dropdown menu?
Yes, you can add icons or images to your dropdown menu in WordPress. Some themes or plugins provide options to include icons or images alongside menu items. Alternatively, you can utilize custom CSS or plugins specifically designed for adding icons or images to menus.
Q5: How do I make my WordPress dropdown menu mobile-friendly?
To make your dropdown menu mobile-friendly, ensure that it is responsive and adapts to smaller screen sizes. Test your menu on mobile devices to ensure it displays correctly.
Make sure it collapses or appears in a user-friendly format, like a hamburger menu or vertically stacked dropdown. Using a responsive WordPress theme and plugins that support mobile navigation can help achieve this.
Q6: Are there plugins available to enhance WordPress dropdown menu functionality?
Yes, there are several WordPress plugins available that can enhance the functionality of dropdown menus. These plugins offer additional customization options, advanced animations, Mega menu capabilities, and more. Popular plugins for dropdown menus include Max Mega Menu, UberMenu, and WP Mega Menu.
Q7: How can I add a WordPress dropdown menu to my website’s sidebar?
Adding a WordPress dropdown menu to your website’s sidebar typically requires a combination of theme customization and widgets. Some WordPress themes provide built-in options to add dropdown menus to sidebars or widget areas. Alternatively, you can utilize plugins that offer sidebar menu widgets to achieve the desired functionality.
Wrapping Up
With all the great features that WordPress offers, learning how to create Drop Down Menu in your WordPress site is a great way to expand the usability and organization of your website. In just a few simple steps, you can build clean, user-friendly navigation for your website.
No matter what kind of website you have or are setting up, creating a drop-down Menu in your WordPress should definitely be part of your design process.
Whether it’s a simple order of items or a complex hierarchy of information, your drop-down Menu will do an excellent job of helping users navigate your site.
Remember that it is crucial to keep the number of items in each drop-down Menu limited to not overwhelm the user with too much on one page.
If you encounter any issues or require additional assistance, consider consulting a web developer. They can offer valuable advice for creating a custom WordPress menu.
Follow these steps to easily create functional, beautiful drop-down menus in no time! Need assistance? Reach out today for expert help!