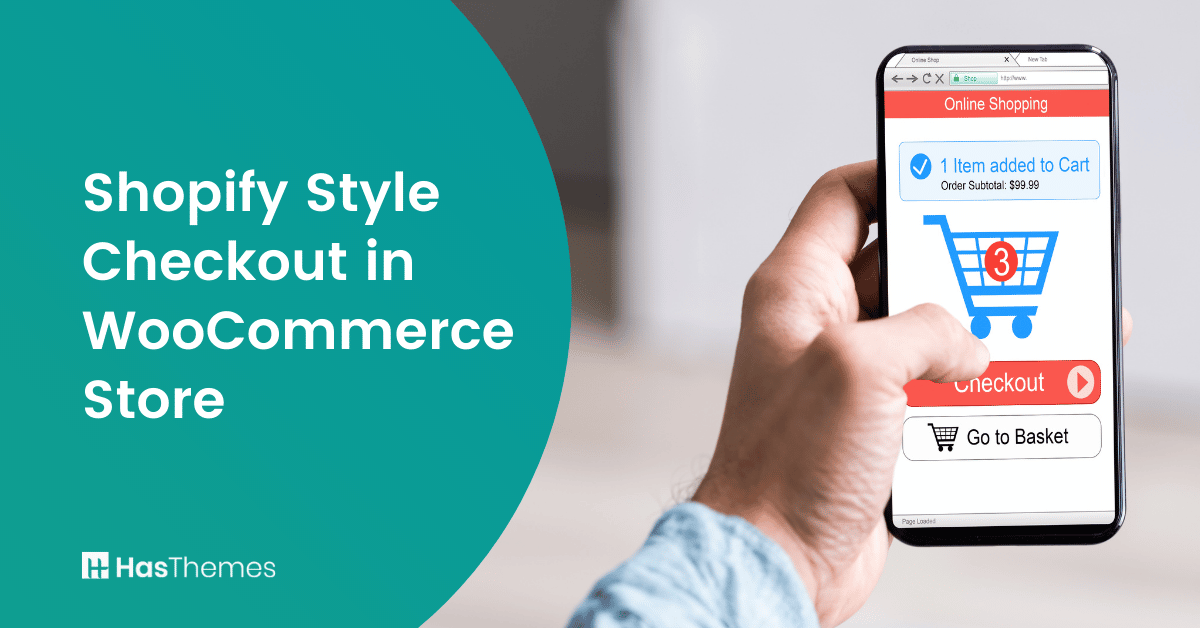
How to add a Shopify Style Checkout in WooCommerce Store
Did you know that over 69% of online shopping carts are abandoned before the purchase is completed? A complex or confusing checkout process is one of the biggest reasons for this.
The checkout page is the final and most critical step in an online shopping journey. It’s where visitorbrowsers become customersbuyers.
Customers can struggle to find what they need when a checkout page is cluttered with too many features or lacks clarity. This frustration often leads to abandoned carts and lost sales.
Around 22% of U.S. online shoppers abandon orders due to a “too long or complicated checkout process.”
On the other hand, a streamlined and straightforward checkout process ensures customer satisfaction and can significantly boost your store’s conversion rates.
In this article, we’ll explore how to add a Shopify style checkout in WooCommerce store. We’ll guide you step by step on how to simplify your checkout experience to delight your customers. Let’s get started!
What is Shopify Style Checkout in WooCommerce?
The Shopify Style Checkout Page in WooCommerce replicates Shopify’s streamlined, user-friendly, and conversion-optimized checkout experience. Unlike WooCommerce’s default checkout, it offers a clean layout, mobile optimization, and a structured flow to reduce friction and boost conversions.
The Shopify Style Checkout Page is a module of WooLentor, allowing WooCommerce store owners to upgrade their checkout process without coding. A simplified checkout reduces cart abandonment, ensuring customers complete purchases smoothly, leading to more sales and higher satisfaction.
This checkout design module is fully compatible with WooCommerce, so store owners can retain WooCommerce’s features while enhancing the checkout experience. It includes customizable form fields, buttons, labels, and branding options, ensuring a seamless and branded purchasing process.
With WooLentor, store owners can enable email-first checkout, display clear order summaries, and optimize for mobile users. A well-structured and user-friendly checkout boosts customer confidence, increasing the likelihood of repeat purchases and long-term business growth.
What are the Specialties of the Shopify Style Checkout Page?
A well-optimized checkout page is essential for any eCommerce website. It’s the final step in the customer journey, and an unoptimized checkout can cause cart abandonment. Many WooCommerce stores struggle with conversions due to checkout friction.
If your checkout process is not fast and user-friendly, customers may leave your site without completing their purchase. Shopify’s checkout flow is widely regarded as one of the best in eCommerce, and WooCommerce store owners can replicate this experience using third-party plugins or custom design improvements.
Shopify-style checkout pages solve common checkout challenges by offering key features. Let’s explore them:
Email as the top field
Capturing the customer’s email first is a proven conversion-boosting strategy. If a user abandons their cart, you can send follow-up emails to recover lost sales.
WooCommerce’s default checkout typically asks for email later in the process, which can reduce cart recovery rates. Shopify places the email field first, increasing customer retention and abandoned cart recovery.
Tips: WooCommerce store owners can modify the checkout sequence using plugins like ShopLentor or CheckoutWC.
Call to action button with clear instructions
The best approach to reduce customers’ uncertainty is to provide them with all they require at the site where they anticipate it. Shopify style checkout page has effectively accomplished this.
The best approach to reduce customers’ uncertainty is to provide them with all they require at the site where they anticipate it. Shopify style checkout page has effectively accomplished this. Shopify’s checkout provides:
1. “Return to Cart” button on the left-hand side.
2. “Continue to Shipping” button for easy navigation.
This structured flow ensures that users move smoothly from one step to the next without confusion or hesitation.
3. WooCommerce users can customize their checkout page using plugins to add clear CTAs and improve user flow.
Order total with break-down of all costs
People have a common tendency to leave the checkout if they can’t see the order total. Shopify checkout clearly displays:
1. Itemized cost breakdown (taxes, shipping, product total)
2. Product images and quantities for order verification
3. Final total before purchase confirmation. This transparent pricing approach builds trust and reduces cart abandonment.
4. WooCommerce users can enhance their order summary display using plugins like WooCommerce Checkout Manager.
Minimalist Layout with No Distractions
A clutter-free checkout page improves conversions by keeping the user focused on completing their purchase. Shopify follows these best practices:
1. WooCommerce store owners can achieve a distraction-free checkout with plugins like Flux Checkout or custom CSS modifications.
2. Minimal distractions (no excessive banners or popups)
3. Clean, balanced design to maintain user focus
4. Essential information only, making the checkout fast and intuitive
Optimized for mobile
Since more than 70% of eCommerce traffic comes from mobile devices, an optimized mobile-friendly checkout is crucial. If you want to make it as easy as possible for your customers to complete their purchases. You definitely want to optimize the checkout experience for mobile buyers.
The Shopify checkout page is perfectly optimized for mobile users. For example, the fields line up one below another and only take as much space there’s a viewing area on your phone or tablet screen- which means you can fit more information into less amount of lines!
How to Add Shopify-Style Checkout in WooLentor
A well-designed checkout page is essential for reducing cart abandonment and improving conversions. Shopify’s checkout process is known for its smooth user experience, and WooCommerce store owners can replicate this experience using plugins like WooLentor.
Set the Shopify Style Checkout Page Using a Plugin
With WooLentor, you can design a Shopify-style checkout page that is fully customizable and mobile-responsive. The plugin allows store owners to reduce unnecessary checkout steps, creating a faster and more user-friendly checkout experience.
Lets start, step by step procedure on How to add a Shopify style checkout page on a WooCommerce Store
Step-1: Download and Activate the Required Plugin
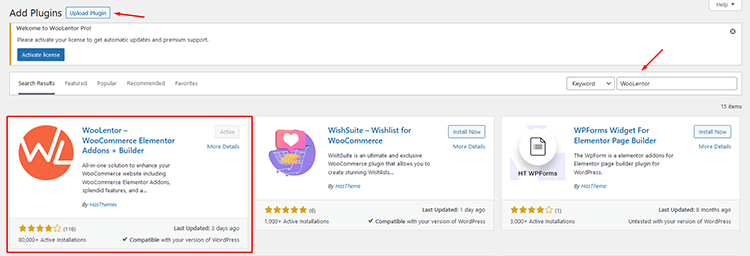
To begin, log in to your WordPress dashboard and go to Plugins → Add New. In the search bar, type WooLentor and click Install Now. After installation, click Activate. Once activated, you will be redirected to the WooLentor settings panel for further configuration.
Step-2: Go to the Settings Panel and Enable the Module
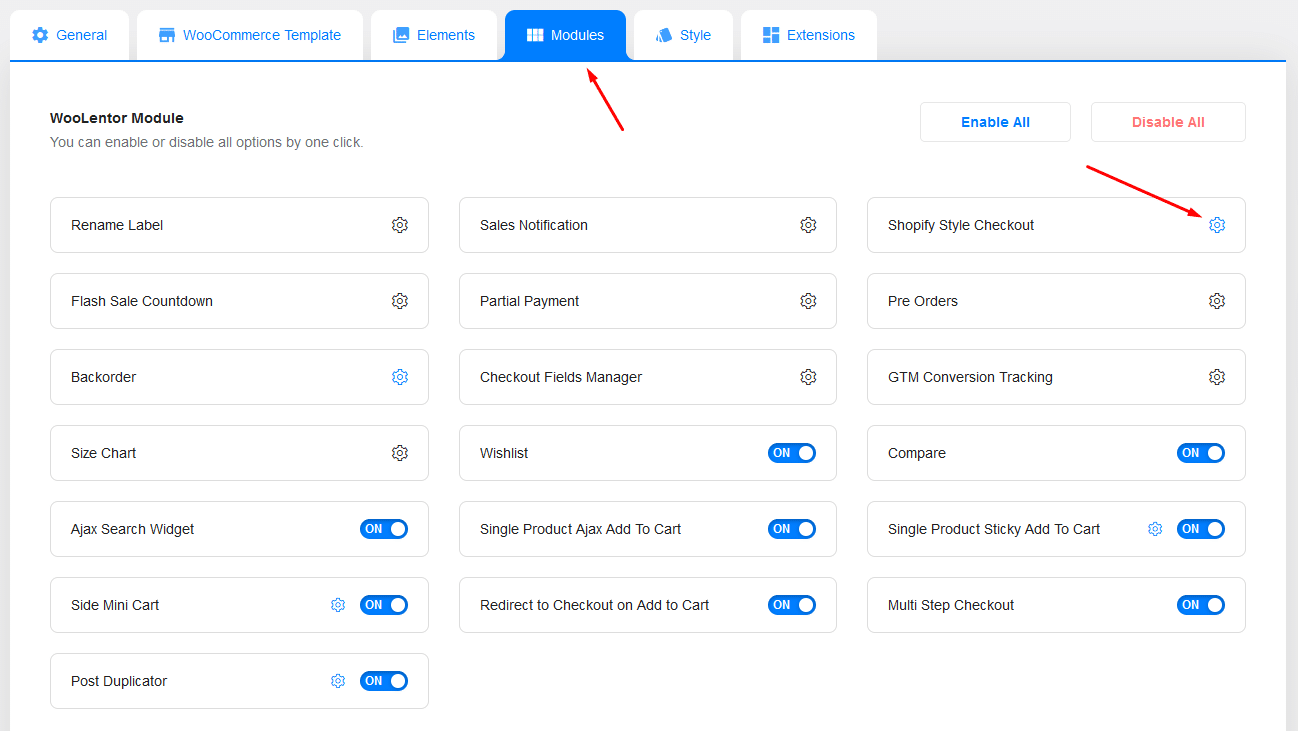
In the WordPress dashboard, go to WooLentor → Modules and look for the Shopify-Style Checkout option. Click on it to open the settings panel.
A pop-up will appear with an option to Enable or Disable the Shopify-style checkout page. Click Enable and save your changes.
Step-3: Go to the Checkout Page of the WooCommerce Store and Modify the Contents
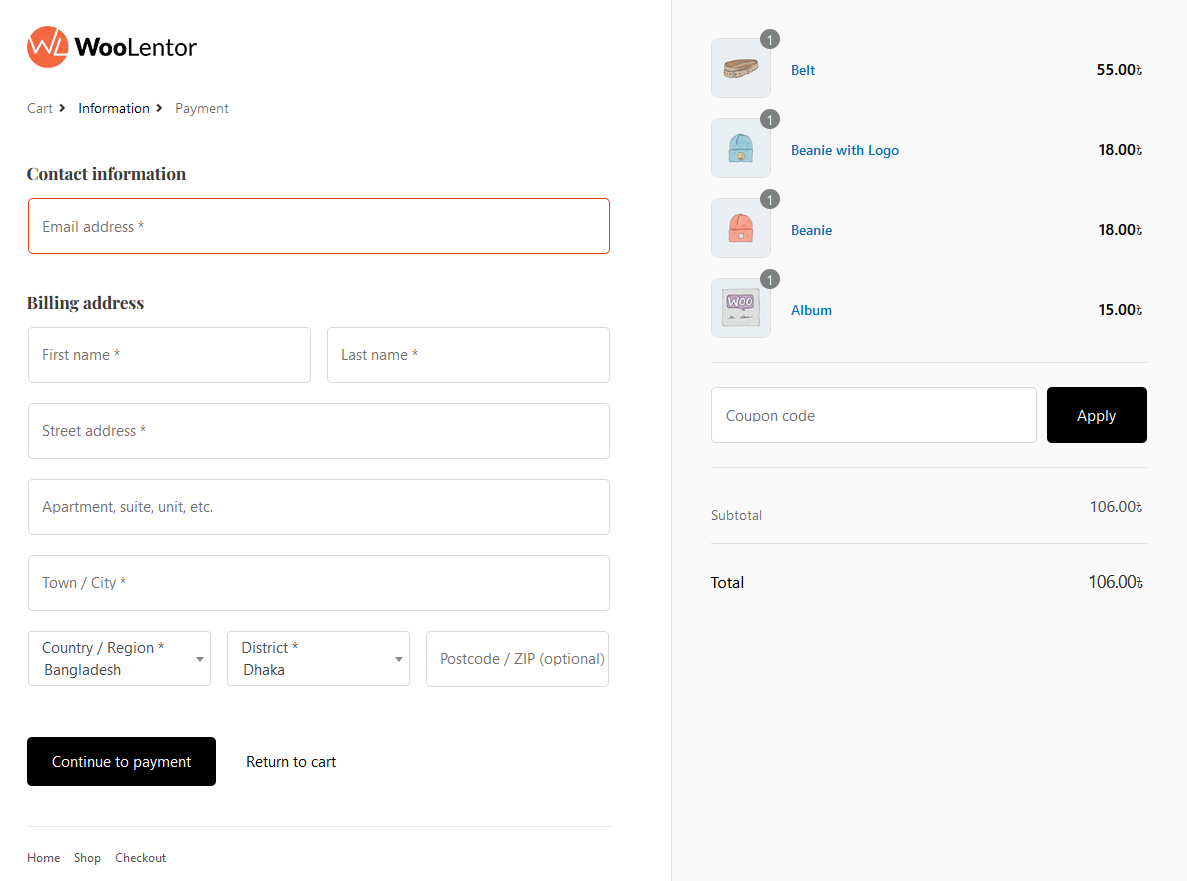
Go to WooCommerce → Checkout Page in your WordPress dashboard.
You’ll notice that the WooCommerce checkout page layout has been replaced with a more user-friendly, minimalistic design similar to Shopify’s checkout.
Modify the contents by adjusting the form fields, colors, and button placements using WooLentor’s customization options.
Here’s What You Can Adjust:
Logo Upload: Add your brand logo to the checkout page for a more personalized touch.
Logo URL: Link the logo to your homepage or any custom URL for easy navigation.
Bottom Menu: Add quick links like customer support, FAQs, refund policy, or any other useful menu items.
Phone Number Field: Enable this field to make it easier for customers to enter their contact details.
Company Name Field: If your store caters to businesses, allow customers to provide their company name for invoices.
Hide Cart Navigation: Remove the “Cart” menu and “Return to cart” button for a streamlined checkout experience.
Hide Shipping Step: If your store does not require shipping, such as for digital products, you can hide the shipping step to simplify checkout.
Rename Labels: Customize checkout page labels to match your branding and tone, making the process more user-friendly and professional.
Step-4: Set Up the Shipping Method
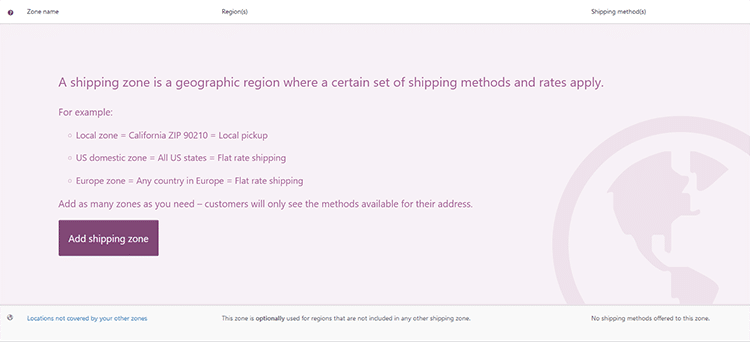
Customers can enter their billing details directly on the Shopify-style checkout page. If their shipping address is different from their billing address, they can check the “Ship to a Different Address” option, which generates a new form for shipping details.
After entering the details, customers can choose their preferred shipping method and proceed by clicking “Continue to Payment”
Step-5: Set Up the Payment Gateway
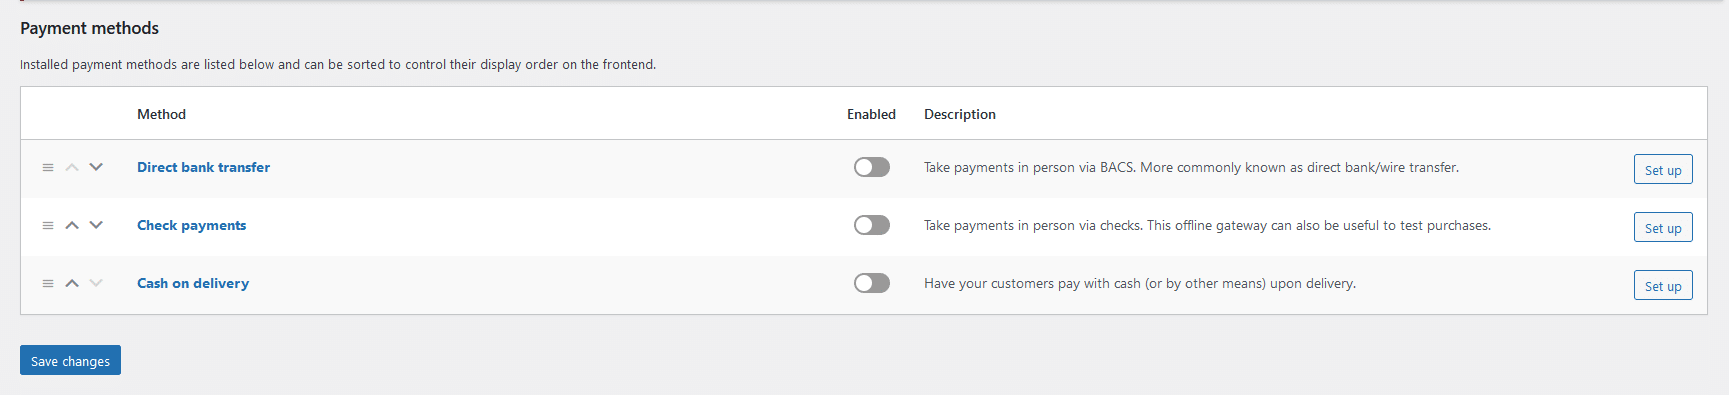
In the next step, customers will select a payment gateway to place their purchase order. Before placing an order, they must check the “I agree to terms and conditions” box (if enabled). Once the purchase is completed, customers will be redirected to the Order Confirmation Page, where they can view their order details.
You can brand your template by changing the logo and tagline. The procedure for customizing the template is simple. From the module settings, you may upload a logo to show on the Shopify checkout page.
Simply click upload and select an image as your logo. Make the necessary modifications. This module even allows you to change the bottom menu as per your needs. You can also include helpline numbers and support-related information.
How to Add a Shopify Style Checkout to WooCommerce | WooCommerce Checkout like Shopify
Frequently Asked Questions
What is a checkout page?
A checkout page is a final page a customer sees before completing a purchase. It usually contains information about the product, the price, and any shipping or delivery information.
How can I customize my Shopify style checkout page?
You can use plugins such as WooLentor to customize your Shopify style checkout page.
How can I get the Shopify style checkout page?
First, install and activate the Woolentor plugin, and from the settings, you will see the Shopify-style checkout module. You can customize it as per your need
Can I use my existing WooCommerce features with this module?
Yes, the Shopify Style Checkout module is fully compatible with WooCommerce, so you can continue using all its features.
How does the Shopify Style Checkout improve conversions?
It simplifies the checkout process, reduces distractions, and optimizes mobile usability, ensuring a smoother customer experience.
Is it challenging to customize the Shopify Style Checkout Page?
Not at all! The ShopLentor plugin provides an intuitive interface to customize the page’s layout, colors, and branding elements without technical expertise.
Final Words
The checkout page in an online store is the most crucial part of an eCommerce experience because it provides customers with a smooth, convenient way to complete their orders. A well-designed WooCommerce checkout should be easy to use and understand. It should provide clear instructions..
The Shopify Style Checkout Page is an excellent and efficient module of our Woolentor plugin. It helps you create an easy and beautiful checkout process. At the same time, it provides your customers with the best user experience. This means they’ll come back again, which in turn increases sales!
Ready to improve your store’s checkout process? Try the Shopify Style Checkout Page module today and create a seamless customer experience!