The Rename Label module in ShopLentor lets you change default WooCommerce text without writing any code. You can rename labels on the shop page, product page, cart, checkout, and thank-you page to better match your store language and make the shopping experience clearer.
Rename Label for WooCommerce Pages
Follow these steps to rename WooCommerce labels using ShopLentor:
1. Go to ShopLentor > Settings > Modules from your WordPress dashboard.
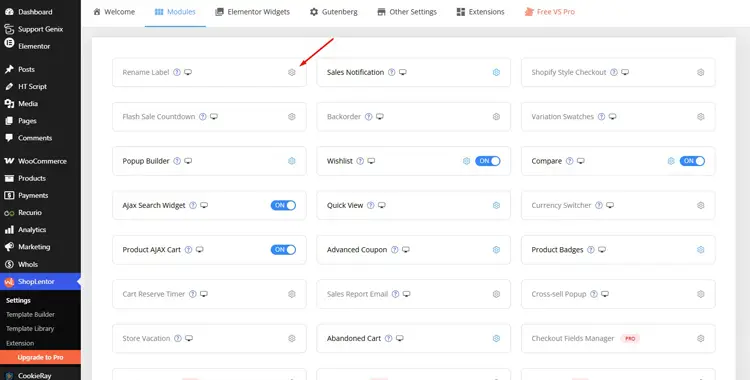
2. Find the Rename Label module in the module list.
3. Enable the module.
4. Open the Rename Label settings to start changing your store text.
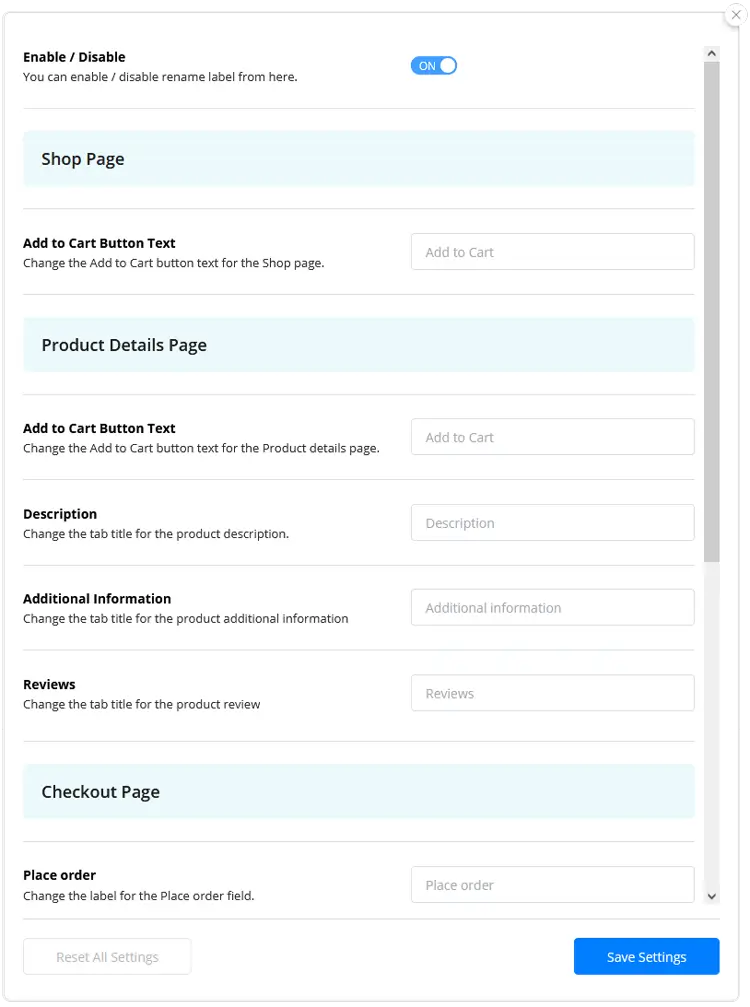
5. Update the labels you want to customize, such as:
- Add to Cart button text on the shop page.
- Description tab title on the product page.
- Additional Information tab title.
- Reviews tab title.
- Place Order button text on the checkout page.
Save your changes after editing the labels.
The module only changes the visible text, so your WooCommerce functionality stays the same.
How to Rename WooCommerce Labels in Minutes | Change “Add to Cart” Button Text | ShopLentor
Activate the Pro License
Rename Label Module is available on the ShopLentor Free version. If you want to unlock the paid feature, visit the Shoplentor pricing page and purchase your required plan.
Follow these steps to activate your ShopLentor Pro license:
1. After purchasing ShopLentor Pro, check your email from the HasThemes Client Portal.
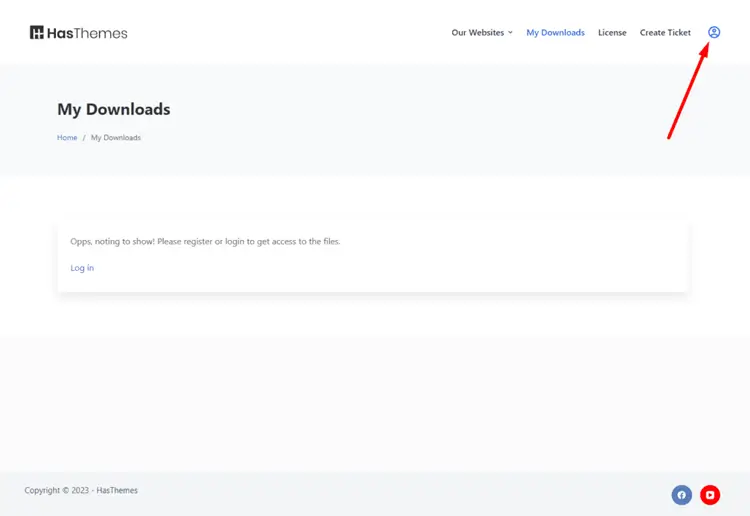
2. Click the Set-up Password link in the email.
3. Create your password to access the client portal.
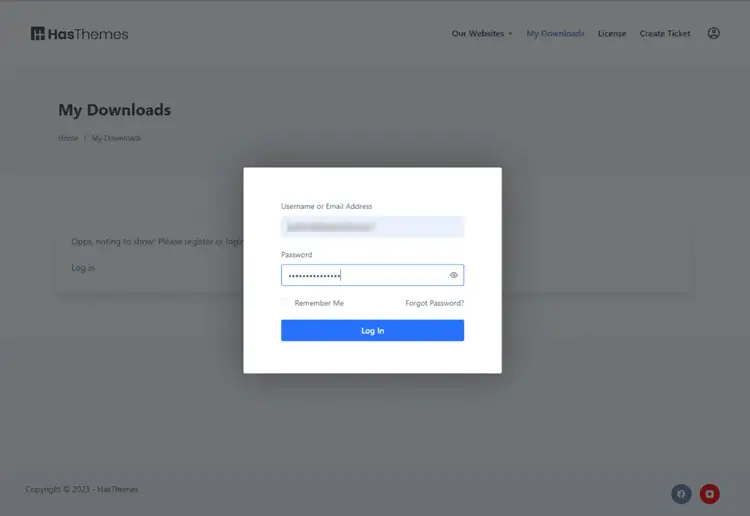
4. Log in using your Username or Email Address and Password.
5. Open the License section from the portal menu.
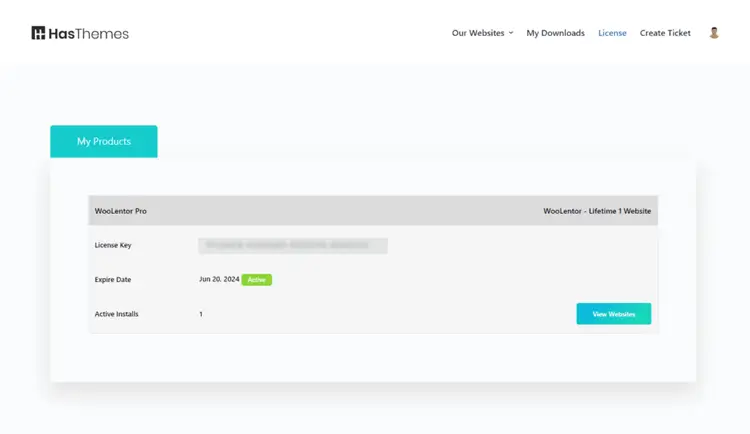
6. Copy your License Key.
7. Go to the ShopLentor license activation area in your WordPress dashboard.
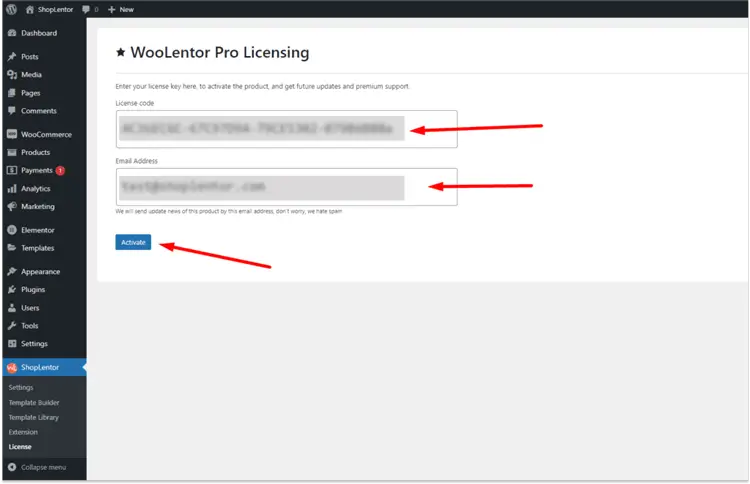
8. Paste the License Code into the license field.
9. Enter your Email Address and Click Activate.
10. Once activated, your ShopLentor Pro license will be ready to use.
How to activate License Key of WooLentor Pro
Frequently Asked Questions
How do I change the “Add to Cart” text without code?
You can do this with the Rename Label module in ShopLentor instead of editing theme files or adding code snippets. Just enable Rename Label from ShopLentor > Settings > Modules, open its settings, and update the Add to Cart button label for your shop and product pages.
Can I rename product tabs like “Description” and “Reviews”?
Yes, the Rename Label module lets you rename common product tabs such as Description, Additional Information, and Reviews directly from its settings. This avoids using custom code or separate plugins just to change tab labels.
Will changing labels break my WooCommerce functionality?
No, Rename Label only changes the display text of buttons and labels and does not modify the underlying WooCommerce behavior. Your checkout, cart, and product logic will keep working as usual; only the text that customers see is updated.
How do I get my ShopLentor Pro license key?
After purchasing ShopLentor Pro, you will receive an email from HasThemes Client Portal with a Set-up Password link. Create your password, log in, go to the License menu, and copy your license key from there.
Where do I activate the ShopLentor Pro license inside WordPress?
In your WordPress dashboard, open the ShopLentor license activation area, paste your License Code, enter your Email Address, and click Activate. Once activated, Pro features such as Rename Label (if it is a Pro module on your setup) will be fully available.
Read More: