
How to Add Google Analytics to WordPress Website in 2026
Quick Answer: You can add Google Analytics 4 (GA4) to a WordPress website in three ways: using an easy plugin (HT Easy GA4), inserting the GA4 tag manually into your theme, or setting it up through Google Tag Manager. The analytics plugin method is the fastest and safest for most users.
If you want to connect Google Analytics to a WordPress website and finally see what your visitors do, GA4 is the way to go. It tracks traffic, engagement, and conversions so you can understand which pages work, which campaigns bring results, and where to improve.
In this guide, you’ll learn step‑by‑step how to add Google Analytics to WordPress with a plugin (recommended) and without a plugin (manual code or Google Tag Manager), plus how to check that everything is working correctly.
With over 3.5 million websites in the US using Google Analytics 4, it’s become the standard for website tracking and analysis.
What You Will Learn:
Why Do You Need Google Analytics 4 on a WordPress Website?
Connecting Google Analytics to a WordPress website turns random visits into meaningful data. GA4 shows you:
- Who visits your site → countries, devices, new vs. returning users
- How people find you → organic search, social media, referral, email, or ads
- What content works best → your top landing pages and posts
- How users behave → scroll depth, clicks, video views, form submissions
- Which campaigns convert → track sales, leads, and key events by channel
With this data, you can:
- Improve your SEO strategy using real traffic and engagement data
- Fix pages with high traffic but low engagement or conversions
- Optimize WooCommerce funnels by tracking add‑to‑cart, checkout, and purchases
GA4 is now the standard Google Analytics version, so adding Google Analytics to your WordPress website properly is essential.
What Do You Need Before Adding Google Analytics to a WordPress Website?
Before you install anything on WordPress, make sure you have:
- A Google account (Gmail / Google Workspace).
- A GA4 property created in your Google Analytics account.
- Your Measurement ID (looks like G-XXXXXXXXXX).
How to Sign Up for Google Analytics 4 and Get Your Measurement ID?
To use Google Analytics on your WordPress website, you will need to sign up for Google Analytics. There are a few simple steps to sign up.
Step 1. Sign Up for Google Analytics
Go to the Google Analytics website at analytics.google.com. Log in with your Gmail account to enable Google Analytics tracking on your site. If you don’t have a Gmail account, create one first. Once logged in, you’ll be directed to the Google Analytics homepage.
Step 2. Set Up an Account
Click the “Start Measuring” button and create an account on the following page.
Provide a name for your account. If you intend to monitor multiple websites or properties within the same account, opt for a general name like your business name.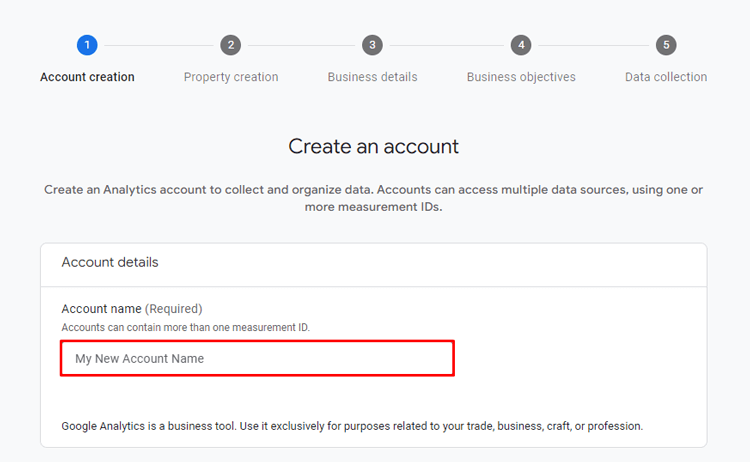
Step 3. Set Up Analytics Property
Once your account is set up, you will proceed to configure the Analytics property. Provide your website’s name, choose the correct time zone, and select the currency based on your business’s location.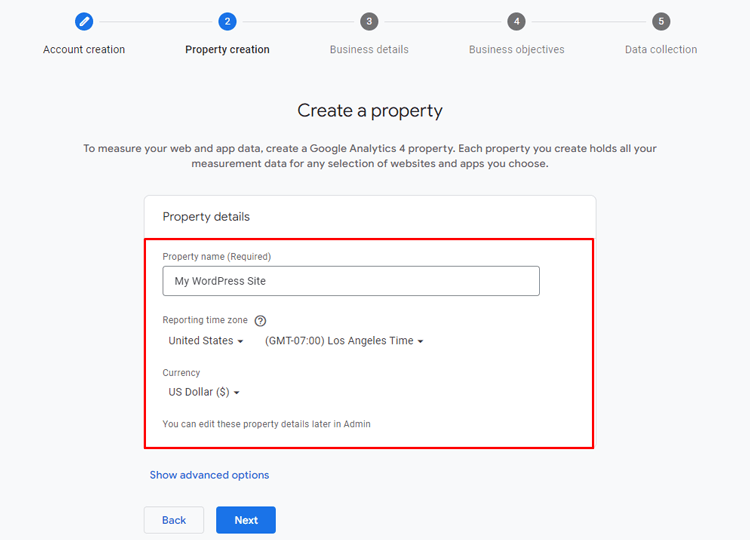
Google Analytics will inquire about your business and its platform usage. Answer these queries thoughtfully.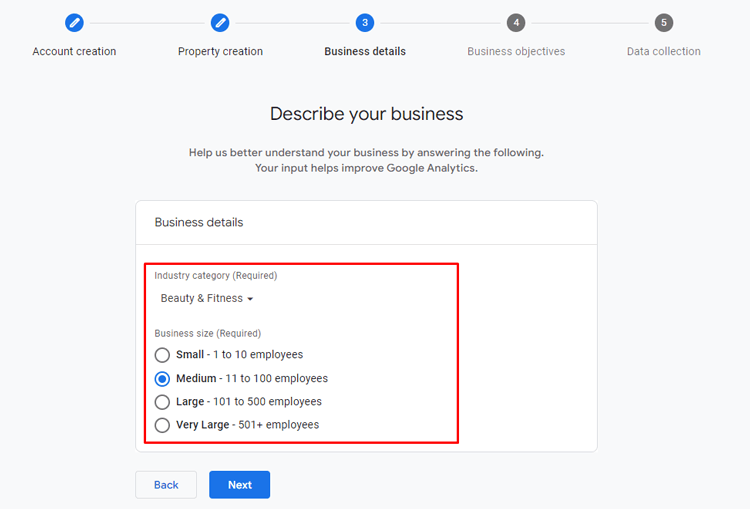
Choose your most suitable topic from the list of business objective topics.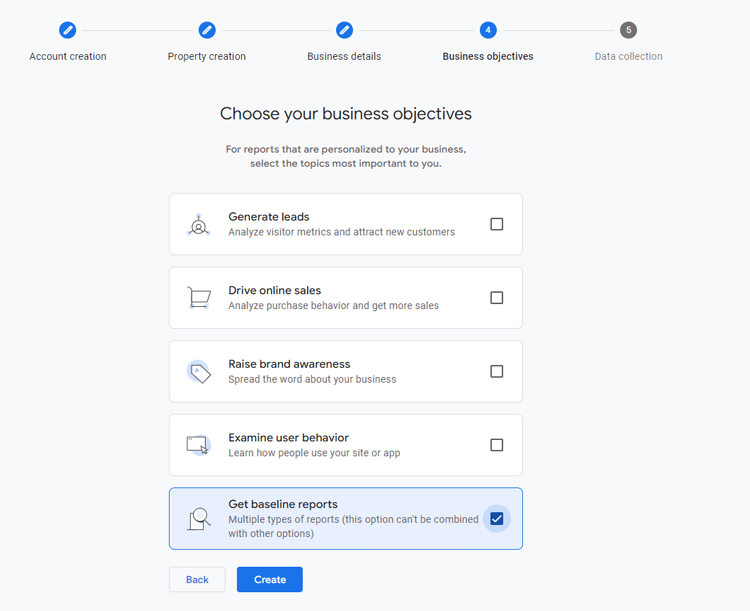
Step 4. Consent to Terms and Receive Email Communications
Please review the terms of service and privacy policy before agreeing to them. You have the option to opt in for email communications from Google Analytics if you desire.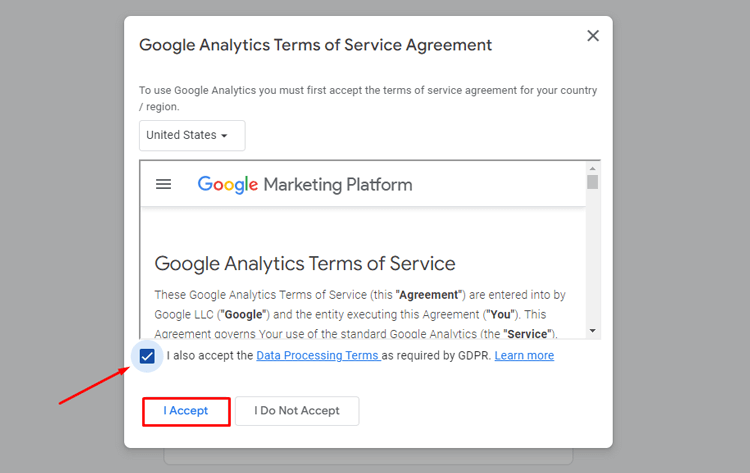
Step 5. Choose Web Stream
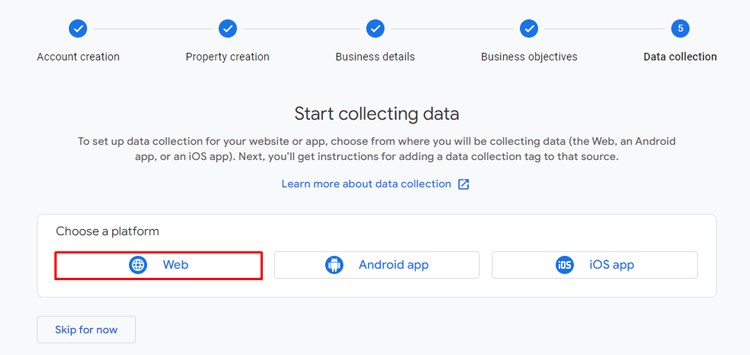
When connecting Google Analytics to your WordPress site, choose “Web” as the stream type.
- Input your website’s URL and assign a name for the data stream (often your WordPress site’s name).

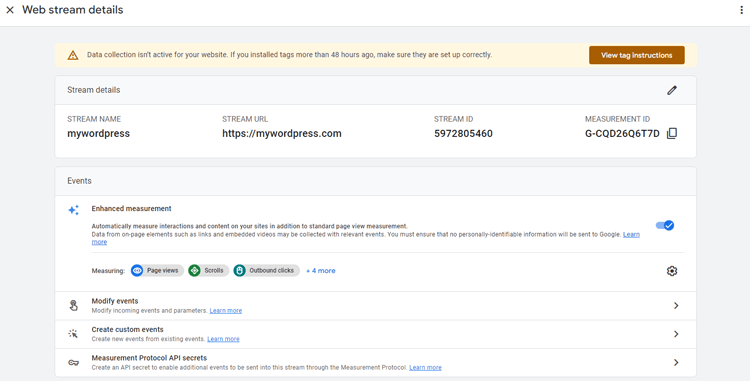
- After creating the data stream, you will find details such as the stream name, stream URL, stream ID, and crucially, the Measurement ID.
- The Measurement ID is a unique identifier for your website, essential for integrating Google Analytics with your WordPress site.
Once you have the Measurement ID, incorporate it into your WordPress site. You can use a Google Analytics WordPress plugin or by adding the tracking code manually to your site’s header.
After adding the code, Google Analytics will start tracking data from your website, providing detailed reports and insights through your Google Analytics account.
💡 For a complete overview of GA4 before setup, see our What Is Google Analytics 4 (GA4)? Beginner’s Guide
How to Install Google Analytics Using a WordPress Plugin?
Optimizing your WordPress site is easy with the right analytics tools. Using a plugin makes Google Analytics integration easy and provides accurate data without any coding.
Now, let’s walk through how to add Google Analytics to a WordPress website using the HT Easy GA4 plugin. This integrated Google Analytics for WordPress helps you quickly set up tracking and access valuable insights to boost your site’s performance and user engagement.
Recommended Blogs for You:
👉 WooCommerce Product Import: A Beginner’s Guide [Error-Free!]
👉 Top 11 Ways for eCommerce Marketing Strategy to Grow your WooCommerce Store
👉 How to Get Facebook Pixel Tracking Code: Step-by-Step Guide
👉 The 6 Best Facebook Pixel Plugins for WordPress
👉 Tips to Finding the Right PDF Editor: Enhance WordPress Websites with PDF Editing Capabilities
Let’s learn how to add a GA4 WordPress plugin(HT Easy GA4).
Plugin Installation
To set up and enable the “HT Easy GA4” analytics plugin on your WordPress website, follow these steps:
Log in to your WordPress dashboard. Navigate to the “Plugins” section and choose “Add New.”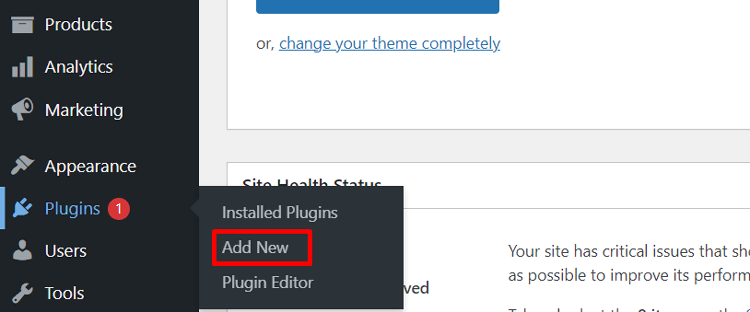
Use the search bar at the top right to look for “HT Easy GA4” analytics plugin and hit Enter. Click on the “Install Now” button beside the plugin’s name. WordPress will download and install the “HT Easy GA4” Google Analytics WordPress plugin.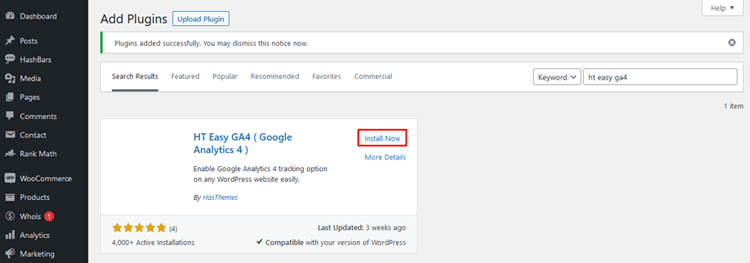
Once the installation finishes, click “Activate” to enable the “HT Easy GA4” analytics plugin.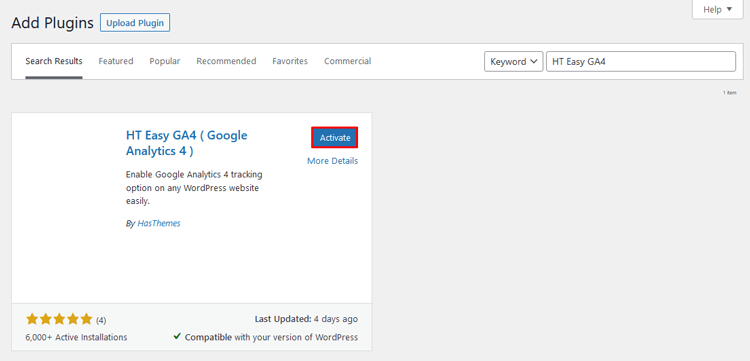
Upon activation, a new menu item labeled “HT Easy GA4” will appear on your WordPress dashboard. Access the plugin’s settings and features by selecting the “HT Easy GA4” menu.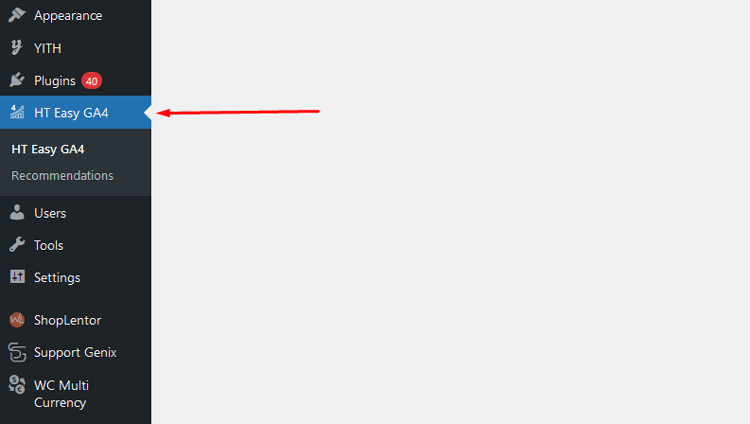
Configuring the Plugin
The “HT Easy GA4” plugin is set for configuration with your Google Analytics Measurement ID. Start tracking your website data with Google Analytics 4 (GA4) seamlessly.
After activating the plugin, a new menu named “HT Easy GA4” will appear in your WordPress dashboard. Follow these steps to configure the plugin settings:
Add the Measurement ID directly (Basic Method):
You can enter your Google Analytics Measurement ID directly in the field provided. This will automatically insert the tracking script (gtag) into your site’s header for website tracking.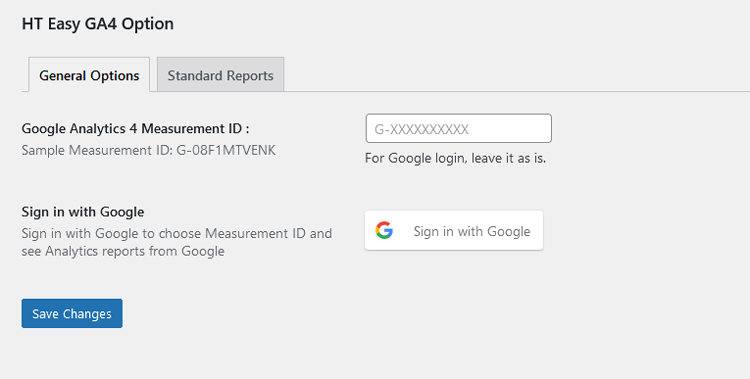
We suggest signing in with Google and setting up the Measurement ID to unlock the full range of the plugin’s capabilities. This will provide access to valuable Google Analytics reports and enable you to select any Measurement IDs from your Google Analytics account directly within the WordPress dashboard.
Sign in using your Google account:
Click the “Sign in with Google” button. A new window will open for you to log in to your Google account with your username and password.
If you’re already logged in, you can choose the Google account linked to your Google Analytics.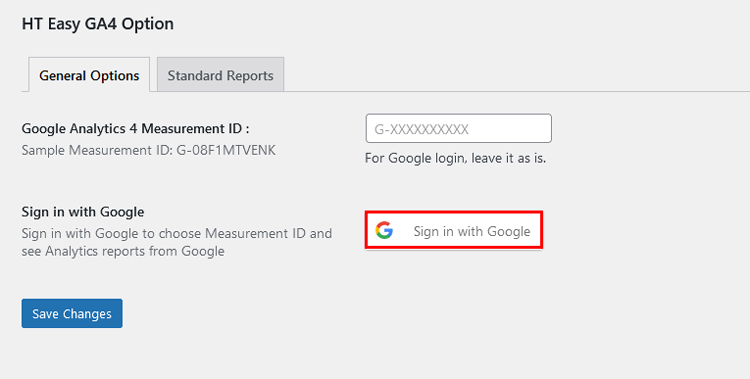
Grant Access:
After choosing the correct Google account, tick the box to permit the plugin to link with Google Analytics. Proceed by clicking the “Continue” button once access has been granted.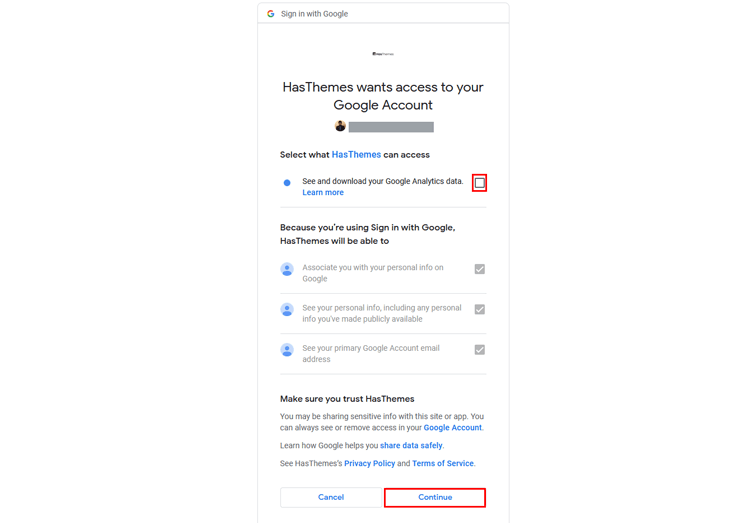
Connected to Google Analytics:
Once you’ve linked the plugin to Google Analytics, a “Logout” button will appear next to the email address you used to sign in. This button allows you to disconnect the plugin from the Google Analytics API.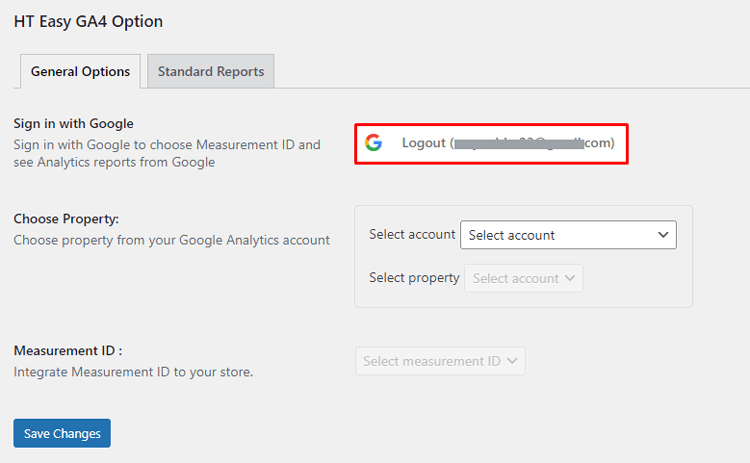
Select Account and Property:
Choose the Google Analytics account linked to your WordPress site from the dropdown list. After selecting the account, the plugin will show the properties connected to it.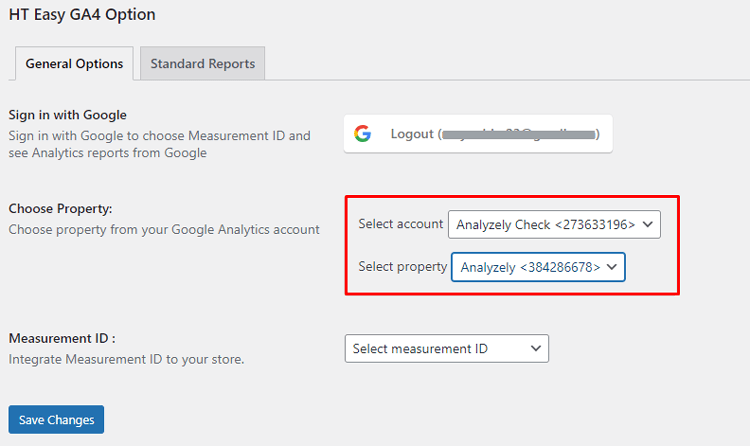
Set up Data Stream:
Set up the data stream in Google Analytics by creating a web stream for your WordPress site. Input your site’s URL, create the stream, and obtain the Measurement ID.
Choose Measurement ID:
Choose a property from the dropdown list to view all the measurement IDs linked to that analytics property. Select the most suitable measurement ID for your website.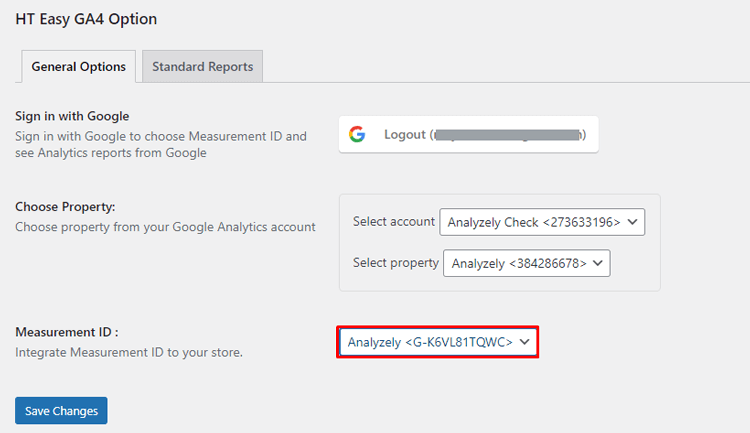
Save the Configuration:
After configuring your settings, save them. The plugin will insert the tracking script into your site’s header to monitor visitor data automatically.
No need for extra third-party plugins or custom code snippets for tracking. If you’ve added tracking code manually or used another plugin, feel free to remove them.
Activate E-Commerce Events (Pro):
With the Pro version of the “HT Easy GA4” and “WooCommerce” plugins activated, E-Commerce Events can be enabled. These events track user behavior on e-commerce sites, including checkout visits, product views, cart additions, and purchases.
Event Tracking:
The plugin offers a range of event tracking options, including “View Product,” “View Category,” “Add to Cart,” “Initiate Checkout,” and “Purchase.”
These events facilitate monitoring user engagements with your products and website, empowering you to enhance your online store for improved conversions and revenue.
Directly Placing the Measurement ID in GA4 Plugin Settings:
We suggest signing in with Google and setting up the Measurement ID to unlock all plugin features. This grants easy access to your Analytics account’s Measurement IDs and essential Reports features without visiting the Google Analytics site.
HT Easy GA4
#1 📈 Google Analytics Plugin for WordPress
🚀 Supercharge your WordPress website with analytical insights. (Including WooCommerce Report)
Common GA4 Setup Mistakes to Avoid in WordPress
When connecting Google Analytics to a WordPress website, avoid these common issues:
- Duplicate tracking: Running GA4 via both a plugin and manual code (or GTM and a plugin) at the same time. This doubles your data.
- Wrong property or Measurement ID: Make sure the ID in your plugin, manual tag, or GTM matches the GA4 property you intend to use.
- Using old UA code: Universal Analytics (UA- IDs) no longer processes new data; rely on GA4 only.
- Caching issues: Some caching or optimization plugins can delay new scripts. Clear your cache after changes.
- Editing parent theme files: Updates can remove your GA4 code; use a child theme or snippets plugin instead.
Frequently Asked Questions
Is Google Analytics 4 free for a WordPress website?
Yes. GA4 is free to use on any WordPress website. You only pay if you upgrade to Google Analytics 360, which most sites don’t need.
Do I need a plugin to connect Google Analytics to a WordPress website?
No. You can add GA4 manually with code or via Google Tag Manager. However, a plugin like HT Easy GA4 makes setup and maintenance easier and reduces the risk of mistakes.
How to add Google Analytics to WordPress?
Easily add Google Analytics to WordPress with plugins like “HT Easy GA4” or by inserting the tracking code manually.
Which is better for WordPress: HT Easy GA4 or manual GA4 installation?
For most site owners, HT Easy GA4 is better because you don’t touch code, you get built‑in reports, and WooCommerce events can be tracked automatically. Manual setup is only recommended if you prefer full code control.
Can I use HT Easy GA4 together with Google Tag Manager on the same WordPress website?
Yes, but avoid setting GA4 in both places. Use HT Easy GA4 for GA4 tracking and GTM only for other tags, or configure everything in GTM and keep GA4 disabled in the plugin.
How long does it take for GA4 data to appear after connecting GA4 to a WordPress website?
Realtime data appears within minutes. Standard reports usually populate within a few hours and stabilize within 24–48 hours.
How to ensure accurate tracking with Google Analytics?
Conduct test visits and regular audits to verify accurate tracking and reporting on WordPress websites.
Watch the Video on how to set up Google Analytics on a WordPress Website using HT Easy GA4.
Conclusion
Adding Google Analytics 4 to a WordPress website is a one‑time setup that pays off every day. Whether you use the HT Easy GA4 plugin, manual code, or Google Tag Manager, once GA4 is installed, you can finally see what’s working and what isn’t.
Next steps (add internal links):
- New to GA4? Read the “What Is Google Analytics 4 (GA4)? Beginner’s Guide”.
- Want to understand your audience? Learn how to track website traffic in GA4.
- Ready to optimize content? Follow the guide on tracking keywords in GA4 + Search Console.
Use your new GA4 data to improve your content, boost conversions, and grow your WordPress site with confidence.