How to Add Popup in WordPress: A Step-by-Step Guide
Popups are one of the fastest ways to turn random visitors into subscribers, buyers, or leads on a WordPress site.
When you know how to add popup in WordPress the right way, you can show targeted offers on blog posts, landing pages, and WooCommerce product pages without hurting user experience.
In this guide, you will learn a simple, step‑by‑step process to create three high‑converting popups: a basic WordPress popup, a WooCommerce popup for store offers, and a newsletter/subscription popup connected to your email tool.
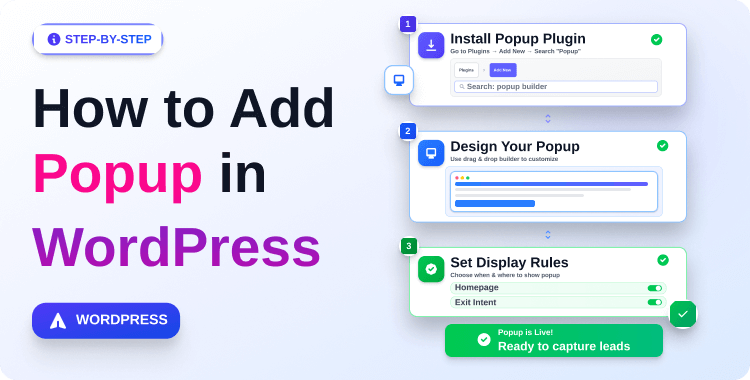
Quick Answer: To add a popup in WordPress, install a pop-up plugin like HT Mega or ShopLentor, enable the pop-up module, design your pop up with Elementor, then set display conditions (which pages) and triggers (time delay, scroll, or exit intent). This guide covers how to add popup in WordPress for general sites, WooCommerce stores, and newsletter/subscription email collection — all in one place.
Table of Contents
What Is a WordPress Popup and Why Does It Matter?
A WordPress popup is an overlay window that appears on top of your page content to present a targeted message — a coupon, a newsletter signup, an announcement, or a product offer. Knowing how to add popup in WordPress correctly means you can grow your email list, reduce cart abandonment, and boost sales without annoying visitors.
A modal popup (sometimes called a “lightbox” or “modal window”) is a specific type of popup that locks focus on itself until the user takes action or dismisses it. WordPress popup builders and Elementor addons like HT Mega and ShopLentor both support modal popups natively.
Why Add a Popup to Your WordPress or WooCommerce Site?
If you’re aiming to expand your business and supercharge your conversion rate, pop-ups are the answer. They have been proven to be highly effective lead magnets. Here are some solid reasons why to add pop-ups to your WordPress site:
- Grow your email list: Newsletter and subscription popups convert passive visitors into subscribers.
- Reduce cart abandonment: Show an exit-intent discount popup before WooCommerce shoppers leave.
- Promote limited-time offers: Popups on product or category pages increase click-through to sale items.
- Collect leads: Ask for name and email using a form embedded inside the popup.
- Announce updates: Show a one-time popup about shipping changes, policy updates, or new product launches.
Recommended Blog for You:
👉 How to Add Widgets to WordPress: A Comprehensive Tutorial
👉 How to Create Drop Down Menu in Your WordPress Site: A Complete Guideline
👉 How to Embed Videos on WordPress: Step-By-Step Guide
👉 How to Showcase Brand Logo in WordPress: A Complete Guide
HT Mega Elementor Addons
The ultimate Elementor page builder addons to build stunning websites.
How to Add Popups in WordPress Site
The fastest way to add popup in WordPress is to use the HT Mega Modal widget inside Elementor. This method works on any WordPress page — blog posts, landing pages, or static pages — without needing a full popup builder setup.
What you need:
- WordPress with Elementor installed (free version works).
- HT Mega – Absolute Addons for Elementor plugin installed and activated.
Step 1 – Enable the Modal Widget in HT Mega
Open your WordPress Dashboard.
Navigate to HT Mega Addons → Settings → Elements.
Scroll to find the Modal widget.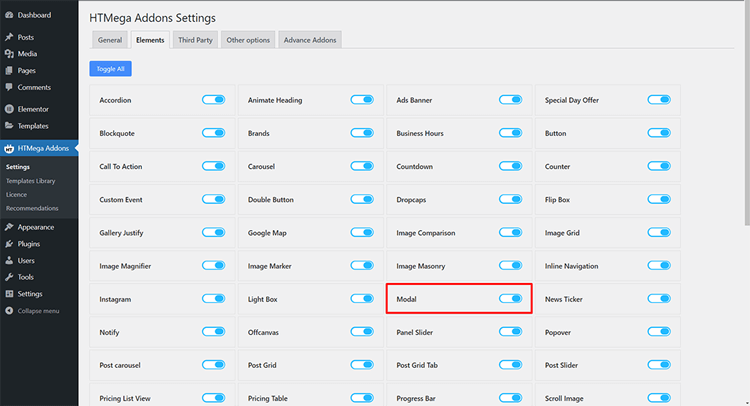
Toggle the switch ON to enable it.
Click Save Settings.
Step 2 – Open Your Page in Elementor and Add the Modal Widget
Once the Modal widget is enabled, you can utilize its powerful features.
Go to Pages (or Posts) and open the page where you want to add popup in WordPress.
Click Edit with Elementor.
In the left panel widget search bar, type Modal.
Look for the HT Mega Modal widget (it has the HT badge icon).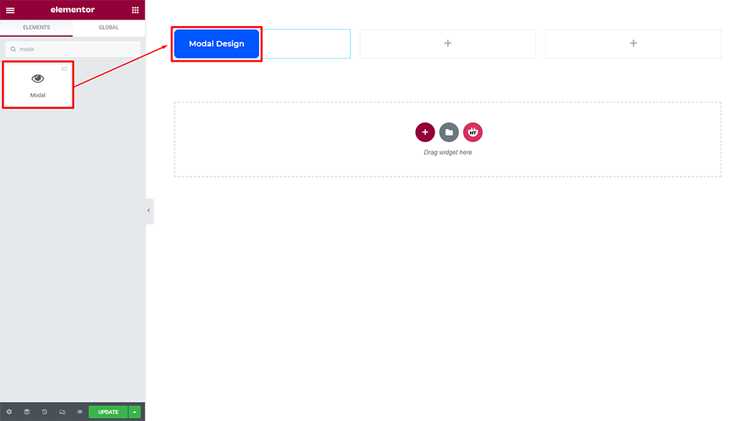
Drag and drop it onto your page layout.
Step 3 – Add Your Popup Content (Header, Body, Footer)
With the Modal widget selected, configure the three content areas in the left panel:
- Header: Add a short headline. Example: “Wait — here’s a special offer for you!”
- Body: Add your main message. Keep it to 2–3 lines maximum. You can also paste a shortcode here for a form or embed an image.
- Footer (optional): Add a CTA button (e.g., “Claim My Discount” or “Subscribe Now”).
Tips for effective pop-up copy:
- Lead with the benefit, not a product name.
- Use action words in your button (Get, Claim, Subscribe, Try).
- Keep the pop-up body under 50 words for better readability.
Step 4 – Style the Popup to Match Your Brand
Switch to the Style tab in the HT Mega widget panel:
- Set the modal box background (white works for most; use brand colors for seasonal offers).
- Adjust border radius for a softer or sharper look.
- Set typography for headline and body text.
- Choose the button color, hover state, and padding.
Avoid heavy animations and large background images; these slow popup load time, which affects Core Web Vitals scores.
Step 5 – Set the Trigger (How the Popup Opens)
In the Settings tab of the Modal widget, choose your trigger:Trigger type When to use it Button click Most common; user clicks a text or image button On page load Announcements: use a time delay (5–10 seconds recommended) Exit intent Discount offers just before the user leaves
Set a cookie duration if the option is available, so the popup does not show every single visit to the same user.
Video Presentation on How to Use the Modal Widget Using HT Mega
How to Add Popup in WooCommerce Store (ShopLentor Method)
If you want to add popup in WordPress specifically for a WooCommerce store, targeting product pages, cart pages, or specific product categories – ShopLentor’s Popup Builder module is the right tool. It allows store-specific conditions that HT Mega’s basic modal does not cover.
Let’s learn how to add popups in WooCommerce with ShopLentor!
What you need:
- WooCommerce is installed and active.
- ShopLentor plugin installed and activated (free version available).
Step 1 – Install and Activate ShopLentor
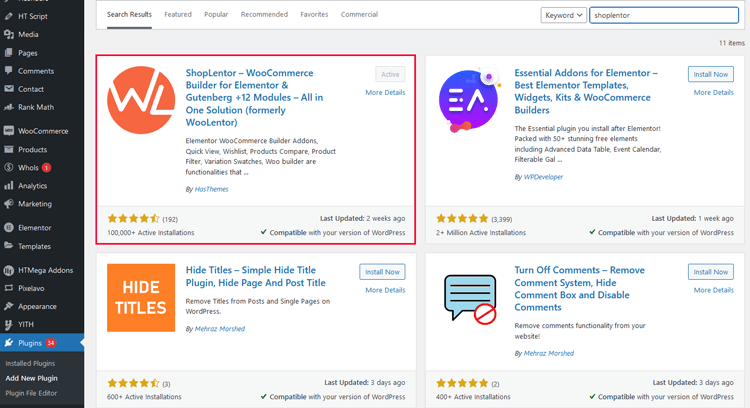
Go to Plugins → Add New in WordPress.
Search for ShopLentor.
Click Install Now, then Activate.
Step 2 – Enable the Popup Builder Module in ShopLentor

In your WordPress Dashboard, go to ShopLentor → Settings.
Click the Modules tab.
Find Popup Builder in the list.
Toggle it ON (Enabled).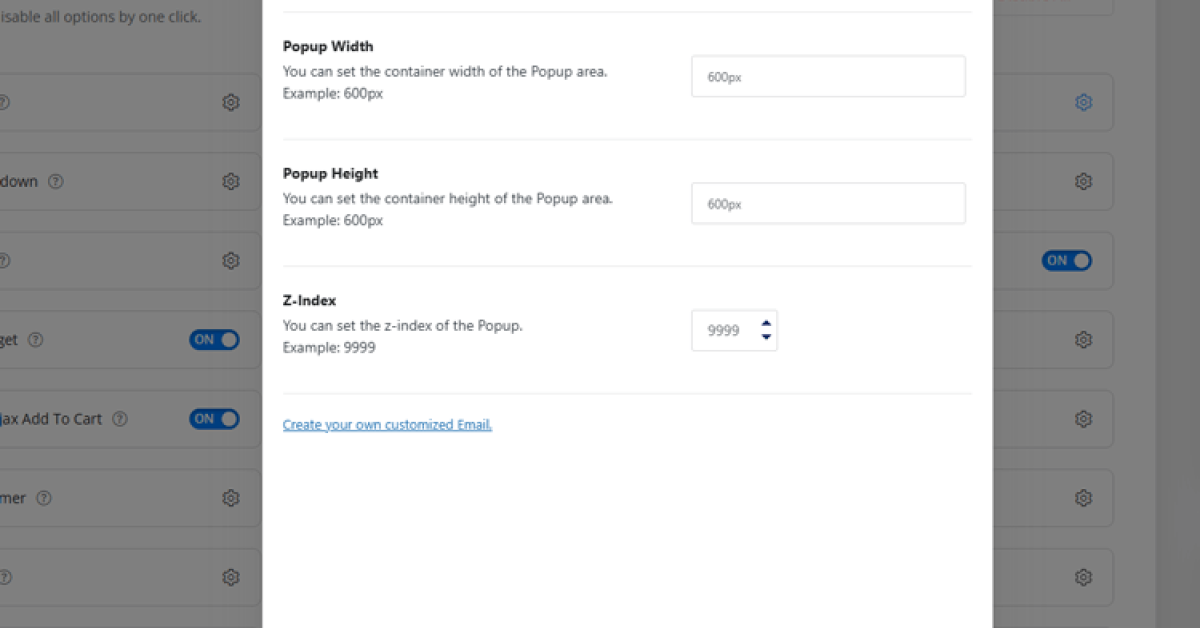
Click Save Changes.
Step 3 – Create a New Popup Template
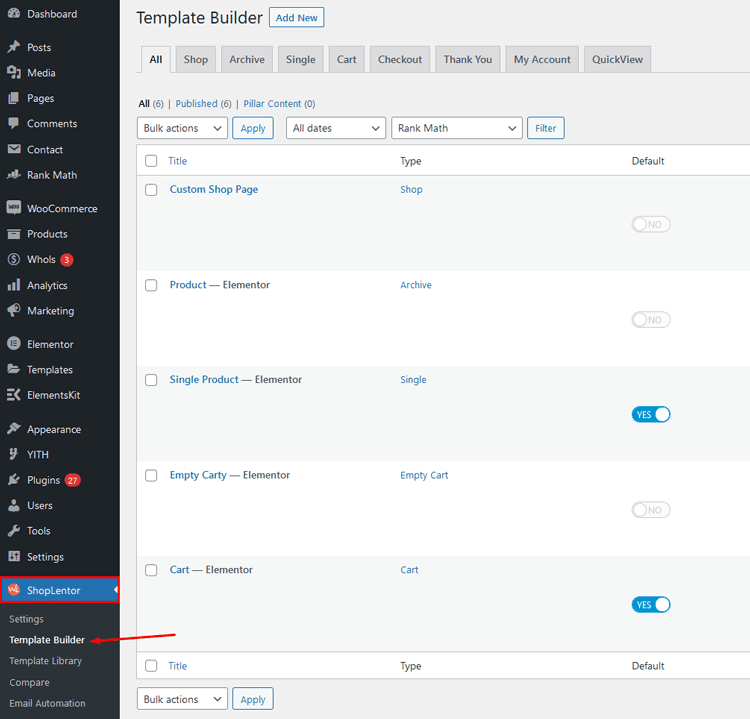
Go to ShopLentor → Template Builder.
Click Add New (top right).
In the dialog box, set:
Template Name: something clear (e.g., “WooCommerce Cart Offer Popup”).
Template Type: select Popup.
Editor: select Elementor.
Click Edit Template to open Elementor.
Step 4 – Design the WooCommerce Popup in Elementor
Keep the WooCommerce popup focused on a single conversion goal:
Recommended layout for a WooCommerce promo popup:
- Row 1: Headline — “Get 10% Off Your Order Today”
- Row 2: 1–2 lines of supporting text — “Use code SAVE10 at checkout. Valid this week only.”
- Row 3: CTA Button — “Shop Now” or “Copy Code”
- Optional: A small product image or icon (keep file size under 50KB).
Avoid overcrowding the popup with too many choices — one clear offer converts better than three mixed messages.
Step 5 – Configure Popup Settings: Conditions, Triggers, and Behavior
After designing the layout, open the Popup Settings panel in ShopLentor.
A) Conditions — Where the popup appears
Control which WooCommerce pages show this popup:Condition Example use case All pages Sitewide announcement (use sparingly) WooCommerce pages Show on all store pages Product pages only Show on individual product detail pages Product category Show only on “Sale” or “New Arrivals” category Cart page Show a cart-abandonment offer Checkout page Use only for critical messages (avoid distracting at payment step)
B) Triggers — When the popup appears
| Trigger | Best for |
| Time delay (5–10 sec) | Promo offers; let users browse first |
| Scroll percentage | Engagement-based; shows mid-content |
| Exit intent | Discount or last-chance offer before leaving (desktop) |
| Page load | Urgent announcements only |
C) Display Behavior
- Enable the close button — always.
- ESC key to close — always.
- Overlay click to close — recommended.
- Disable page scroll — avoid unless absolutely necessary; it harms UX.
- Show once per session — prevents showing every page view.
[Screenshot: ShopLentor Popup Settings → Conditions / Triggers / Behavior tabs]
Step 6 – Save and Publish the WooCommerce Popup
- Click Save Settings in the Popup Settings panel.
- Click Publish in Elementor.
- Test in incognito mode:
- Visit the target page (product/category/cart).
- Confirm the popup appears at the right trigger.
- Confirm it is fully visible and functional on mobile.
- Confirm it closes correctly.
How to Create a Newsletter or Subscription Popup in WordPress
A newsletter popup and a subscription popup in WordPress serve the same goal: capture email addresses and add them to a mailing list. The cleanest method to add this type of popup in WordPress is:
Step 1 – Create Your Email Signup Form and Copy the Shortcode
Your email marketing plugin (FluentCRM, Mailchimp for WordPress, MailPoet, etc.) will generate a form shortcode.
Example using FluentCRM:
Install and activate FluentCRM.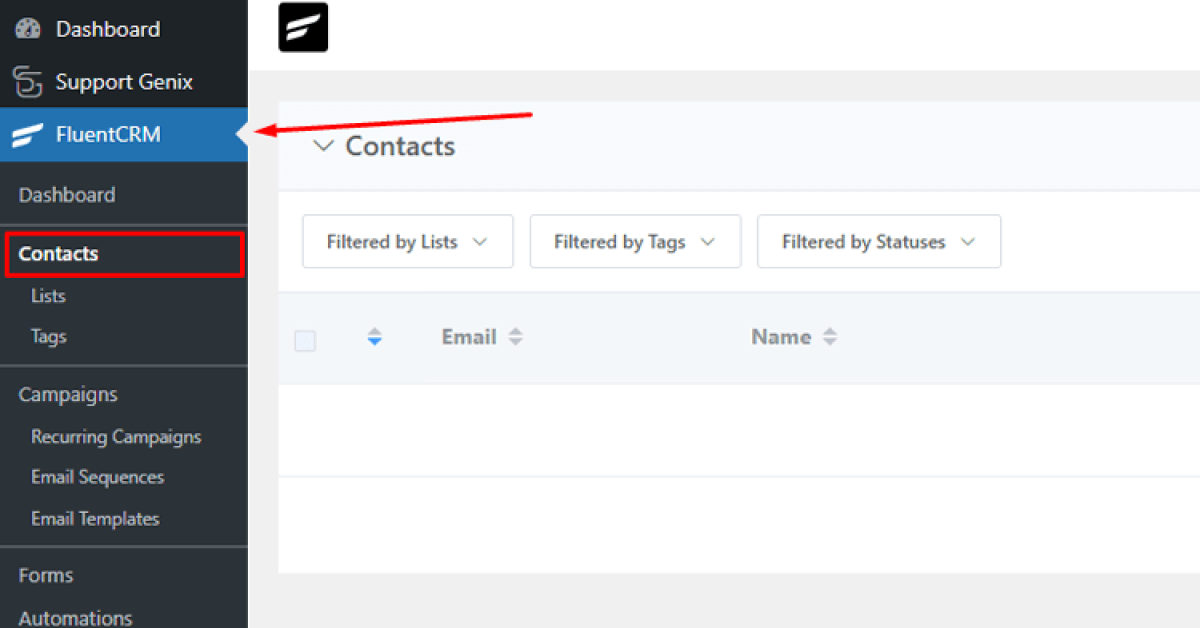
Click Lists or Tags to begin creating them.
To create a List: Click “Create List.”
Enter a title, slug, and optional internal subtitle. Click “Create.”
To create a Tag: Click “Create Tag.”
Add a title, slug, and optional subtitle. Click “Create.”
To create a Subscription Form: Navigate to Forms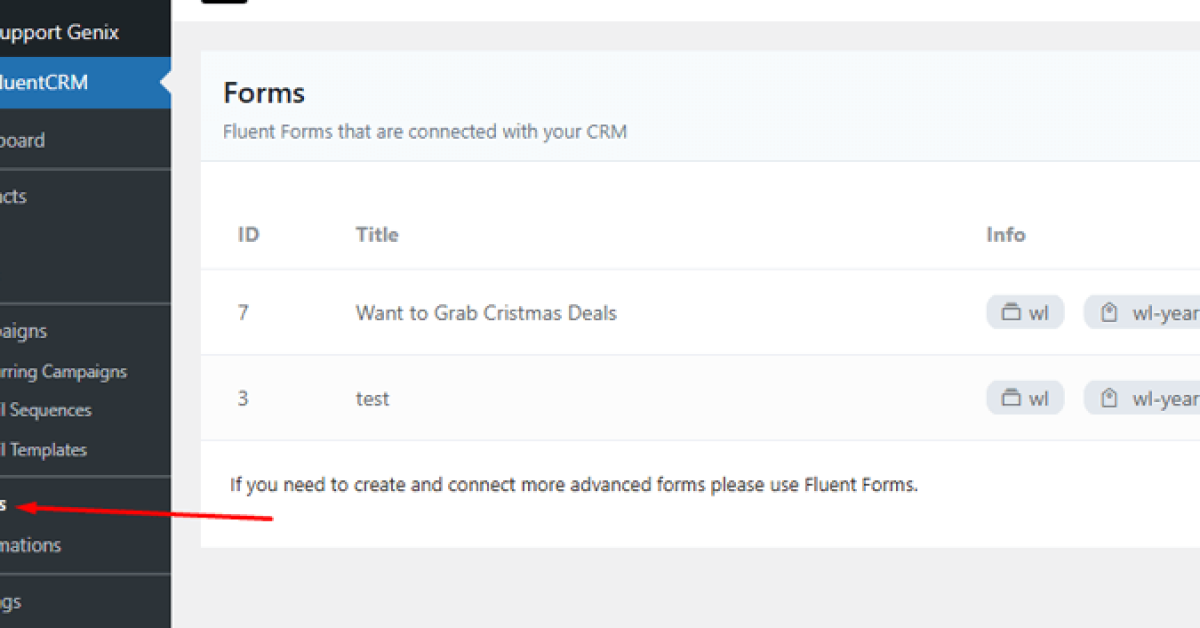
and click “Create a New Form.”
Select a pre-built template or start fresh.
Enter the form title and assign it to a List and Tags you’ve created.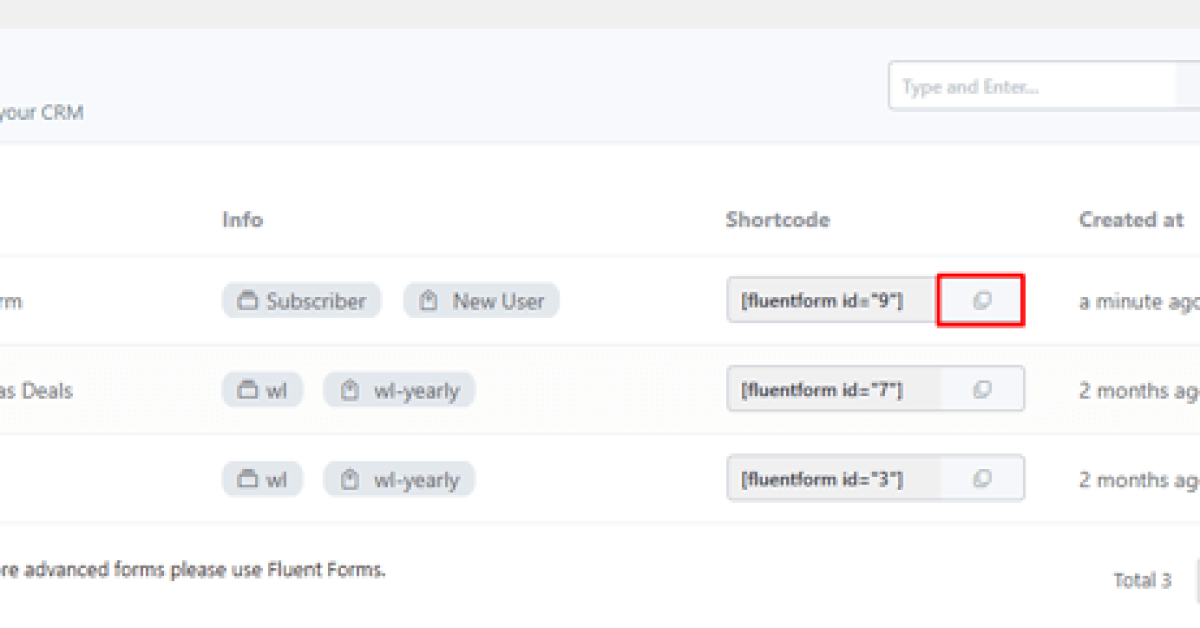
Copy that shortcode. Once your form is ready, copy its shortcode. It will look like this:
Add the Form to Your Popup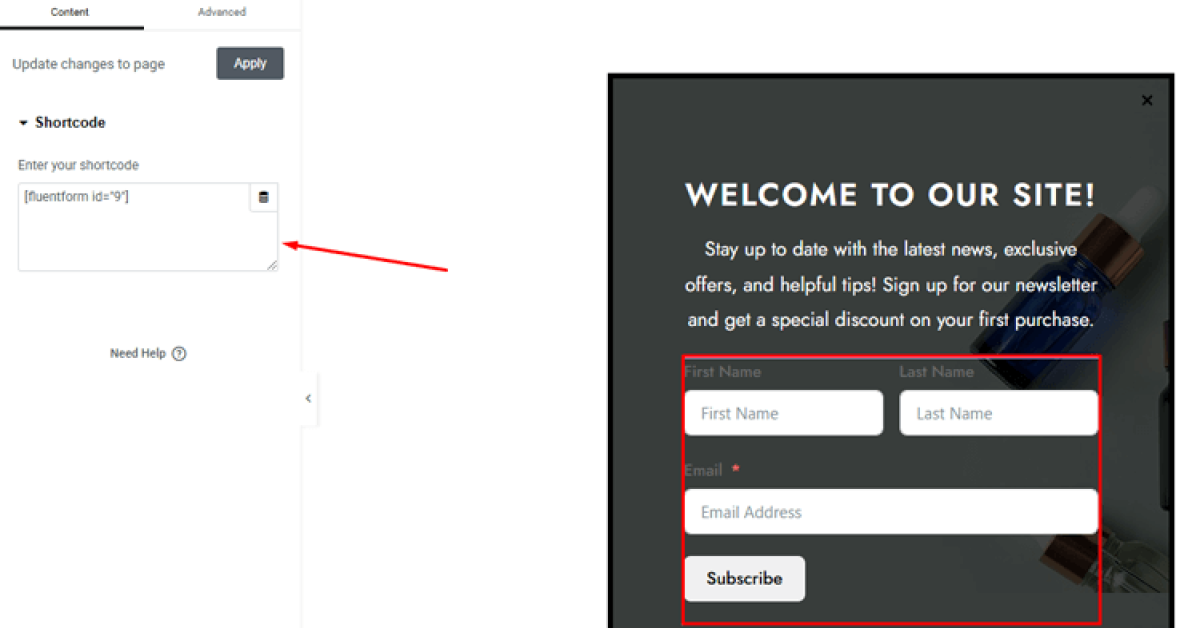
Open the ShopLentor popup template editor. Paste the shortcode you copied from FluentCRM into the pop-up content area.
Step 2 – Create a Popup Template in ShopLentor (for Newsletter)
Follow Steps 1–3 from the WooCommerce popup section to: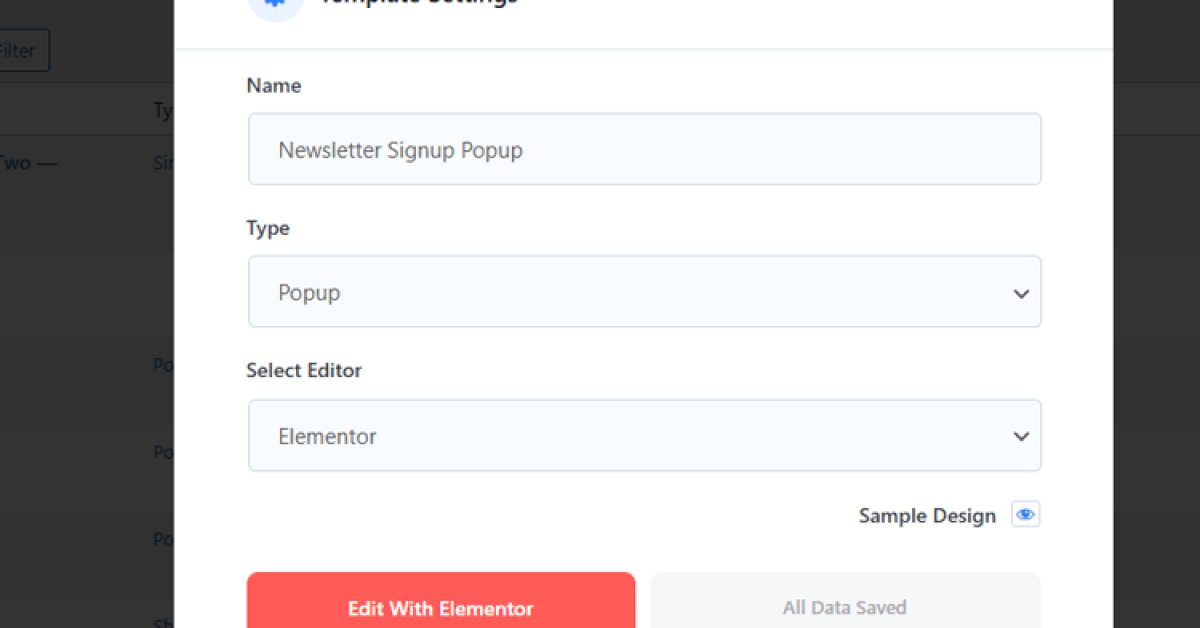
- Install ShopLentor.
- Go to ShopLentor → Template Builder
- Click “Add New Template”
- Go to template setting an
- Create a new Popup template named “Newsletter Signup Popup.”
Step 3 – Add the Email Form Shortcode Inside the Popup
- In Elementor (editing the newsletter popup template):
- Add a Shortcode widget (standard Elementor widget).
- Paste your email form shortcode (e.g., [fluentcrm_form id=”1″]) into the shortcode field.
- Add a short headline above the shortcode widget (e.g., “Join 5,000+ subscribers — get weekly WordPress tips”).
- Add a small privacy note below the form (e.g., “No spam. Unsubscribe any time.”) — this increases conversion trust.
Step 4 – Configure Newsletter Popup Triggers and Frequency

Newsletter popups work best when visitors have spent some time on the page.
Recommended settings:Setting Recommended value Trigger Time delay (8–12 seconds) OR scroll 40–50% Exit intent Great for blog posts and product pages Cookie duration 7–30 days (don’t show again to recent subscribers) Show frequency Once per session minimum Exclude pages Checkout, Thank You, existing subscriber pages (if detectable)
Step 5 – Test the Full Signup Flow End-to-End

Before going live, run a full test:
- Open the target page in incognito mode.
- Wait for the popup trigger (or scroll to the threshold).
- Enter a test email address and submit the form.
- Confirm:
- The success message appears (“Thank you for subscribing!”).
- The test email appears in FluentCRM (or your email tool) with the correct tag/list.
- The popup closes after submission (or shows a thank-you state).
- Test on mobile, confirm form fields are readable, and the submit button is easily tappable.
Best Practices for High-Converting Popups in 2026
Learning how to add popup in WordPress is only half the job. The second half is making sure those popups actually work — and don’t drive visitors away.
Do’s
- One offer per pop-up. A single clear CTA always outperforms a cluttered popup with multiple actions.
- Use benefit-focused headlines. “Get 10% off” > “Subscribe to our newsletter.”
- Set frequency limits. Show the pop-up at most once per session; use a cookie to suppress it for 7–30 days after dismissal.
- Target the right pages. Product pages, blog posts, and landing pages are ideal. Checkout pages should almost always be excluded.
- Test two versions. Alternate between two different headlines or offer types for 2–4 weeks and keep the better performer.
- Add a privacy note. “We respect your privacy. Unsubscribe any time.” visibly increases signup rates.
- Keep forms minimal. An email address is enough for a newsletter pop-up. Add name only if you need personalization.
Don’ts
- Never block mobile screens entirely. Google penalizes sites with intrusive interstitials on mobile (this is a confirmed ranking factor).
- Don’t hide the close button. Making it hard to close increases bounce rate, not conversions.
- Don’t show popups on first page load immediately. Give visitors at least 5–8 seconds or let them scroll first.
- Don’t ignore Core Web Vitals. Heavy popup scripts, large images, or layout-shifting popups hurt LCP, INP, and CLS scores — all of which directly affect Google rankings in 2026.
- Don’t run multiple popups simultaneously. If a visitor could see 3 different popups on one page, your popup strategy needs simplification.
Popup Types at a Glance: Which One Should You Use?
| Popup Type | Best Plugin/Widget | Best Trigger | Best Used On | Main Goal |
| Basic modal popup | HT Mega Modal widget | Button click or time delay | Blog posts, landing pages | Announcements, simple CTAs |
| WooCommerce promo popup | ShopLentor Popup Builder | Scroll or time delay | Product pages, category pages, cart | Coupons, offers, sales |
| Newsletter subscription popup | ShopLentor + email tool form | Time delay (8–12 sec) or scroll 40% | High-traffic blog posts, homepage | Email list growth |
| Exit intent popup | ShopLentor Popup Builder | Exit intent | Product pages, blog posts (desktop) | Cart abandonment, last-chance offer |
| Announcement popup | HT Mega or ShopLentor | Page load | Site-wide or specific landing pages | Policy updates, shipping notices |
Frequently Asked Questions
Q: How do I add a popup in WordPress without coding?
To add popup in WordPress without writing any code, install a visual popup builder plugin like HT Mega or ShopLentor, enable the popup module, and design your popup using Elementor’s drag-and-drop editor. Set your conditions and triggers in the plugin settings and publish — no code required at any step.
Q: What is the easiest way to add popup in WordPress for beginners?
The easiest way to add popup in WordPress is to use the HT Mega Modal widget inside Elementor. Install HT Mega, enable the Modal element, drag it onto your page in Elementor, add your content, and choose a trigger (button click or time delay). The entire setup takes under 10 minutes.
Q: How do I add a popup in WordPress that only shows on WooCommerce product pages?
Use ShopLentor’s Popup Builder module. After creating your popup template, open Popup Settings and under Conditions, select “Product Pages” or a specific product category. This limits the popup to only those WooCommerce pages so it does not disrupt browsing elsewhere.
Q: How do I create a newsletter popup in WordPress?
To create a newsletter popup in WordPress:
(1) Create an email signup form in your email tool (FluentCRM, Mailchimp, etc.) and copy its shortcode.
(2) Create a popup template in ShopLentor.
(3) Add a Shortcode widget inside the popup and paste the form shortcode.
(4) Set a time delay or scroll trigger and configure cookie duration so it does not repeat.
(5) Test end-to-end: submit a test email and confirm it appears in your email tool.
Q: Will pop-ups hurt my WordPress site’s SEO in 2026?
Popups can hurt SEO if they block the main content on mobile (Google’s intrusive interstitial penalty), if they cause layout shift (CLS), or if they slow down the page (LCP/INP). Well-coded, lightweight popups with proper delay triggers and a visible close button do not harm rankings. Follow the best practices section above to stay on the safe side.
Q: Can I add a popup in WordPress to collect both name and email?
Yes. In your email tool’s form builder (e.g., FluentCRM), add a “First Name” field alongside the email field before generating the shortcode. Paste the updated shortcode inside your ShopLentor popup template. Keep it to two fields only – longer forms typically have lower conversion rates.
Q: How many popups should I run at the same time on my WordPress site?
As a rule, run one active popup per “zone” — one sitewide newsletter popup, one product-page offer popup, and one cart popup. Running more than 2–3 popup campaigns simultaneously increases the chance of popup conflicts and visitor frustration. Quality and targeting matter more than volume.
Q: How do I stop a popup from showing again after someone subscribes?
Use the cookie duration setting in your popup builder to prevent the popup from reappearing for 7–30 days after a user dismisses or submits it. Some advanced setups also allow hiding the popup for users who are already logged in or who have already submitted the form, check your popup plugin’s advanced settings for these options.
Q: Can I integrate popups with email marketing services?
Yes, many WordPress popup plugins allow integration with popular email marketing services. This enables you to seamlessly capture email addresses and automatically add subscribers to your email lists.
Q: Are there guidelines for using popups effectively?
Yes, effective use of popups involves factors like clear messaging, attractive design, proper timing, easy close options, and respecting user preferences. A well-balanced approach can enhance user engagement.
Conclusion
As we come to a close, it’s worth recapping the importance and benefits of using popups on your WordPress site. First and foremost, popups can help you grow your email list and capture leads. They can also be used to announce promotions, showcase new products, or encourage visitors to take specific action.
Whether you’re using a simple WordPress popup form or a more complex design, the key is to make it eye-catching and engaging. By harnessing the power of popups, you can better connect with your audience and achieve your goals.