How to Develop a WordPress Plugin (Step-by-Step Guide)
Creating a WordPress plugin can seem daunting at first, but it can be a rewarding experience that allows you to add custom functionality to your website. A plugin is essentially a set of code that extends the functionality of WordPress, allowing you to add new features, modify existing ones, or automate tasks.
To create a WordPress plugin, you will need a basic understanding of PHP, WordPress’ plugin architecture, and the WordPress APIs. In general, the process involves creating a new directory for your plugin in the WordPress plugins directory, writing the plugin code, and then activating the plugin from the WordPress admin panel.
In this guide, we’ll walk you through how to develop a WordPress plugin step by step. Whether you’re a seasoned developer or just getting started with WordPress, this guide will help you get started with creating your own custom WordPress plugin.
Key Takeaways:
- Learn how plugins extend functionality and enhance WordPress websites.
- Discover how a local development setup helps you safely test and develop plugins.
- From planning functionality to packaging, step-by-step guidance simplifies plugin creation.
- Learn how to add custom functionality with WordPress hooks and filters.
- Understand how to troubleshoot issues and ensure your plugin works perfectly before distribution.
- Gain insight into sharing plugins and building more complex custom WordPress plugins.
How to Develop a WordPress Plugin: Step by Step
Step 1: Define the plugin’s functionality
Before you get started with coding, decide exactly what functionality you want your plugin to have. Is it going to add new features or extend existing ones?
Step 2: Set up a development environment
To start writing your plugin, you’ll need to set up a local development environment with WordPress installed. This will allow you to test your plugin without making changes to your live site.
Setting up a Development Environment for a WordPress Plugin Requires the Following Steps:
1. Install the latest version of WordPress on your local machine.
2. Download and install a code editor such as Visual Studio Code or Sublime Text.
3. Set up a testing server such as XAMPP, MAMP, or WAMP.
4. Enable debugging in WordPress by adding the following line to your wp-config.php file: define(‘WP_DEBUG’, true);
Step 3: Create a plugin directory
Next, create a new directory with a name of your choice for your plugin in the wp-content/plugins directory of your WordPress installation.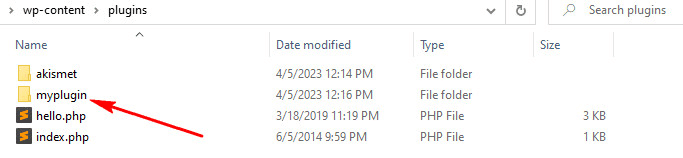
Step 4: Create a main plugin file
In your newly created plugin directory, create a new PHP file and name it after your plugin. This file will be the main plugin file that WordPress will load. For example, if you named your plugin myplugin, your main plugin file should be named myplugin.php.
Step 5: Add Plugin Information
Add the following plugin header information at the top of the main plugin file. This information is used by WordPress to identify your plugin.
<?php

/**
* Plugin Name: My Plugin
* Plugin URI: https://example.com/my-plugin/
* Description: A brief description of my plugin.
* Version: 1.0.0
* Author: Your Name
* Author URI: https://example.com/
* License: GPL2
**/
This information will be displayed on the Plugins page in the WordPress admin area.
Step 6: Add functionality with hooks and filters
If your plugin requires code that modifies templates or triggers other processes upon certain events, you can use WordPress hooks and filters to add custom functionality to your plugin.
This can include custom post types, shortcodes, widgets, or other features. In this tutorial, we will create a basic function that adds a message to the top of each post using a filter hook.
function myplugin_add_message( $content ) {

return '<div class="myplugin-message">This is my basic plugin!</div>' . $content;

}
add_filter( 'the_content', 'myplugin_add_message' );
Step 7: Add plugin settings and options(Optional)
Depending on your plugin’s functionality, you may need to add settings or options that allow users to customize how the plugin works.
Step 8: Test & debug your plugin
Once you’ve completed the above steps, you can test your plugin by navigating to the Plugins page in the WordPress admin area and activating your plugin. Then, go to any post on your website, and you should see the message added by your plugin.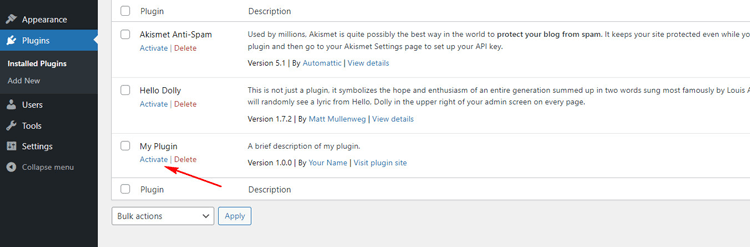
Debug any issues using WordPress debugging tools and error logs.
Step 9: Package and distribute your plugin
Finally, package your plugin into a zip file and distribute it to other WordPress users or submit it to the WordPress plugin repository.
That’s it! You’ve just created a basic WordPress plugin. Of course, there’s a lot more you can do with plugins, such as adding options pages, creating custom post types, and integrating with other plugins. But this should give you a good starting point to build upon. Happy coding!
Here are a Few Resources for WordPress Plugin Development
Before you start building your own plugin, it helps to explore trusted resources for guidance. These references can make WordPress plugin development easier and provide tips for creating effective plugins.
- WordPress Codex: The official documentation for WordPress provides a wealth of information on plugin development, including best practices and code snippets.
- WordPress Developer Handbook: This comprehensive guide covers all aspects of WordPress development, including creating plugins, themes, and custom functionality.
- WordPress Plugin Boilerplate: This project provides a standardized, organized structure for plugin development, with a focus on best practices and efficient code.
- WordPress.tv: WordPress.tv is a video resource that provides tutorials and talks on WordPress development. It includes a dedicated section for plugin development
- GitHub: GitHub hosts a wide range of open-source WordPress plugins, which can serve as examples or starting points for your own development.
- Udemy: Udemy offers a variety of online courses on WordPress plugin development, ranging from beginner-level introductions to advanced topics like creating custom APIs and integrating third-party services.
Frequently Asked Questions
What tools do I need to develop a WordPress plugin?
What tools do I need to develop a WordPress plugin?
Can I create a WordPress plugin without coding experience?
While basic coding knowledge in PHP is recommended, beginners can start with simple plugins and gradually learn WordPress plugin development through tutorials or courses.
How do I add settings or options to my plugin?
You can create an options page using WordPress APIs, allowing users to customize your plugin’s functionality in a user-friendly way.
What are WordPress hooks and filters?
Hooks and filters let you modify or extend WordPress functionality without changing core files. They are essential tools for custom WordPress plugin development.
How do I ensure my plugin is compatible with WordPress updates?
Regularly test your plugin on the latest WordPress version, follow best coding practices, and use hooks and filters rather than modifying core files.
Where can I learn advanced WordPress plugin development?
Advanced learning options include online tutorials, WordPress plugin tutorial videos, or platforms like Udemy, which offer courses on WordPress plugin development, covering the building of complex plugins and integrations.
Conclusion
Creating a WordPress plugin may seem challenging at first, but with the right approach, anyone can develop WordPress plugins effectively. By following this guide, you’ve now learned how to develop a WordPress plugin step by step.
This includes defining functionality, setting up a development environment, testing, debugging, and distributing your plugin. Whether you’re a beginner or aiming for advanced custom WordPress plugin development, these skills provide valuable opportunities.
You can extend WordPress functionality, enhance user experience, and even contribute to the WordPress community. Ready to put your knowledge into practice? Start today and create a plugin in WordPress that solves a problem or adds a unique feature to your site.