
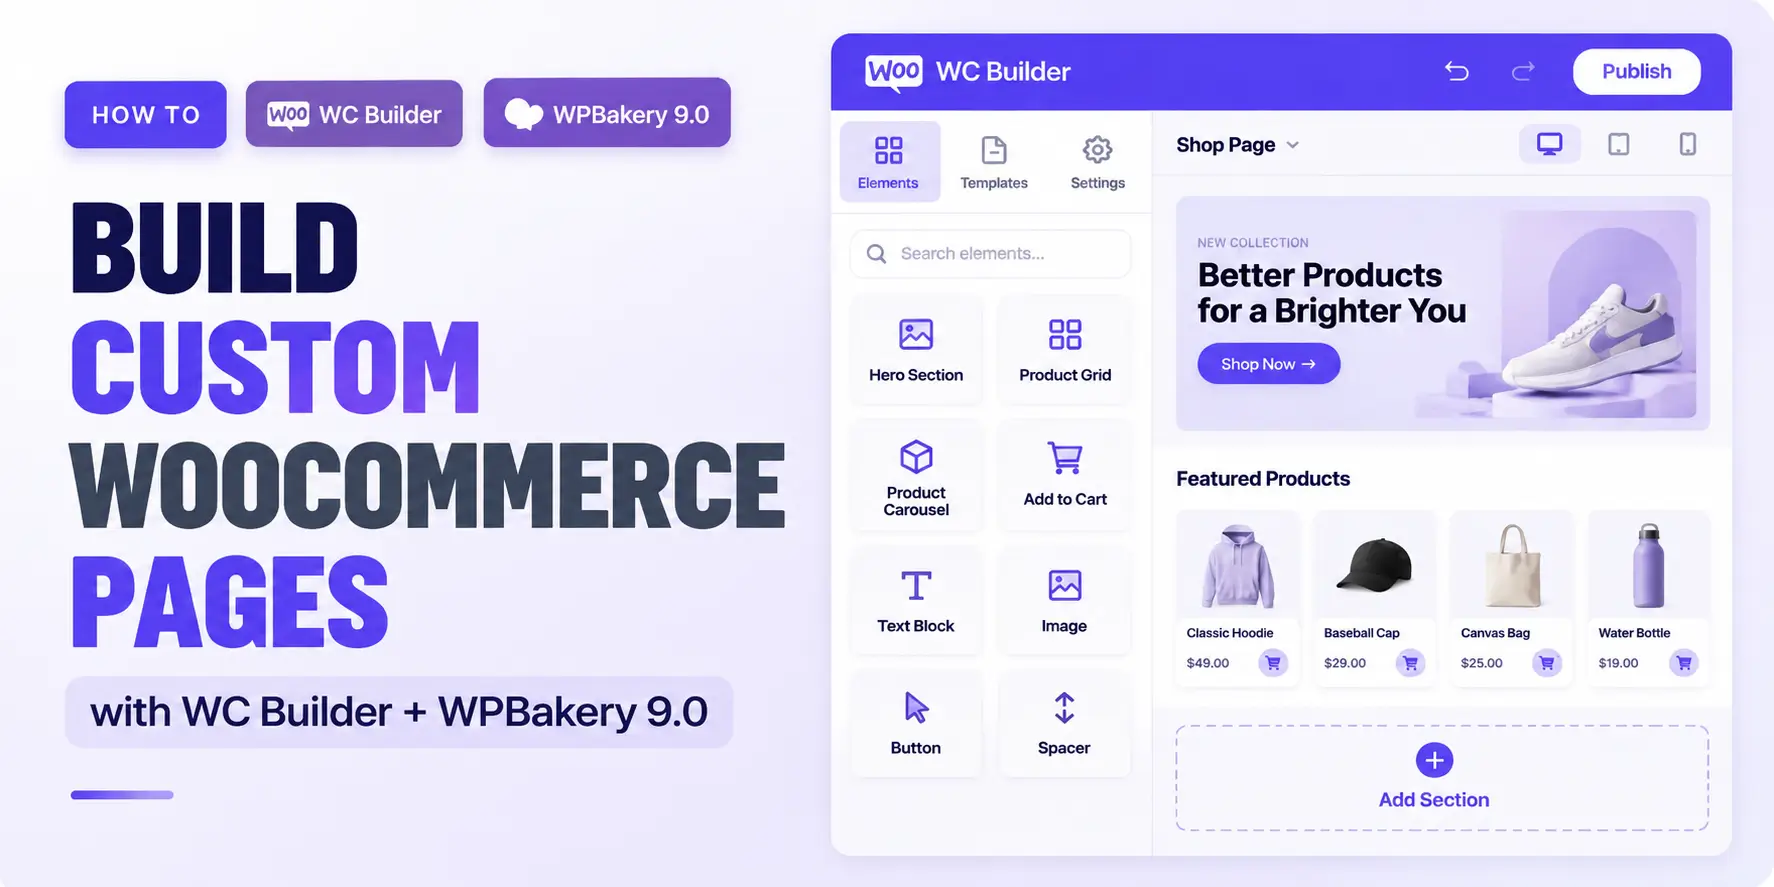
How to Build Custom WooCommerce Pages with WC Builder and WPBakery 9.0

Quick Answer: WC Builder is a WooCommerce add-on for WPBakery Page Builder that lets you build Shop, Product, Cart, Checkout, My Account, and Thank You pages visually, without code. WC Builder now works with WPBakery 9.0’s refreshed editor. This guide walks through setup, page building, useful elements, and troubleshooting for the updated workflow.
If your WooCommerce store already runs on WPBakery, you may eventually run into a common limitation: WooCommerce’s default templates are functional, but they weren’t designed with your brand or layout preferences in mind.
Rebuilding a Shop or Product page from scratch usually means custom code or switching your entire page-building stack, neither of which is appealing if you’re already comfortable in WPBakery.
That’s the gap WC Builder fills. It extends WPBakery with WooCommerce-specific elements so you can redesign store pages inside the same drag-and-drop editor you already use.
With WPBakery 9.0 now live and bringing a noticeably different editing interface, it’s a good time to walk through how WC Builder fits into that updated workflow, step by step.
What Is WC Builder for WPBakery?
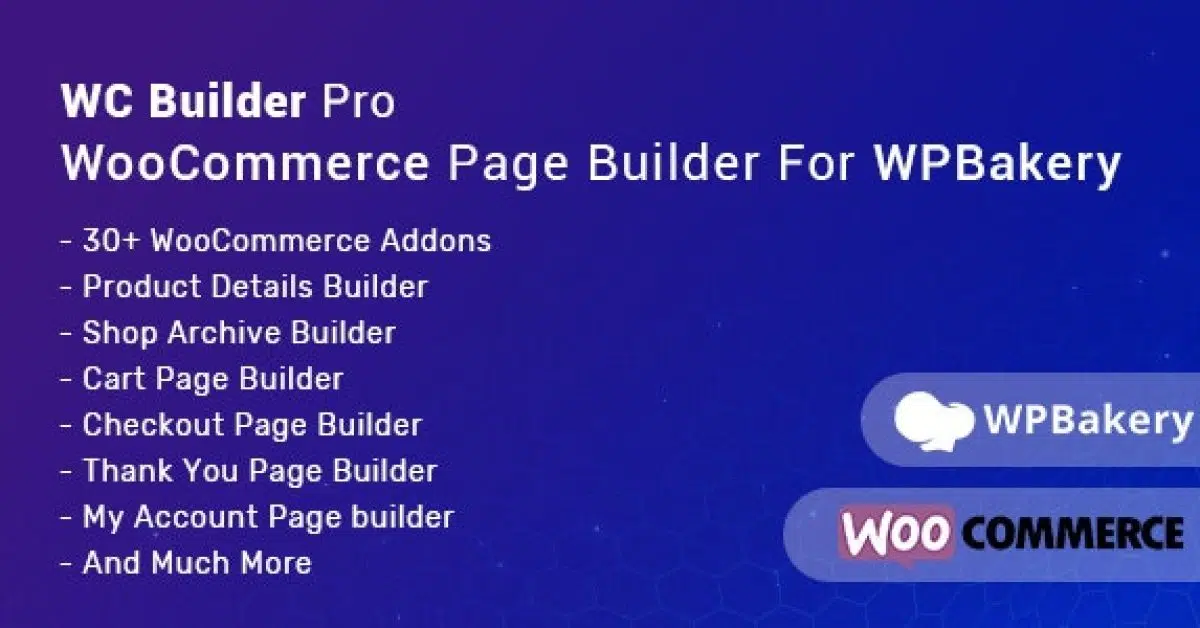
WC Builder is a WooCommerce add-on plugin built specifically for WPBakery Page Builder. Rather than replacing WPBakery, it adds WooCommerce-focused building blocks, product elements, cart and checkout components, and account page controls directly into the WPBakery element library.
Definition: WC Builder is a WordPress plugin that gives WPBakery Page Builder dedicated WooCommerce elements, allowing store owners to visually design Shop, Product Details, Cart, Checkout, My Account, and Thank You pages without writing code.
According to HasThemes’ official product page, WC Builder Pro includes 34+ custom WooCommerce addons and supports building or customizing six core WooCommerce page types: Shop, Product Details (Single Product), Cart, Checkout, My Account, and Thank You.
It works through the standard WPBakery drag-and-drop interface, so if you already know how to build a row, add a column, and insert an element in WPBakery, the learning curve for WC Builder itself is short.
Someone already invested in WPBakery would choose WC Builder over switching page builders because it keeps their existing pages, templates, and workflow intact while adding the WooCommerce-specific flexibility that WPBakery doesn’t include out of the box.
Is WC Builder Compatible with WPBakery 9.0?
Yes, WC Builder has been updated to work with WPBakery 9.0. This means WC Builder’s WooCommerce elements continue to function inside the WPBakery 9.0 editing environment.
WC Builder version 1.2.2, released August 19, 2026, states in its official WordPress.org changelog that it was tested for compatibility with the latest version of WPBakery Page Builder. This update came after WPBakery 9.0 was released on July 29, 2026, and after the WPBakery 9.0.1 maintenance release on August 5, 2026.
That said, “compatible” here means WC Builder’s elements and workflow operate correctly within the new WPBakery 9.0 editor; it does not mean every visual detail is identical to older WPBakery versions, since WPBakery 9.0 changed several parts of the editor interface itself.
If you’re upgrading an existing WC Builder site, treat the update the same way you would any major page-builder version change: test on staging before pushing to production.
What’s New in WPBakery 9.0 for WC Builder Users?
WPBakery 9.0, released July 29, 2026, is described by WPBakery as its “biggest editor experience update in years,” with a redesigned interface, rebuilt drag-and-drop engine, and updated attribute controls, alongside more than 200 smaller improvements.
A follow-up maintenance release, 9.0.1, shipped shortly after on August 5, 2026, with additional fixes. Not every change in that release is relevant to someone customizing WooCommerce pages, so here’s what actually affects your day-to-day editing:
- Refreshed editing interface: WPBakery redesigned the navigation bar, element-edit window layout, template window, tooltips, and settings/SEO windows. If you’ve used WPBakery before, expect the general layout and menus to look and feel different, including when you configure WC Builder’s WooCommerce elements.
- Improved element and attribute controls: The attributes UI and frontend editor controls were rebuilt, which changes how parameter fields and settings panels appear when you open any element, including WC Builder’s.
- Updated drag-and-drop experience: WPBakery’s drag-and-drop library was improved, which affects how you reposition rows, columns, and elements, including WooCommerce elements, on the canvas.
- Improved CSS loading structure: WPBakery now loads only the CSS actually in use and splits CSS files to reduce page weight, a change that can influence page-load behavior on WooCommerce pages built with many elements.
It’s worth being precise here: these are WPBakery platform changes, not features added by WC Builder. WC Builder’s job is to supply the WooCommerce elements; WPBakery 9.0 changed the editor shell those elements live inside.
What You Need Before You Start
Before building or updating any WooCommerce page, confirm you have:
- A working WordPress installation
- WooCommerce installed and configured with at least a few sample products
- WPBakery Page Builder updated to version 9.x
- WC Builder (or WC Builder Pro, depending on which pages you want to customize) installed and activated
- A staging environment or backup, especially before editing live Shop, Cart, or Checkout pages
Testing layout changes on staging matters more for WooCommerce pages than for ordinary content pages, because Cart and Checkout directly affect whether customers can complete a purchase. A layout mistake on a blog post is cosmetic; the same mistake on Checkout can cost sales.
How to Install and Set Up WC Builder
- Install and activate WooCommerce: If it isn’t already active, make sure your shop has at least a few products configured.
- Install and activate WPBakery Page Builder 9.x: Using the plugin package available through your WPBakery license or your theme/plugin bundle, depending on how your site obtained WPBakery.
- Install and activate WC Builder: The same way, through Plugins → Add New, or by uploading the plugin ZIP file if you purchased it directly from HasThemes.
- Check for a setup notice: WC Builder typically prompts you to install WPBakery if it isn’t detected, which confirms the two plugins recognize each other.
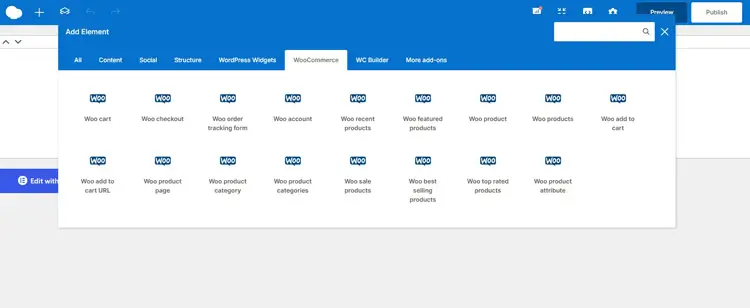
- Open a WooCommerce page in the WPBakery editor, for example, the Shop page, and check that a WooCommerce-related element category or set of elements is available in the WPBakery “Add Element” window. This confirms the WooCommerce elements are loaded correctly inside the updated 9.0 editor.
If you’re new to WPBakery itself, it may help to first review a general guide on how to use WPBakery Page Builder before diving into WooCommerce-specific customization.
How to Create a Custom WooCommerce Shop Page with WC Builder
- Open the Shop page in the WPBakery editor (Frontend or Backend editor, depending on your preference).
- Start with a row and column structure. Decide whether your shop grid needs a sidebar (for filters) or a full-width product grid.
- Add WooCommerce shop-related elements from the element library; this is where WC Builder’s product-listing elements come in, letting you control how products are displayed instead of relying purely on the default archive template.
- Arrange product information such as images, titles, and pricing in the order that matches your store’s visual priorities.
- Configure element settings — adjust columns per row, pagination behavior, and any filtering options the element exposes.
- Check the responsive preview using WPBakery’s device preview controls to confirm the grid holds up on tablet and mobile widths.
- Preview the page before publishing, and view it as a logged-out visitor to make sure nothing displays differently than expected.
How to Build a Custom Single Product Page
A Single Product page carries more functional weight than the Shop page, since it’s where the actual add-to-cart decision happens. A practical layout groups information the way shoppers naturally scan it:
Desktop layout example:
- Left column: Product gallery/image area.
- Right column: Product title, rating (where relevant), price, short description, variation/options, add-to-cart action.
- Below: Tabbed product information (description, specifications) and reviews.
- Bottom: Related products.
This structure is practical because it keeps the purchase decision (image, price, add-to-cart) above the fold, while supporting details sit below, not because it’s a guaranteed conversion formula. Every store’s audience and products differ, so treat this as a sound starting point rather than a fixed rule.
When building this with WC Builder, add each functional piece- gallery, title, price, add-to-cart, tabs, reviews, related products- as its own element rather than trying to recreate the whole page in one block. This makes it far easier to adjust spacing or reorder sections later without rebuilding the page.
How to Customize the WooCommerce Cart Page
The Cart page has one job: make it obvious what’s in the cart and how to proceed to checkout. When customizing it with WC Builder, prioritize clarity over decoration, keep item details, quantity controls, and the checkout button visually prominent, and avoid adding unrelated content blocks that push the checkout action further down the page.
Test the cart with multiple products, and with variable products if your store sells them, to confirm quantities and totals still calculate correctly after any layout change.
How to Customize the WooCommerce Checkout Page
Checkout customization deserves the most caution of any page in this workflow, because layout changes here can directly affect whether an order completes successfully. Keep required fields, payment options, and the order summary clearly visible, and resist the temptation to add extra design elements that increase visual complexity without adding value to the purchase flow.
After making any Checkout page changes, place several test orders, including with different payment methods if you offer more than one, to confirm the checkout still functions correctly before the change goes live on your production site.
How to Customize My Account and Thank You Pages
The My Account page is where logged-in customers manage orders, addresses, and account details, while the Thank You page confirms a completed order. Customization here is usually about branding consistency, matching these pages to your site’s visual style, rather than adding new functionality.
Keep changes proportional: these pages don’t need the same level of layout complexity as Shop or Product pages, since their job is confirmation and account management, not product discovery.
Useful WC Builder WooCommerce Elements
HasThemes states that WC Builder Pro includes 34+ custom WooCommerce addons for building these pages. The table below groups verified WC Builder page-building capabilities by the task they support, rather than listing unverified individual element names.Page-Building Capability Used For Typical Placement Shop/product listing elements Displaying products in a grid or list Shop/archive pages Product detail elements Core product information Top of Single Product page Add-to-cart elements Purchase action Single Product page Cart display elements Showing cart contents and totals Cart page Checkout form elements Collecting checkout information Checkout page Account management elements Order history and account details My Account page
For the exact names and full list of all 34+ addons, refer to the official WC Builder product page, since HasThemes maintains the current, authoritative list.
Example: Building a Complete Product Page
Consider a clothing store that wants to move away from its theme’s default product layout while keeping WPBakery as its main page builder.
Rather than rebuilding the entire site, the practical approach is to open just the Single Product template in WPBakery, add a WC Builder gallery element on one side and a stacked column of title, price, and add-to-cart elements on the other, then add tabs below for sizing information and reviews.
This keeps the rest of the site untouched while giving the product page a custom look, demonstrating how WC Builder slots into an existing WooCommerce workflow rather than requiring a full rebuild.
Best Practices When Using WC Builder with WPBakery 9.0
- Update WPBakery and WC Builder carefully, one at a time, rather than updating everything simultaneously.
- Take a full backup before making layout changes to Shop, Cart, or Checkout pages.
- Test any update on a staging site first, especially after moving to WPBakery 9.0.
- Check mobile and tablet layouts using WPBakery’s responsive preview.
- Preview different product types (simple, variable) to confirm layouts hold up across your catalog.
- Test add-to-cart behavior after any Product page change.
- Run through the full cart-to-checkout flow after Cart or Checkout edits.
- Verify My Account and Thank You pages still display order and account data correctly.
- Watch for theme styling conflicts that may override WC Builder element styles.
- Avoid overcrowding product layouts with too many elements competing for attention
- Optimize product images for size before uploading.
- Check page speed after significant layout changes. WPBakery 9.0 introduced improved CSS loading and CSS file splitting, but it is still good practice to test the performance of your finished WooCommerce layouts.
- Keep essential purchase information (price, add-to-cart, checkout button) easy to find.
Troubleshooting Common WC Builder and WPBakery Issues
WC Builder elements aren’t appearing in the WPBakery editor: Confirm both WooCommerce and WPBakery are active, and that WC Builder itself is activated; WC Builder depends on both plugins being present and enabled.
Layout looks different after updating WPBakery to 9.0: Clear relevant caches, review custom CSS, and confirm the responsive settings on affected rows and columns. If an existing layout looks different after the update, test it on staging and check for theme, custom CSS, or third-party add-on conflicts before treating it as a WPBakery or WC Builder issue.
Product information isn’t displaying correctly: Check that the page is actually using the correct WooCommerce template context (Shop, Single Product, etc.) rather than a generic page template, since WooCommerce elements typically expect that context to pull the right data.
Cart or checkout behaves unexpectedly after a layout change: Temporarily disable other WooCommerce-related plugins to rule out a conflict, confirm your WooCommerce settings (shipping, payment gateways) are still correctly configured, and re-test the flow on staging before pushing changes live.
None of these should be assumed to be a known WC Builder bug unless confirmed through HasThemes’ own release notes or support channels; most layout issues after a page-builder update trace back to caching, theme CSS conflicts, or configuration rather than the plugin itself.
Should You Use WC Builder with WPBakery 9.0?
WC Builder makes the most sense if you’re already running WPBakery and want more visual control over WooCommerce-specific pages without adding a second page-building tool or writing custom code.
It suits WordPress freelancers, agencies maintaining client WooCommerce stores, and designers who prefer visual editing over templating.
Before adding it, evaluate your current theme’s WooCommerce templates, how much customization you actually need, and whether your existing workflow already covers your requirements.
WC Builder is most valuable when default WooCommerce templates are genuinely limiting your design, not simply as an added tool for its own sake.
If WPBakery is already part of your WooCommerce workflow and you want more control over store-specific pages, explore WC Builder – WooCommerce Page Builder for WPBakery and its WooCommerce-focused elements.
Video Presentation
WooCommerce Page Builder for WPBakery – WC Builder
Frequently Asked Questions
Is WC Builder compatible with WPBakery 9.0?
Yes. WC Builder has been updated to work with the WPBakery 9.0 editing environment, so its WooCommerce elements continue to function inside the redesigned editor.
What WooCommerce pages can I customize with WC Builder?
WC Builder Pro supports customizing the Shop, Product Details (Single Product), Cart, Checkout, My Account, and Thank You pages.
Do I need WPBakery to use WC Builder?
Yes. WC Builder is an add-on for WPBakery Page Builder and requires WPBakery to be installed and active.
Can I create a custom WooCommerce product page without coding?
Yes. WC Builder uses WPBakery’s drag-and-drop editor, so you can add and arrange WooCommerce elements visually without writing code.
Can WC Builder customize the WooCommerce Cart and Checkout pages?
Yes, WC Builder Pro includes support for building and customizing both Cart and Checkout pages.
Does WC Builder work on mobile devices?
WC Builder pages are built through WPBakery, which includes responsive preview and layout controls, so you can check and adjust how pages appear on mobile and tablet widths during editing.
What should I check after updating WPBakery to version 9.0?
Test your existing WooCommerce pages on staging first, check responsive layouts, clear caching, and confirm cart/checkout still function correctly, since WPBakery 9.0 changed several editor interface components.
Final Word
WPBakery 9.0 changes how the editor looks and feels, but the core task, building custom WooCommerce pages, still comes down to the same principles: keep purchase-critical information visible, test thoroughly, and treat Cart and Checkout changes with extra caution.
WC Builder’s role hasn’t changed with the update; it still supplies the WooCommerce-specific building blocks that let you shape Shop, Product, Cart, Checkout, My Account, and Thank You pages inside WPBakery’s visual editor.
If you already use WC Builder, verify your important WooCommerce layouts on staging after updating to WPBakery 9.0 before applying the update to a live store.
For a more introductory look at the base plugin, see HasThemes’ WooCommerce Page Builder for WPBakery guide.