How to Create Button in WordPress with Elementor- A Complete Guide
If you are looking for how to create button in WordPress with Elementor, the easiest method is to add a button widget inside the Elementor editor, enter your button text, add a link, and then customize its style, alignment, and icon settings. Elementor’s Button widget supports key options such as text, link, icon, icon position, spacing, alignment, hover styling, border, and padding.
Quick Answer
To create a button in WordPress with Elementor using HT Mega, install and activate Elementor and HT Mega, enable the Button widget from HT Mega settings, open your page in Elementor, drag in the HT Button widget, and then customize the text, link, icon, and style settings.
Table of Contents
Key Takeaways
What is a Button Widget and How Does It Work
A Button widgets lets you add a clickable call-to-action button to a page without writing code. It is commonly used to send visitors to another page, a contact form, a product, a pricing section, or a downloadable file.
In Elementor, you place the widget on the page and then edit its content and style from the left-side panel. This makes it easy to create buttons that match your site design and guide visitors toward the next action.
How to Create Button in WordPress with a Widget
n this tutorial, the button is created with HT Mega Addons for Elementor, which is an Elementor add-on plugin that adds extra widgets to the editor.
Before you begin, make sure these are already active on your site:
- HT Mega Addons for Elementor
- WordPress
- Elementor
Step 1: Install and Activate HT Mega
To Create Button in WordPress using HT Mega Plugin, simply navigate to the WordPress site, download it, and activate it. It’s an easy process that will take only a few minutes!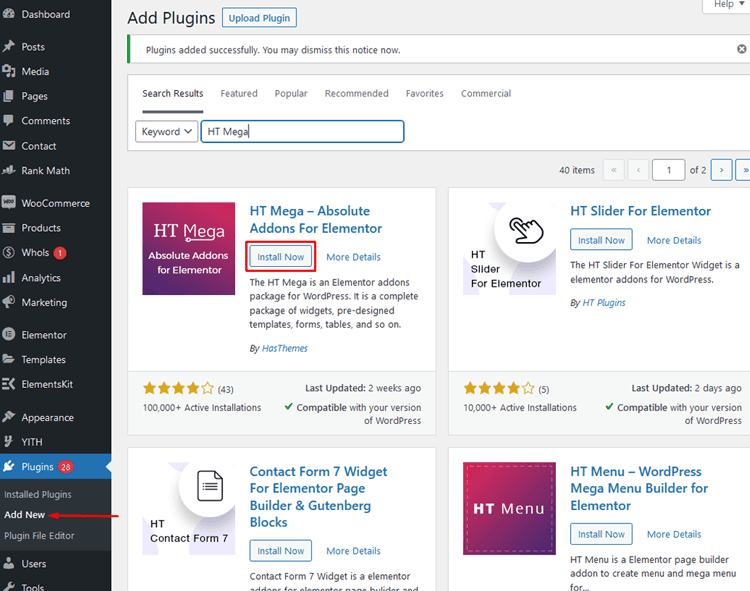
Step 2: How to Enable Button?
To enable the “Button” widget, head over to your WordPress
Dashboard > HTMega Addons> Settings > Elements.
Select the Button and turn it ON; you’re now ready to go!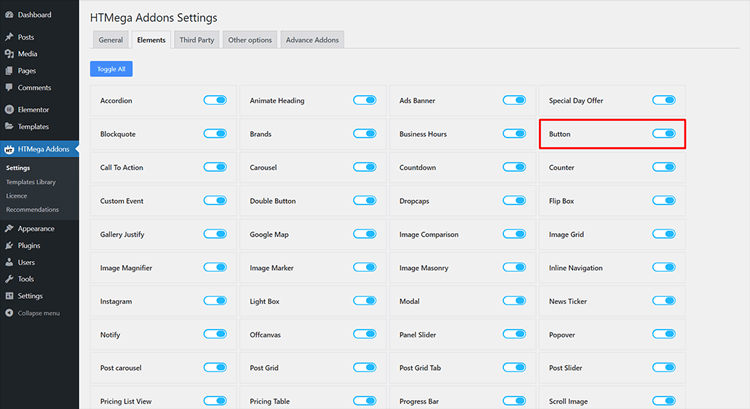
Step 3: How to use the Button Widget?
Now go to the Elementor edit screen of the particular page or post where you want to include a button.
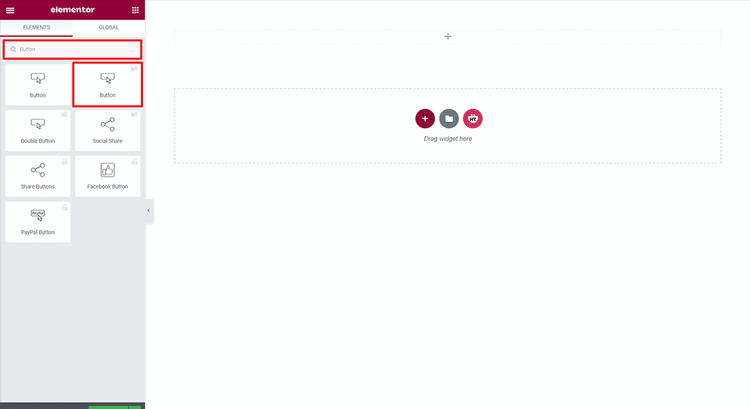
In order to use this widget, simply search for “Button” and select the one with an HT badge in the Elementor search panel.
To add an HT Mega Button to your page, simply drag and drop the widget onto your page template.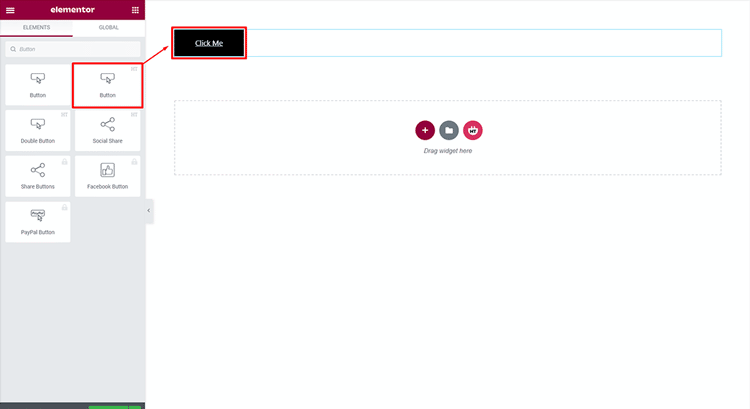
Step 4: How to customize the Button Widget?
After adding the widget, customize the button based on your goal. For example, you might create a Contact Us button that links to your contact page, or a Get Started button that sends users to a signup section.
You can typically customize settings such as:
- Button text
- Button link
- Icon
- Icon position
- Icon spacing
- Alignment
- Size and spacing
- Colors and styling
Elementor’s current Button widget supports text, link, icon, icon position, icon spacing, alignment, typography, normal and hover colors, border options, border radius, box shadow, and padding, so these customization areas are accurate and current for Elementor-based workflows.
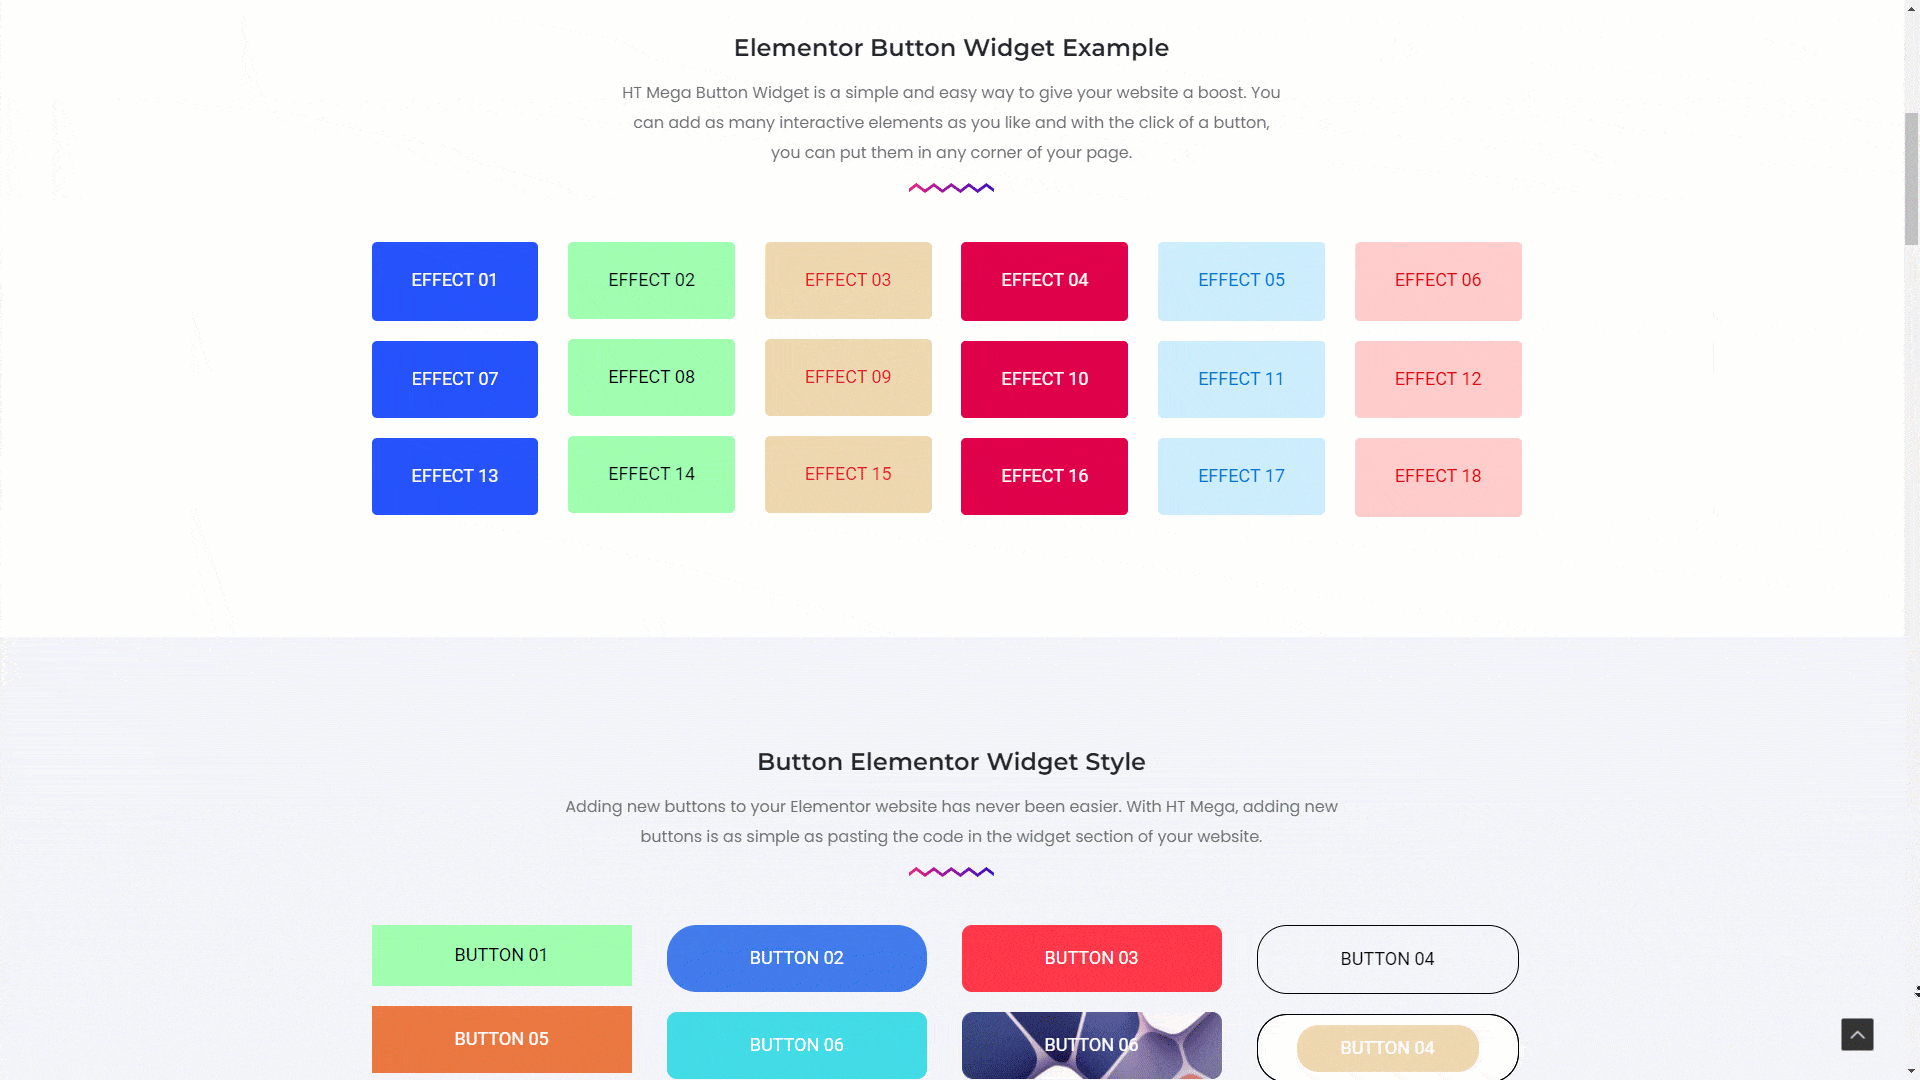
How to customize the Button style
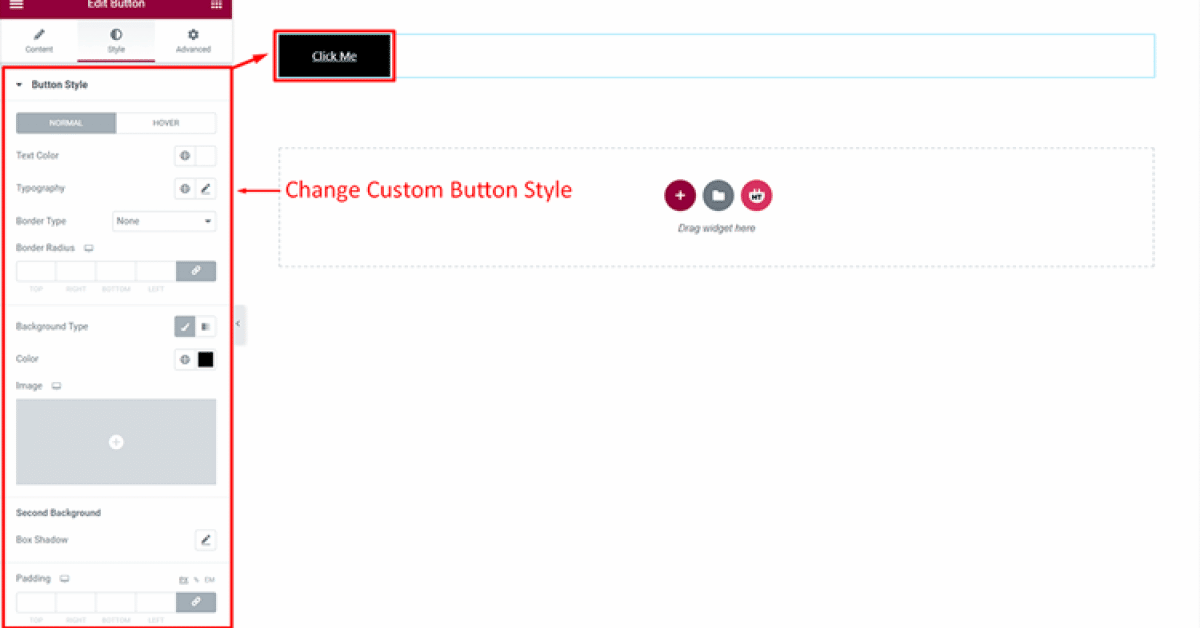
Use the Style tab to control how the button looks. Depending on your setup, this may include typography, text color, background color, hover color, border, border radius, box shadow, and padding.
If your HT Mega Button widget shows different preset styles or slightly different labels from older screenshots or article text, verify the current interface before publishing that detail as exact wording.
Tips for Creating Better CTA Buttons
A button should be easy to notice and easy to understand. Use clear action text like Contact Us, Download Now, Subscribe, or Get Started so visitors instantly know what the click will do.
It also helps to use enough contrast between the button and the background, keep the text short, and check the design on mobile devices so the button is easy to tap
Frequently Asked Questions
Q: What is the Button widget?
A: This widget is a powerful tool for adding stylish buttons to your WordPress website. It allows you to add interactive call-to-action buttons to your site without having any coding knowledge. With this widget, you can set up with custom text and link it to an internal or external page in just a few clicks!
Q: What types of buttons can I create with the Button widget?
A: The button widget provides a variety of customizable options to help you craft this perfectly. You can choose from a range of different shapes, sizes, colors, and animations to make your button stand out!
Q: How do I customize the Button widget?
A: This widget is designed to be easy and intuitive. You can quickly adjust the size, color, and animation of the button right from the WordPress dashboard. Additionally, this widget provides advanced options such as padding and margin adjustments to give you complete control over the look and feel of your button.
Q: Can I link Button widget to external pages?
A: Absolutely! This widget allows you to add links to both internal and external pages with just a few clicks.
Q: What other features does the Button widget have?
A: The button widget offers a range of useful features to help you create it perfectly. You can customize the text, and adjust padding and margin settings as well.
Q: How do I get started with the Button widget?
A: This widget is easy to use and doesn’t require any coding knowledge. Simply install the HT Mega plugin from the WordPress dashboard and start to create button in WordPress. You can find detailed instructions on how to get up and running with this widget in their comprehensive documentation.
Final Thoughts
Adding buttons in WordPress is a great way to boost interaction on your website. WordPress buttons encourage users to take action, such as signing up for a newsletter or purchasing products, with ease.
The process of adding a button in WordPress enhances conversion opportunities. The method on how to create buttons in WordPress continues to evolve. Popular websites showcase effective button placement for optimal user engagement.
There are many plugins available that make it easy to add buttons to WordPress, but we recommend using the HT Mega plugin. This plugin makes it simple to add a beautiful button to your sidebar or any other area of your site.
Additionally, it offers numerous customization options, allowing you to create the ideal call-to-action button for your business. Give it a try today and create button in WordPress in a quick and straightforward way.