How to Use Elementor in WordPress – Step by Step
Creating a beautiful website for your business or blog is easier than ever with WordPress and Elementor.
If you’re looking to build a stunning website from scratch, look no further – you can use the Elementor page builder plugin in WordPress to make it happen.
In this article, we’ll provide you with an easy step-by-step guide on how to use Elementor in WordPress so that you can create the perfect website for your WooCommerce store.
- Key Takeaways
- What is Elementor?
- Installing Elementor in WordPress
- Getting Started with Elementor
- Customizing Elements with Elementor
- Bonus Sections:
- Improve Your Elementor Experience with HT Mega Addons
- Create Professional Online Store with ShopLentor and Elementor
- Best Practices with Elementor
- Tips and tricks for creating professional-looking websites with Elementor
- Common mistakes to avoid when using Elementor
- Frequently Asked Questions
- Conclusion
Key Takeaways
- Design responsive websites using an intuitive drag-and-drop interface tool.
- Customize every visual element without writing any code.
- Access hundreds of pre-designed templates for faster site creation.
- Integrate Elementor with complementary plugins for enhanced functionality.
- Preview site appearance across different devices before publishing
What is Elementor?
Elementor Plugin is a powerful page builder plugin that allows users to create stunning websites for their WooCommerce store without any coding knowledge.
With its intuitive drag-and-drop interface, users can easily design and customize their websites to suit their needs.
But the Elementor plugin is much more than just a page builder plugin, it also offers a wide range of widgets and add-ons that can be used to enhance the functionality of your website.
Furthermore, when designing your entire website using Elementor Theme Builder and Elementor template kit, there is no need to search for design elements in your active WordPress theme.
Whether you’re a beginner or an experienced web designer, Elementor website builder has something for everyone. So if you’re looking to create a website that stands out from the crowd, give Elementor WordPress plugin a try and see what it can do for you.
Definition and Features of Elementor
Elementor simplifies website creation and maintenance for anyone seeking a professional-looking website. Its drag-and-drop feature and extensive customization options enable users of all skill levels to design beautiful websites easily and quickly.
Additionally, the Pro version of the elementor editor provides many useful elementor designs and elementor templates that make building your site easier. The Elementor drag and drop functionality makes building complex layouts intuitive and code-free.
The Elementor template library offers numerous options. You have the option to either create your own template or select one of the pre-designed templates available in the Elementor template library. The Elementor theme builder lets you design entire website templates, including headers, footers, and archives.
Elementor WooCommerce Builder provides the same level of flexibility for the shop and single product templates on your WooCommerce store. You can speed up your website creation process and get inspiration by using designer-made elementor template kits that save time.
Elementor website builder has categorized its features into four distinct categories.
1. Basic Widgets
The free version of Basic Widgets includes enough features to create an impressive website without advanced options like a Table Of Contents, Portfolio, or Form.
However, you cannot create a Header/Nav Menu with the free version and may need to search for a WordPress theme that includes a Navigation Menu that fits your preferences. The Elementor Pro features include advanced form builders, motion effects, and popup builders.
2. Pro Widgets
Elementor Pro offers a wide variety of Pro Widgets that can cater to almost all your website creation process needs. These widgets include the ability to add and select posts from various categories or post types, display price tables, galleries, flip boxes, social media embeds, media carousels, a Lottie Widget, and even a HotSpot.
3. Theme Elements
To create template pages and single post templates, you need to use Theme Elements which is included with Elementor Pro. Pages like Category, Tag, and Author are dynamically populated with content, so you need to create a template using Theme Elements for those pages.
Similarly, for Single Posts, you can design a template once and use it for all posts without having to create a new template every time. Simply add your content and you’re done.
4. WooCommerce Widgets
Finally, there are WooCommerce Widgets which also allow you to easily create template pages and single product templates. These widgets allow you to incorporate WooCommerce elements into your pages. This functionality is similar to the capabilities offered by Theme Builder.
HT Mega Elementor Addons
The ultimate Elementor page builder addons to build stunning websites.
Benefits of Using Elementor in WordPress
Elementor helps you create pages and posts that look professional and attractive. The WordPress page builder Elementor lets you design visually while seeing real-time results.
Its editor is user-friendly and allows you to add elements like buttons, forms, maps, images, and videos quickly. With Elementor design, designing your website becomes simple and intuitive. Some remarkable benefits of using Elementor website builder include:
1. Easy-to-Use Editor:
Elementor comes with an easy-to-use WordPress editor that makes it easy to design and customize your pages in a matter of minutes. With the drag-and-drop interface, you can quickly add elements such as photos, videos, text blocks, buttons, forms, and more.
You can also use built-in free Elementor templates to quickly create pages without having to start from scratch. It is perfect responsive design with Elementor ensures your site looks great on all devices.Perfect
2. Professional Design:
Elementor plugin offers a wide range of design options that can help you create professional-looking sites in no time. With dozens of premade styles and elements, you can make your website look great with minimal effort.
You also have access to powerful Elementor design tools such as custom color palettes and font controls. The Elementor customization options allow for precise control over typography, spacing, and colors.
3. Fast Performance:
Strong Elementor and WordPress compatibility ensures smooth operation with most themes and plugins. Elementor plugins are optimized for performance, which means that your pages load quickly and efficiently. This helps to improve user experience and can also boost your website’s ranking in search engine results.
Installing Elementor in WordPress
To access the Elementor dashboard, we must install Elementor on our WordPress site. The installation process is straightforward. Follow the steps below to install and activate the Elementor plugin quickly:
Go to your WordPress site dashboard and click on “Plugins” and then “Add New.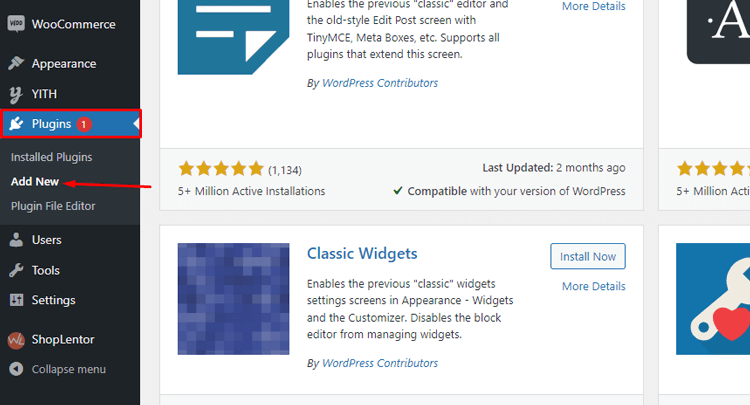
In the search box, type “Elementor” and select it from the search result. Click on the “Install” button.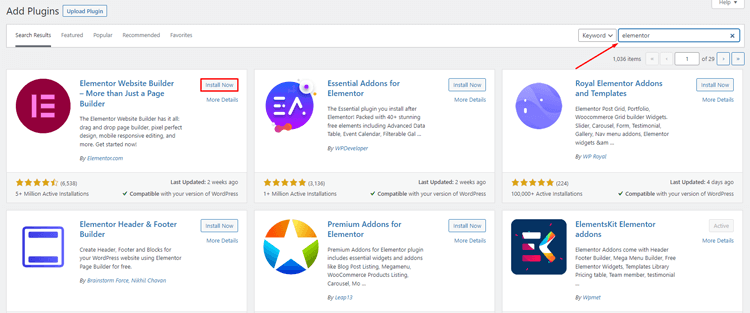
Once it’s installed, click the “Activate” button to start using the Elementor WordPress editor.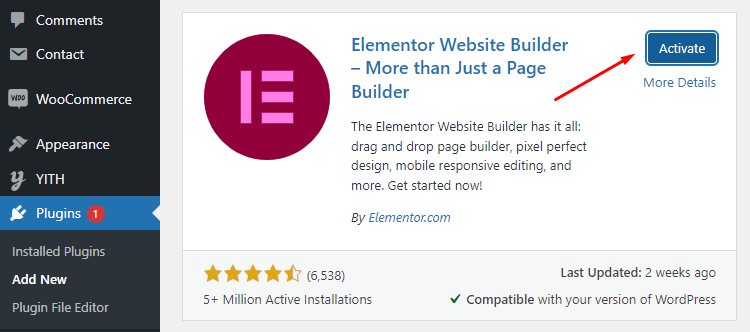
Getting Started with Elementor
Learning how to design with Elementor starts with understanding the interface layout. Activate the Elementor page builder plugin to be automatically directed to its editor interface. Alternatively, go to your WordPress dashboard and select the Elementor editor manually from there.
Elementor Settings
Once you have activated the Elementor plugin, you can access its settings by navigating to the Elementor menu in your WordPress dashboard. Here is more about the settings:
General Settings
At the General tab of Elementor editor settings, you can choose which post types to use and turn off the default colors and fonts.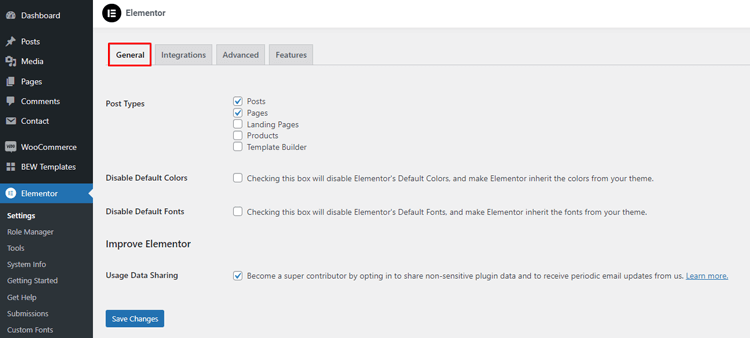
Integrations Settings
If you want to integrate Google Maps into your site, you can place the Google Maps Embed API key here. 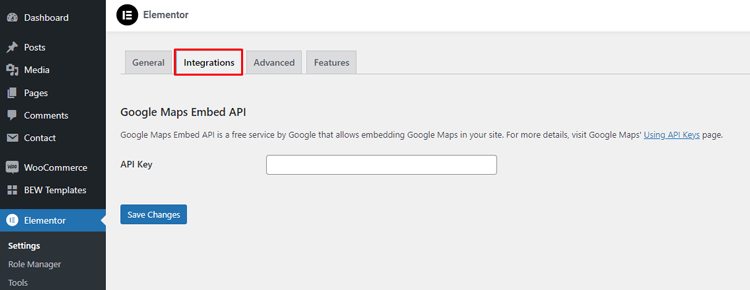
Features Settings
From here, you can configure settings such as Inline font icons, Flexbox container, Grid container, Editor top bar, Nested Elements, Lazy load background images and so on.
Advanced Settings
Here are the list of settings mentioned below that you’ll find in the Advanced tab of Elementor settings:
CSS Print Method: For CSS Print Method, you can either use an External File or Internal Embedding. It is recommended to use external CSS files for all generated stylesheets as it provides better performance.
Switch Editor Loader Method: To troubleshoot server configuration conflicts, you can enable the “Switch Editor Loader Method” option.
Enable Unfiltered File Uploads: WordPress offers the option to allow unfiltered file uploads. However, this poses a security risk, as it includes SVG and JSON. It is essential to understand the potential risks before enabling this feature.
Elementor will attempt to sanitize these files by removing any potentially harmful code or scripts. Only enable this feature if you fully comprehend the associated risks.
Google Fonts: If you don’t want Google Fonts to load, Disable this option. It’s a good idea to do this when using a different source for your fonts, like a plugin, theme, or custom fonts.
Google Fonts Load: You can choose how the browser loads and displays Google Fonts by setting the font-display property. This setting has different options including Default, Blocking, Swap, Fallback, and Optional. The current default option is Auto.
Load Font Awesome 4 Support: The shim.js script ensures Font Awesome 4 icons are displayed correctly with Font Awesome 5. It maintains compatibility by properly rendering previously selected icons when upgrading to the newer library.
Generator Tag: The generator tag is a meta element that specifies the attributes used to build a webpage. Its purpose is primarily for analysis.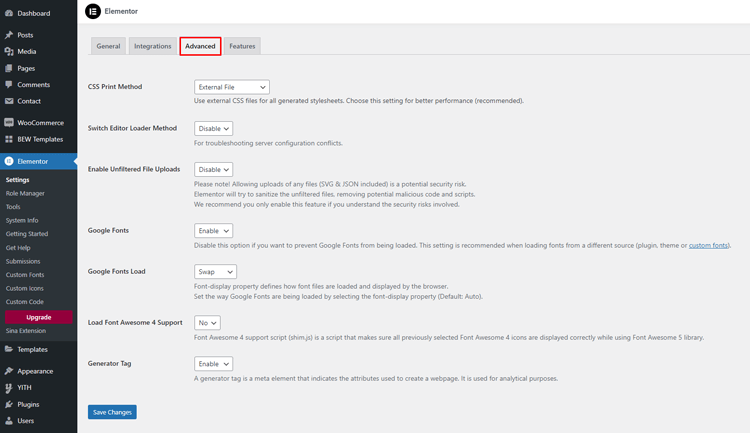
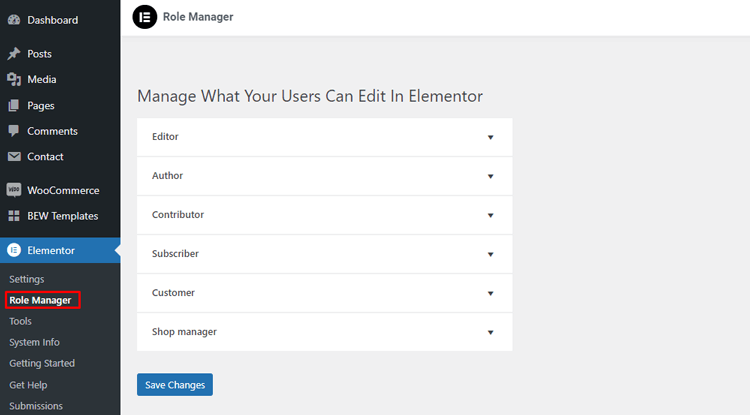
Role Manager:
- Your website can grant varying levels of access to different types of users based on their roles. Additionally, the Pro version enables you to restrict users’ access solely to content, without other permissions.
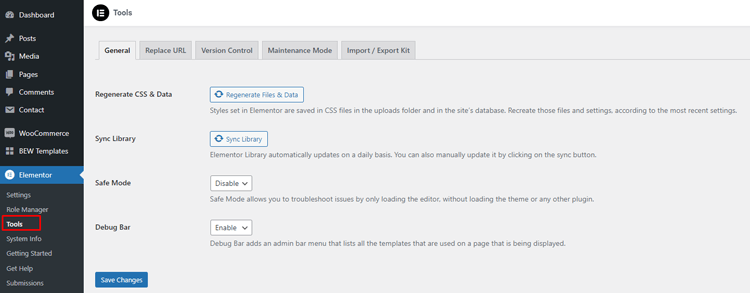
Tools:
- General: If you need to, you can use the general tools to regenerate the CSS on your website and manually sync your Elementor library.
- Replace URL: The “Replace URL” tab allows you to replace URLs in case you have changed the site address.
- Maintenance Mode: You can find all the necessary controls for managing your website’s maintenance mode in the Maintenance Mode tab.
- Version Control: From here, you can control the Rollback version, rerun the update script, etc. Also, you can enable or disable beta testers if you want.
Overview of Elementor Canvas
First, we will provide an overview of the Elementor canvas, and then we will discuss how to use Elementor in WordPress more efficiently. The process of creating a website with Elementor begins with this simple editing interface.
To access the Elementor dashboard, follow these steps:
First, go to the WordPress site Dashboard and select Pages.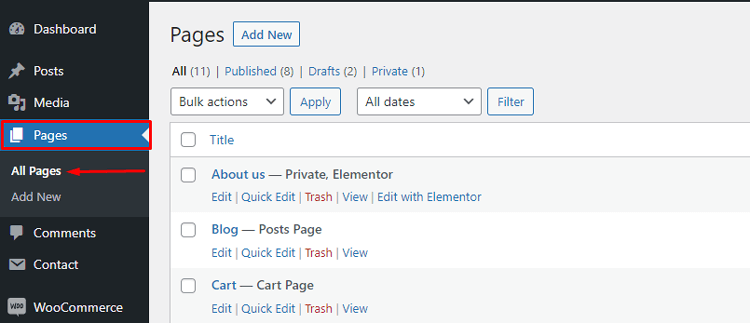
Next, choose Add New and enter a page title. From the template dropdown on the right, select Elementor Canvas and click the “Edit with Elementor button” to start using the page builder. 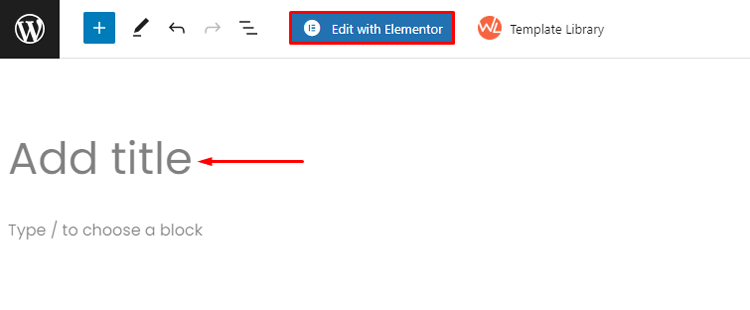
If you want to edit an existing page of your WooCommerce store, go to All Pages and hover over the desired page. You’ll see a button that says “Edit with Elementor button” – click it to start editing.
You can use this Elementor editor interface to create your webpage by dragging and dropping elements. You can also view a live preview of your site.
- A search box will appear that allows you to quickly find the required widgets from the list.
- The left panel contains all the useful modules.
- To get a full preview of your page, click on the arrow sign that appears on the right side of the module panel. This will make the panel disappear.
HT Mega Elementor Addons
The ultimate Elementor page builder addons to build stunning websites.
Customizing Elements with Elementor
When it comes to the website creation process, customization is key. Fortunately, the Elementor plugin makes it simple to create unique and visually appealing websites without any coding knowledge. With pre-designed templates and widgets, you can easily customize your site in accordance with your needs and preferences.
Using Elementor’s pre-designed templates
Customizing your website has never been easier with Elementor’s pre-designed templates. The WordPress Elementor templates library contains hundreds of professional pre-designed page layouts.
With just one click, you can insert a pre-made page or block into your website and start personalizing it to fit your brand.
We will show you how to use Elementor in WordPress to customize elements. You can easily access and use pre-designed templates from the Elementor template library to enhance your site.
Now, we will demonstrate how to use elementor in WordPress and customize elements using Elementor’s pre-designed templates from the Elementor template library.
Step 1:
To access the Elementor template library, click on the “library icon” depicted in the screenshot. ![]()
Step 2:
To preview a template from the Elementor template library, click on the magnifying glass icon. ![]()
Step 3:
Once you have found the one you want to use, select it by clicking on INSERT.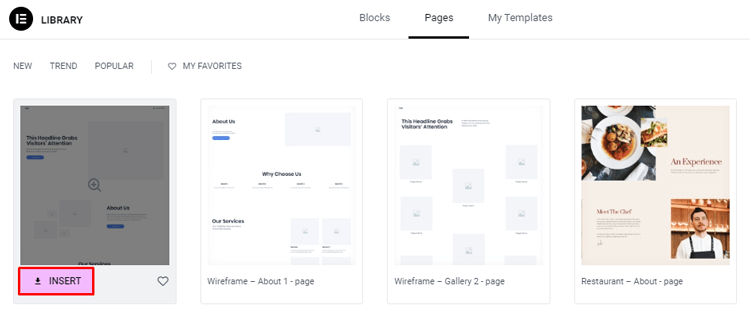
Step 4:
You can mark your preferred templates with a heart icon and save them to My Favorites.![]()
Step 5:
If you have a downloaded template that you want to use, simply click on the arrow located in the top right corner and upload its .json or .zip file.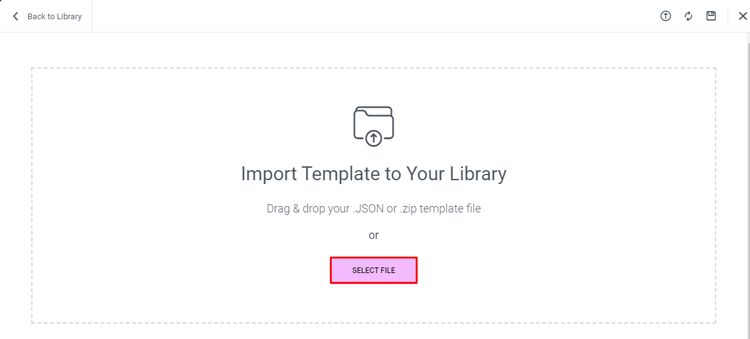
Step 6:
To move forward, please preview and publish your page.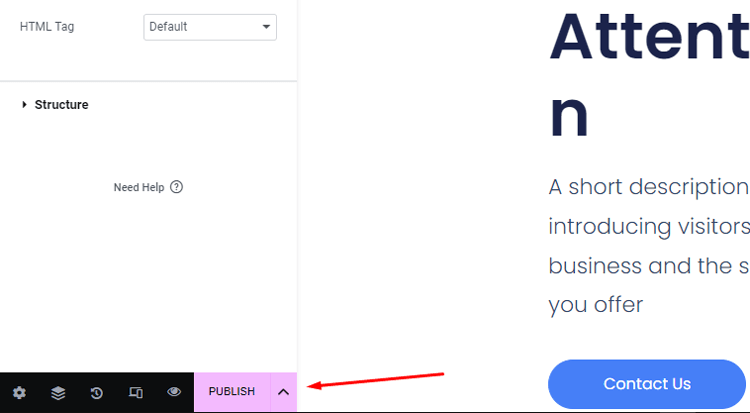
How to style and customize Elementor widgets
Elementor plugin allows you to create a visually appealing website for various purposes. You can easily edit Elementor widgets and drag and drop them to give a personalized touch to your site. In this section, we will discuss how to edit Elementor widgets.
. Professional Elementor design tips include using consistent colors and limiting font variations. When you choose an Elementor widget, you will notice three tabs in the widget panel: Content, Style, and Advanced.
These tabs enable you to manage the widget’s function, appearance, and advanced settings. Let’s explore the purpose of each tab! The Content tab is where you can customize and modify the widget’s appearance.
For example, The Content tab of the image widget lets you choose an image, adjust its size and alignment, add a caption, and link to it. It is a tool that enables you to add pictures to your website.
The “Style” tab is where you can customize the styling options of a specific widget. When using Elementor’s “Heading” widget, you can customize the color, typography, and shadow. These options are available under the Style tab, allowing you to adjust the heading’s appearance easily.
You can access the common options for all widgets here. The Advanced tab provides additional settings for the widget’s positioning, layout, motion effects, background, border, and responsiveness.
As an example, you can find the Advanced tab for the Divider widget here. The Divider widget helps separate content and keeps your website layout clean and organized. Use the Advanced tab to customize style and adjust interaction with nearby elements.
You can fully customize widgets to control the appearance of your website using the three editing tabs.
Bonus Sections:
We’ve identified several WordPress plugins for WooCommerce that enhance your eCommerce platform. These plugins also improve your experience with the Elementor WordPress plugin.
Improve Your Elementor Experience with HT Mega Addons
With the HT Mega plugin, customizing your website has never been easier. This Elementor add-ons package gives you comprehensive control over designing and managing pages. It enhances your ability to manage menus and content with the user-friendly power of Elementor.![]()
This WordPress add-ons plugin provides you with over 107 Elementor widgets, 782 blocks, 91-page templates, and more. You can easily customize the appearance and functionality of your site without any coding skills.
Additionally, it has a library of pre-built layouts that allows you to create attractive designs quickly and effortlessly. If you’re ready to enhance your website, try this powerful plugin today!
Create Professional Online Store with ShopLentor and Elementor
Creating an online store can be a daunting task, but with ShopLentor and Elementor, it’s never been easier. With over 105 unique Elementor widgets and pre-made templates, ShopLentor takes the stress out of designing and configuring your WooCommerce online store trusted by more than 100k businesses in 120 countries. 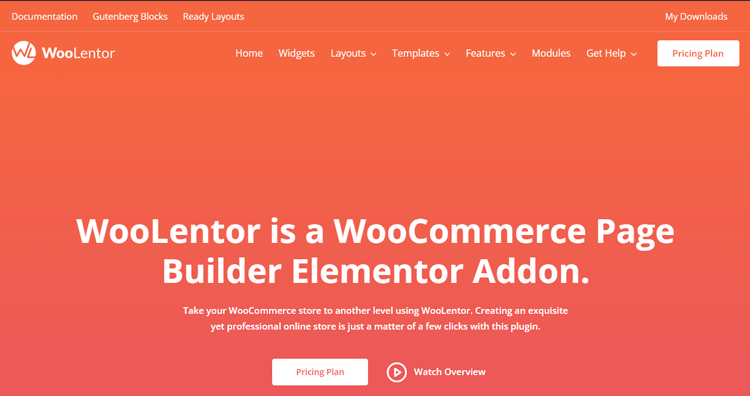
Elementor widgets include single product page widgets, shop or archive page widgets, cart page widgets, checkout page widgets, and my account page widgets, making it simple to set up the various components of your store.
Just use the Elementor editor to drag and drop these widgets onto your pages to create a stunning online store that will attract and engage your customers.
ShopLentor includes ready-made templates that integrate smoothly with any WordPress-based online store. These templates help users build stunning eCommerce sites without needing technical experience or tools.
You can upgrade your WooCommerce site using advanced templates like cart and account pages. ShopLentor saves time and effort by removing the need for extra plugins or coding..
ShopLentor and Elementor are the perfect combinations for anyone looking to create a professional online store.
Using ShopLentor Template Builder to Create Elementor Pages with a Few Clicks
ShopLentor Template Builder is the perfect tool to craft stunning Elementor pages with just a few clicks.
To get started, first, navigate to Dashboard > ShopLentor > Template Builder and click “Add New” in the top right corner of “Template Builder”. 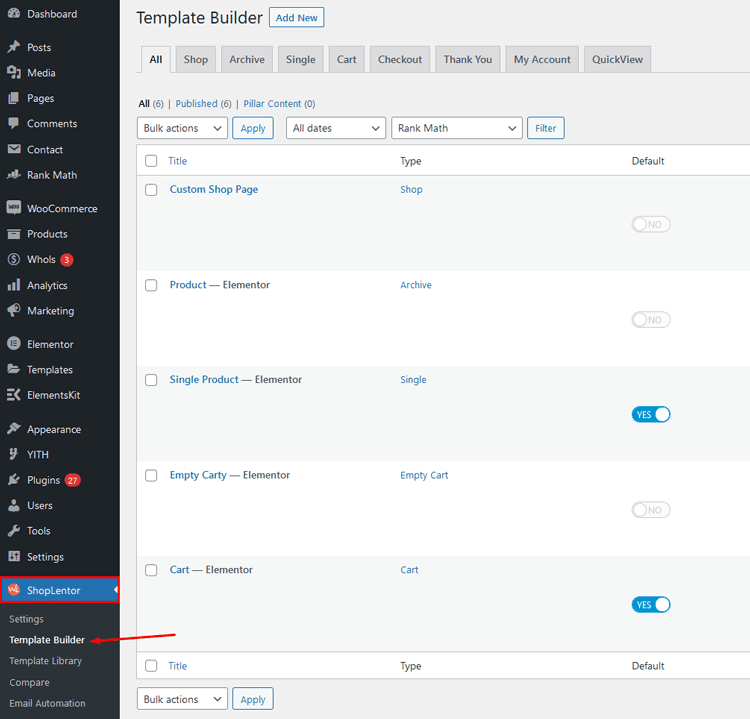
Next, open up your template settings window and give your new template a title before selecting from one of our beautiful templates (be sure not to forget to check off “Set Default”).
Once you have saved those changes, you can begin customizing by editing through Elementor! 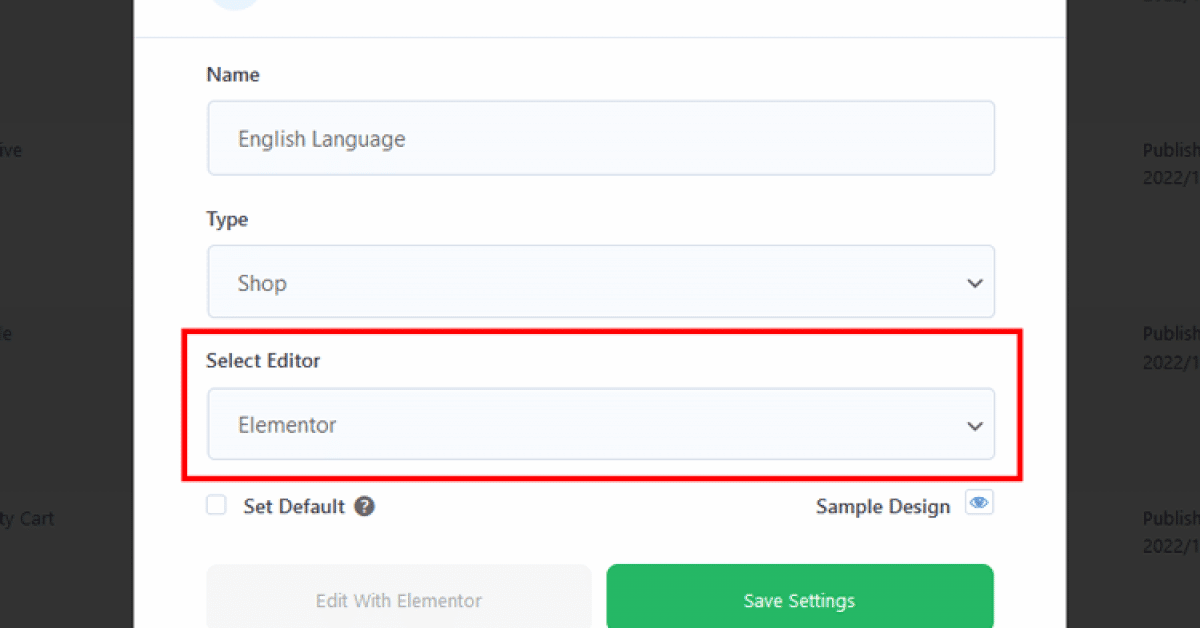
Best Practices with Elementor
Elementor has become one of the most popular page builder plugins for WordPress, and as such, offers users a great way to create custom designs without having to write any code.
Whether you’re a beginner or an experienced user, it’s important to understand how to use Elementor in WordPress in the best possible way when designing your site in WordPress.
To help you create professional-looking websites with Elementor, we have compiled tips and tricks along with some common mistakes to avoid.
Tips and tricks for creating professional-looking websites with Elementor
- Utilize the various widgets available to build out your page design. Elementor has many different types of widgets including text boxes, images, videos, and more that can be used to create professional-looking pages.
- Make use of the preview feature to see how your page will look on different devices. This can be a great way to ensure that your page looks good across various platforms and browsers.
- Take advantage of the templates and themes available for Elementor. These can save you time by providing a base design that you can then customize to fit your needs.
- Test out different elements to see which ones work best on your site. This can involve experimenting with different fonts, colors, and images to find the right combination for your design.
- Finally, remember to save regularly so that you don’t lose any of your progress or changes.
Common mistakes to avoid when using Elementor
Elementor is a popular website builder used by individuals and businesses worldwide. It allows users to create stunning websites without needing any coding experience.
However, there are some common mistakes that you should avoid when using Elementor-
- Don’t forget to check for compatibility with other plugins. Some plugins may conflict with Elementor, so it’s important to make sure everything is compatible before making changes.
- One of the most frequent mistakes is not optimizing your images before uploading them, which can negatively impact the page load time and user experience.
- Avoid making too many changes at once. This can create a cluttered page that looks unprofessional and confusing to visitors.
- Don’t forget to save your changes. Elementor can revert back to a previous version if you forget to hit “save” before closing the page.
- Be sure to check your mobile view. Many people access websites from their phones, so it’s important that your pages look equally great on desktop and mobile devices.
Frequently Asked Questions
Q: What is Elementor?
A: Elementor is a popular WordPress plugin that allows users to create and design custom web pages using a drag-and-drop interface. It provides a visual editor that lets you design your website in real time without any coding knowledge.
Q: Can I use Elementor for my entire website?
A: Yes, you can use Elementor to design and customize your entire website. It gives you full control over the appearance and layout of your pages. However, you can also choose to use Elementor only for specific pages while using the default WordPress editor for others.
Q: Can I use Elementor to design my website for mobile devices?
A: Yes, Elementor provides built-in responsiveness options, allowing you to design your website for optimal display on various screen sizes and devices. You can switch between desktop, tablet, and mobile views within the editor and make specific adjustments for each.
Q: Can I translate my Elementor-designed pages into different languages?
A: Yes, you can translate Elementor-designed pages using translation plugins such as WPML or Polylang. These plugins allow you to create multilingual versions of your website and translate the content created with Elementor.
Q: Is Elementor compatible with other WordPress plugins?
A: In most cases, Elementor is compatible with other WordPress plugins. However, conflicts can occur if both plugins try to modify the same functionality or if there are compatibility issues between the two. It’s always recommended to test plugins together and ensure compatibility before using them on a live website.
Q: Is Elementor SEO-friendly?
A: Yes, Elementor is designed to be SEO-friendly. It generates clean code and allows you to optimize your page content for search engines. You can add meta titles, descriptions, and keywords, as well as customize heading tags, alt text for images, and other SEO-related elements. However, remember that SEO involves more than just design, and other factors like content quality and website performance also play a crucial role in search engine optimization.
Conclusion
Now you know how to use Elementor in WordPress with ease and confidence. Combining Elementor’s features with WordPress gives you endless design flexibility and creative freedom.
With its drag-and-drop interface and powerful widgets, building stunning pages is fast and simple. You can now explore different themes and WordPress page builder plugin to enhance your site even further.
Ready to start building a professional website that stands out? Dive into Elementor for website design today and turn your ideas into reality!